Contrast Therapy Protocol Recovery: Step-by-Step Guide
Goal: Use contrast therapy protocol recovery to improve circulation and reduce soreness
Contrast therapy protocol recovery is a structured method that alternates hot and cold water (or temperature-controlled modalities) to support circulation, comfort, and post-exercise recovery. The goal is to use controlled temperature swings to promote blood flow during the hot phase and help manage inflammation and perceived soreness during the cold phase. When done correctly, it can be a useful addition to a recovery routine for athletes, active people, and those managing minor musculoskeletal discomfort.
This guide explains how to set up a safe protocol, how to progress through each session step-by-step, and how to fine-tune timing based on your response. The focus is on practical execution and recovery outcomes—not guesswork.
Preparation: What you need before you start
Before running a contrast cycle, prepare your environment and temperature targets so the session stays consistent. Consistency matters because recovery depends on controlled exposure, not random temperature changes.
1) Choose your temperature targets
Use a hot phase that feels comfortably warm rather than scalding, and a cold phase that is challenging but tolerable. A common starting point is:
- Hot: about 98–110°F (37–43°C)
- Cold: about 50–60°F (10–16°C)
If you’re unsure, start closer to the middle of these ranges and adjust after the first few sessions.
2) Set up two containers or a contrast unit
You’ll need two water sources or one contrast therapy system that can switch temperatures reliably. Options include:
- Two tubs or buckets (one for hot, one for cold)
- A whirlpool-style contrast unit designed for alternating temperatures
For practical recovery at home, many people use two tubs and a thermometer to maintain stable temperatures. If you use a dedicated system, still verify temperatures at the start.
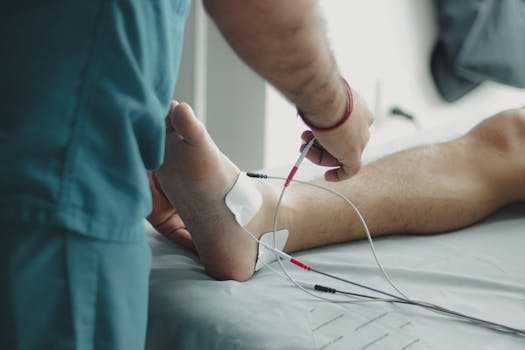
3) Gather tools that improve safety and control
- Water thermometer (prevents guessing and accidental extremes)
- Timer (phone timer works)
- Towel for drying and warmth after cold exposure
- Non-slip mat if you’ll step into tubs
- Water thermometer or temperature display for any device
4) Consider timing relative to training
Contrast therapy protocol recovery is often used after workouts or during recovery days. If you’re doing it for soreness, use it after exercise. If your goal is to feel more mobile and comfortable for the next session, you can place it 1–3 hours after training when you’re cooled down but not completely “cold stiff.”
Step-by-step: Contrast therapy protocol recovery session
Use the steps below to run a controlled protocol. Keep the sequence identical each session so you can track how you respond.
1) Start with a safe baseline check
Before you begin, make sure you have no active contraindications (examples include open wounds in the area, uncontrolled circulation problems, or reduced sensation in the treated region). If you have diabetes with neuropathy or a history of cold injury, proceed cautiously and consider medical guidance.
Also check how the area feels right now. If the tissue is acutely inflamed with significant swelling and heat, you may need a gentler cold phase and shorter exposure.
2) Warm up briefly (5–10 minutes)
Do light movement before the first hot phase. Examples:
- Easy walking
- Gentle cycling
- Range-of-motion movements for the target area
This reduces shock to the system and helps the hot phase do more effective work.
3) Enter the hot phase first
Start with the hot container. Immerse the target area gradually. Hold steady and aim for the planned duration.
- Beginner duration: 1–2 minutes
- Standard duration: 2–3 minutes
Use a comfortable warm temperature. You should feel warmth and relaxation, not pain.
4) Transition quickly but safely to the cold phase
Move to the cold container promptly. The transition time should be short—typically under 30–60 seconds—so the temperature contrast remains meaningful. Keep your footing stable and avoid rushing.
If you’re treating a limb, immerse enough to cover the area of focus (for example, the lower leg or forearm). Don’t submerge more than necessary.
5) Apply the cold phase
Enter the cold container and hold for the planned duration.
- Beginner duration: 30–60 seconds
- Standard duration: 1–2 minutes
You should feel cold intensity that is tolerable and controlled. If you experience numbness that persists after you exit, shorten the cold duration next time.
6) Repeat hot-to-cold cycles
Most protocols use multiple alternating cycles in one session. A practical recovery structure is:
- 3–4 cycles total
- Hot phase slightly longer than cold phase
Example for a standard session:
- Hot: 2–3 minutes
- Cold: 1–2 minutes
- Repeat for 3–4 total cycles
7) Finish with cold (or end with a shorter hot, depending on your response)
Many contrast sessions end on cold to leave you feeling alert and comfortable. However, some people feel better ending with a brief warm phase, especially when stiffness is the main issue. Choose the approach that helps you feel functional afterward.
If you’re unsure, follow the default: finish with cold, then proceed to the cooldown step below.
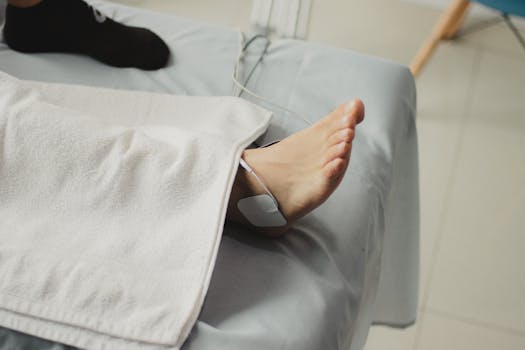
8) Dry thoroughly and protect from chill
After the final cold exposure, dry the area quickly and cover it with a towel or light clothing. If you’re treating limbs, keep them warm for at least 20–30 minutes to reduce post-session discomfort.
Then do gentle mobility—slow range-of-motion movements for 3–5 minutes—to help restore normal movement patterns.
9) Monitor recovery signals over the next 24 hours
Track how you feel after the session and the next day. Useful signals include:
- Perceived soreness level
- Swelling or tightness (if you can observe it)
- Range of motion
- Sleep quality after training
If you feel worse or more sensitive after sessions, reduce intensity or shorten the cold exposure.
Common mistakes that reduce results or increase risk
Contrast therapy protocol recovery can help when executed with control. These issues are common and often explain inconsistent outcomes.
1) Using extreme temperatures
Going too hot increases the risk of skin irritation and can aggravate discomfort. Going too cold can cause prolonged numbness or worsen sensitivity. Use your thermometer and start within the safe ranges provided earlier.
2) Skipping the warm-up
Jumping straight into cold after being sedentary can feel harsh and may provoke a stress response. A short warm-up helps make the temperature change more tolerable and effective.
3) Taking too long between hot and cold
If the transition lasts several minutes, the temperature difference collapses and the session becomes less consistent. Aim for a brief, safe transfer under about 1 minute.
4) Holding cold too long
Many people overdo the cold duration because they expect stronger results. Longer cold isn’t always better. Persistent numbness or lingering sensitivity is a sign to shorten cold exposure.
5) Treating the wrong timing for your symptoms
Immediately after a very intense injury with active swelling, you may benefit from a more conservative approach. If you’re using contrast for general soreness after training, keep sessions consistent and avoid overusing it during the most acute phase of a new injury.
6) Doing contrast too frequently
Frequent sessions can increase sensitivity for some people. Many users do contrast 1–3 times per week during training cycles, with adjustments based on how the tissue responds.
7) Not protecting skin and circulation
Never apply contrast over compromised skin, open wounds, or areas with reduced sensation. If you have circulation conditions, consult a clinician before using temperature-based protocols.
Additional practical tips and optimization advice
To get the most from contrast therapy protocol recovery, fine-tune the protocol based on your goals, the target area, and your response. Small adjustments often matter more than pushing intensity.
Adjust based on the recovery goal
- Soreness reduction: start with 3 cycles, moderate hot, shorter cold, and end with cold.
- Stiffness and mobility: consider a slightly longer hot phase and a shorter cold phase; you may also tolerate ending with a brief warm phase if it helps you move comfortably afterward.
- Post-event recovery: use the session after you’re cooled down and aim for consistency rather than maximum intensity.
Use a consistent schedule and track outcomes
Run your sessions at the same time of day when possible. Keep a simple log: session date, hot/cold temperatures, cycle count, and how the area feels later. Over 2–4 sessions, you’ll usually learn the best duration for your body.
Optimize technique for different body areas
Contrast works best when the target area is fully exposed to the water temperature you’re measuring. Practical guidance:
- Lower legs/ankles: immerse enough to cover the area you want to recover; keep the rest supported to avoid fatigue from holding position.
- Forearms/hands: keep immersion controlled and avoid long cold exposure that can irritate sensitive skin.
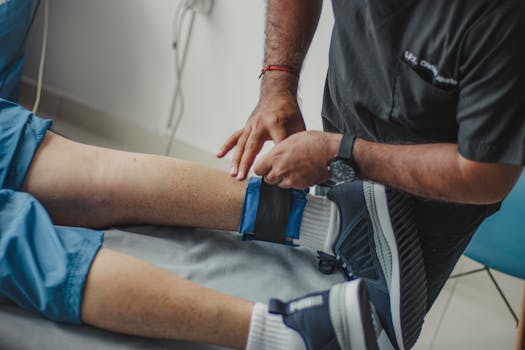
- Knees/shoulders: use careful positioning so the water covers the target; consider support to avoid strain during the session.
Consider pairing with recovery basics
Contrast therapy supports recovery, but it doesn’t replace core recovery behaviors. Pair it with:
- Hydration
- Light movement the rest of the day
- Sleep consistency
- Progressive training that avoids “all-out” frequency
If you’re using a recovery device, such as a temperature-controlled contrast therapy unit, treat it as a controlled tool. Still verify temperatures and keep your protocol timing consistent.
Know when to scale back
Reduce session intensity or stop if you experience:
- Skin irritation, rash, or burning sensations
- Prolonged numbness after leaving the cold water
- Increased pain or swelling later that day
- Unusual dizziness or discomfort during exposure
Example protocols you can start with
Use these as starting templates. Adjust based on your comfort and results.
- Beginner recovery session (3 cycles):
- Hot: 1–2 minutes at a comfortable warm temperature
- Cold: 30–60 seconds
- Repeat for 3 cycles
- Dry and warm up afterward
- Standard recovery session (4 cycles):
- Hot: 2–3 minutes
- Cold: 1–2 minutes
- Repeat for 4 cycles
Once you find a comfortable baseline, you can fine-tune one variable at a time—usually cycle count or cold duration—rather than changing everything at once.
contrast therapy protocol recovery
Contrast therapy protocol recovery works best when you treat it like a controlled training tool: consistent temperatures, timed exposure, safe transitions, and a clear plan for progression. Prepare your setup, follow the hot-to-cold sequence with practical durations, and monitor how you feel over the next day. When you avoid common pitfalls—extreme temperatures, long cold holds, slow transitions, and overuse—you give your recovery routine a reliable structure.
Use the session templates as a starting point, then adjust based on soreness, stiffness, and comfort. With careful execution, contrast therapy can become a repeatable part of your recovery strategy rather than a random experiment.
09.01.2026. 23:05