

Bedroom Lighting Plan: Blue Light at Night for Better Sleep

Goal: build a bedroom lighting plan that reduces blue light at night
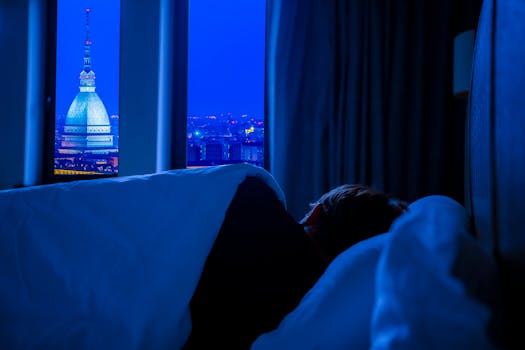
You want your bedroom to signal “sleep mode” to your body. The fastest way to do that is to control light intensity, color temperature, and timing. Blue light at night can suppress melatonin and make it harder to fall asleep, especially when you’re exposed during the last 1–2 hours before bed.
This guide helps you create a practical, room-by-room lighting plan you can implement in a single evening. You’ll set up lighting levels you can actually live with—without turning your room into a cave—and you’ll make it easy to stay consistent night after night.
Preparation: measure your current lighting and decide your sleep window
Before you buy anything, do a quick audit. You’re looking for when your eyes get bright light, what color the light is, and whether any screens or LED indicators are “accidentally” bright.
Set your sleep window first. Choose a target wind-down period of 60–120 minutes before your normal bedtime. If you sleep at 11:00 p.m., your lighting plan should start dimming at 9:00–10:00 p.m. for most people.
Gather what you already have:
- Your existing bulbs (note wattage and color temperature if printed on the box or bulb base).
- A phone flashlight or a simple light meter app (optional) to estimate brightness at eye level.
- Your bedtime routine items: bedside lamp, overhead light, LED strips, TV, charger lights, smart speakers, etc.
Recommended tools (optional but helpful):
- A pack of smart bulbs or a dimmer switch (if you’re replacing fixtures).
- Warm, dimmable bulbs in the 2200K–2700K range for nighttime use.
- Amber/red “night mode” lighting for very late hours (especially if you wake during the night).
- Light-blocking curtains or blackout blinds if streetlight spills in.
- Electrical tape or a small diffuser for any LED indicators you can’t cover (only if safe and non-heating).
Step 1: Map every light source in your bedroom
Walk through your bedroom and list every light source that could be on during your wind-down and sleep. Don’t forget the small things. In many bedrooms, the biggest offenders are subtle: a charging LED, a TV standby glow, or a hallway light that leaks in.
Do this in 10 minutes:
- Write down each light source and where it is located (ceiling, bedside lamp, LED strip, smart device LED).
- Turn each one on and observe what you see from your usual reading position (sitting in bed or in your chair).
- Note whether the light feels “cool” (bluish/white) or “warm” (yellowish/amber).
- Label which lights are typically used 1–2 hours before bed, and which are used only at night.
Practical example: If your bedside lamp uses a 5000K “daylight” bulb and you read for 30 minutes before sleep, that lamp becomes part of your blue-light problem—even if the overhead light is already off.
Step 2: Set your color temperature targets for nighttime
You’re aiming for warmer, lower-blue lighting during your wind-down period. Use these practical targets:
- Wind-down (60–120 minutes before bed): 2200K–2700K dimmable bulbs.
- In-bed reading: warm bulbs around 2400K–2700K, dimmed to a comfortable level (often 10–30% brightness).
- Middle-of-the-night (if you wake): amber/red lighting if possible, or very dim warm light (near the floor or with a diffuser).
If your bulbs don’t list Kelvin (K), choose “soft white” or “warm white” and prioritize dimmability. The key is lower blue content and reduced brightness—not just a warmer label.
Step 3: Choose the right fixtures and bulbs for your plan
Your goal isn’t only to “use warm bulbs.” It’s to control where light lands and how bright it is at eye level.
Use these fixture rules:
- Bedside lighting should be directional. Lamps with shades, adjustable heads, or gooseneck designs reduce glare.
- Overhead lights should be avoided at night. If you must use them, keep them minimal and brief.
- LED strips should be indirect. Aim them behind furniture or under shelves so you don’t see the LEDs directly.
Soft product guidance (optional): If you want convenience, consider dimmable smart bulbs or smart plugs that let you schedule warm lighting. Brands like Philips Hue, LIFX, or similar systems can support gradual warm transitions. For simpler setups, a dimmer switch paired with warm dimmable bulbs is often enough.
When you shop, prioritize these features:
- Dimmable capability (not all “warm white” bulbs are dimmable).
- Color temperature control (2200K–2700K ideally).
- Good shielding (lamp shades that block direct LED visibility).
Step 4: Build your lighting schedule by time, not by vibes
Consistency matters more than perfection. Create a simple schedule you can follow automatically or manually.
Use this example timeline (adjust to your bedtime):
- 2 hours before bed: Dim main bedroom lights to a low level (about 20–40% brightness). Switch to warm bulbs if you have multiple color temperatures.
- 1 hour before bed: Keep only bedside or reading lights on. Target 10–30% brightness. Avoid bright white light.
- Final 30 minutes: Reduce lighting further. If you read, use a lamp with a shade pointed downward. If you use a phone, keep the screen brightness low and consider night mode.
- During sleep: Keep a night light only if you need it. Use the warmest/amber option available and keep it low.
Action step: If you have smart bulbs, set a schedule. If you don’t, set reminders and use a dimmer or smart plug timer to automate at least the transition point (for example, turning down at 9:30 p.m.).
Step 5: Set brightness targets at eye level (the part most people miss)
Blue light matters, but brightness matters just as much. Even warm light can disrupt sleep if it’s too bright.
Do a quick “eye-level check”:
- Turn on your wind-down lighting (the lamps you plan to use).
- Sit or lie in your usual reading position.
- Observe your field of view. If you can see a glare hotspot from a bulb or LED, it’s too bright or too exposed.
- Dim until the light is comfortable without making you squint or lean away.
Practical example: Many people think a bedside lamp is “soft.” Then they realize the bulb is visible straight from bed. By switching to a lamp shade with fuller coverage—or by moving the lamp slightly and dimming—it becomes genuinely sleep-friendly.
Step 6: Control glare and direct line-of-sight exposure
Glare is one of the fastest ways to make your lighting plan feel worse. It also increases effective brightness on your eyes.
Fix glare with these steps:
- Position lamps so the light source is not directly visible when you’re lying down.
- Prefer shades, diffusers, or indirect lighting over bare bulbs.
- For LED strips, mount them so the LEDs are hidden behind a ledge or shelf.
- If you use a smart display, cover or dim it so it doesn’t throw a bright rectangle across your room.
Real-world scenario: Your partner falls asleep easily, but you don’t. You notice the TV standby light reflects on the ceiling. You swap to a warmer night light with a diffuser and cover the TV’s indicator. The improvement is often immediate because your eyes stop receiving that bright “signal” every few minutes.
Step 7: Replace or adjust bulbs systematically (start with the biggest offenders)
Don’t replace everything at once. Upgrade the lights that affect your eyes the most during your wind-down period.
Prioritize in this order:
- Bedside lamp bulbs: usually the highest impact because you look at them while reading.
- Overhead lights: if they’re used late, switch to warm dimmable bulbs or plan to avoid them.
- Any “cool white” bulbs (4000K–6500K): replace with warm 2200K–2700K for nighttime.
- LED strips and accent lighting: adjust to indirect warm modes.
Systematic approach for a weekend:
- Day 1 (30–60 minutes): swap bedside bulbs to warm dimmable options.
- Day 1 (10–20 minutes): set dimmer levels and lamp positioning.
- Day 2 (20–45 minutes): fix hallway spill, cover LEDs, and set night light behavior.
This keeps the project manageable while still improving sleep quickly.
Step 8: Add a “sleep mode” lighting layer for late-night wake-ups
If you wake during the night, you want the light to help you function without fully turning your brain back on. This is where amber/red night lights can be especially useful.
Set up a night-light strategy:
- Choose one low-level light source near the route you need (bathroom doorway or path).
- Keep it dim—just enough to prevent stumbling.
- Use warm/amber lighting if available.
- Turn off overhead and bedside reading lights during the night unless necessary.
Practical example: You install a small plug-in night light in the hallway. When you wake at 2:00 a.m., you don’t reach for the ceiling light. You walk safely with low light, then return to bed.
Step 9: Schedule transitions to avoid abrupt “light shocks”
Sudden changes can be jarring. Instead of flipping from bright to dark instantly, aim for gradual transitions.
Try a 15–30 minute dimming ramp:
- Start at moderate warm light (for example, 40–60% brightness) at the beginning of your wind-down.
- Lower to 20–30% over the next 15–30 minutes.
- Keep only bedside lighting at low brightness as you get closer to bedtime.
If you use smart bulbs, you can create a “movie/sleep” routine that gradually warms and dims. If you’re manual, turn the lights down once at the first wind-down stage and again at the final stage.
Step 10: Integrate screens and device indicators into your plan
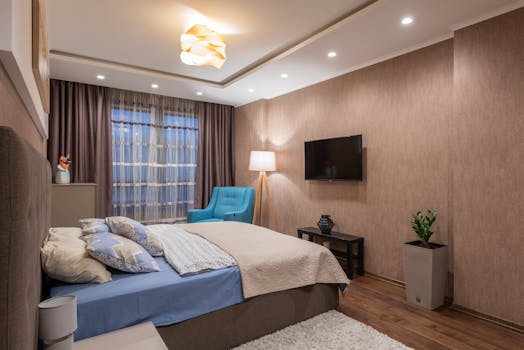
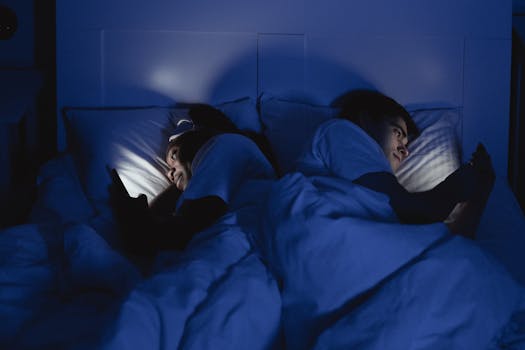
Your bedroom lighting plan isn’t only about bulbs. Your phone, tablet, TV, and smart speaker LEDs can all contribute to blue-light exposure and brightness.
Do these quick adjustments:
- Enable night mode or eye comfort settings on your phone 60–90 minutes before bed.
- Lower screen brightness to the minimum you can comfortably read.
- Dim or cover device status LEDs (charging lights, router LEDs, smart clocks).
- If your TV is on during wind-down, keep it on low brightness and avoid “cool” picture modes.
Important detail: If you watch videos in bed, your eyes are still receiving bright light even if your lamps are warm. Reduce screen use near bedtime or switch to audio-only when possible.
Common mistakes that undermine a blue-light at night plan
These are the issues that commonly derail the effort, even when you buy warm bulbs.
- Using warm bulbs but keeping them too bright. If you can see glare clearly from bed, dim more.
- Leaving overhead lights on “just for a minute.” That minute can reset your body’s timing cues.
- Ignoring hallway and window spill. Streetlights and LEDs outside your room can be surprisingly disruptive.
- Focusing only on the bulb color temperature. Brightness and exposure time matter just as much.
- Forgetting LED indicators. A tiny blue LED can be visible from your pillow.
- Turning lights on abruptly at wake time. Even warm light can feel intense if it blasts your eyes.
Additional practical tips to optimize your results
Once your lighting plan is in place, you can fine-tune it for better sleep quality and easier routines.
Use lighting zones: reading zone, relaxing zone, and night path
Create three “zones” in your bedroom. Keep the reading zone bright enough to see, but limited to where you’re looking. Keep the relaxing zone dim and warm. Keep the night path minimal.
- Reading zone: bedside lamp with shade, dimmed to comfortable levels.
- Relaxing zone: only one warm light source, often indirect.
- Night path: a single low night light you can’t trip over.
Try a 7-night consistency test
Don’t judge the plan after one evening. For a simple experiment, follow your schedule for 7 nights and track:
- Time to fall asleep (estimate it).
- Number of night wake-ups.
- How refreshed you feel the next morning.
If sleep improves slightly, keep the plan. If it doesn’t, adjust one variable at a time—usually brightness, glare, or screen exposure.
Adjust based on your bedtime routine
If you read for 45 minutes, your bedside lamp matters most. If you do paperwork or browse your phone in bed, screen light becomes the priority. Your lighting plan should match what you actually do.
Example: You start a “wind-down” habit of reading on your phone while lying down. You switch to a warm bedside lamp, but you still scroll for 30 minutes. The lighting plan alone won’t fully solve the issue. Reduce screen time or increase distance and dimness during those 30 minutes.
Consider blackout and ambient control
If you can’t control indoor lights perfectly, you can still control what enters from outside. Blackout curtains, blinds, or even a simple eye mask can reduce exposure to early-evening streetlight and late-night porch LEDs.
This doesn’t replace your bedroom lighting plan. It complements it by lowering stray light that your eyes pick up even when your lamps are dim.
Use dimmers where you can
Dimmability is the difference between “warm enough” and “sleep-ready.” If your fixtures aren’t dimmable, the room may stay too bright at the exact times you need it to be gentle.
If you’re upgrading, consider dimmer switches for overhead fixtures and choose warm dimmable bulbs for lamps. For renters, smart bulbs or plug-in dimmers can be a flexible alternative.
Make it easy: set routines you won’t forget
The best plan is the one you follow. If you’re likely to forget, automate the first transition point. For example: schedule your bedside lamps to warm and dim at 9:30 p.m. even if you’re still winding down.
Then you only have to do the second step—turning off overhead lights and keeping only bedside lighting—when you start your final routine.
Putting it all together: your step-by-step checklist for tonight
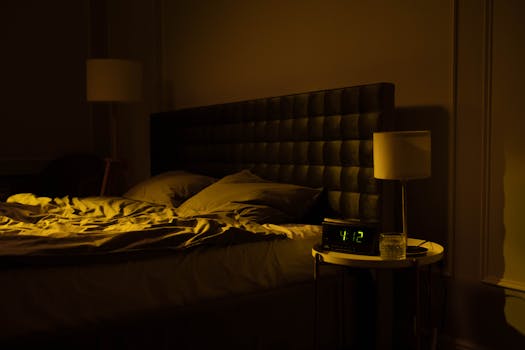
If you want a fast “do it now” approach, use this checklist based on the steps above.
- Pick your wind-down start time (aim for 60–120 minutes before bed).
- Identify your brightest light source in that window (often bedside lamp or overhead).
- Switch to warm bulbs (2200K–2700K) in the lights you use near bedtime.
- Dim everything until glare disappears from your line of sight.
- Turn off overhead lights during the last hour.
- Set a night light for any late-night movement and keep it very low.
- Adjust phone/screen settings and reduce brightness in bed.
- Run the plan for 7 nights and fine-tune one thing if needed.
Once your bedroom behaves like a consistent sleep environment, you’ll feel the difference in how quickly you settle. It’s not about one perfect bulb. It’s about controlling timing, warmth, and brightness—so your brain gets the same message every night.
01.05.2026. 19:58