Wearable Sensor Accuracy Protocol for HRV, SpO2, ODI, and Activity
Goal: produce accurate wearable readings for HRV, SpO2, ODI, and activity
Wearables can be remarkably useful, but their accuracy depends heavily on how you wear the device, how you collect data, and how you handle signal quality. This how-to protocol gives you a repeatable workflow for improving the reliability of HRV, SpO2, ODI, and activity metrics. The objective is not to “force” perfect numbers, but to reduce avoidable sources of error so your trends become trustworthy enough for training decisions, sleep evaluation, and health monitoring conversations with clinicians.
You’ll follow a structured process: prepare your body and environment, set up the device correctly, capture baseline data, verify signal quality, and then apply consistency rules so your results are comparable across days.
Preparation and setup you need before collecting data
Before you start, gather the basics that affect sensor performance and make your protocol repeatable.
- Wearable device and app: Use the same model and the same app version for the tracking period you want to compare. If the app updates, note the date because processing algorithms can change.
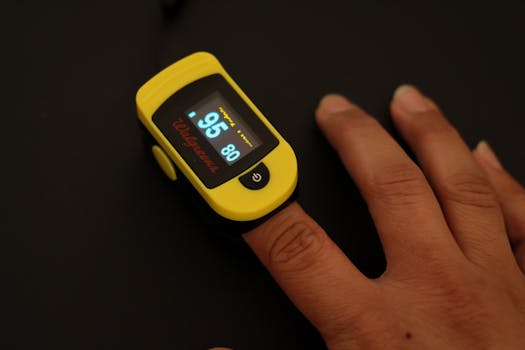
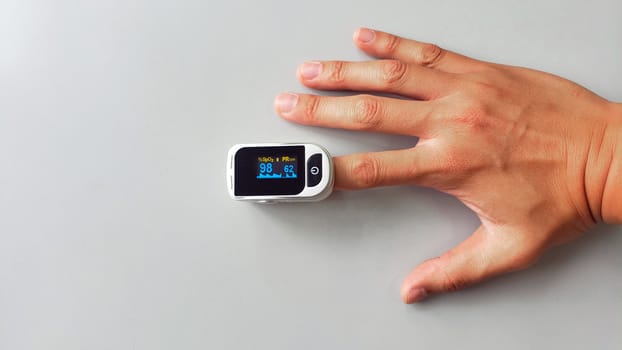
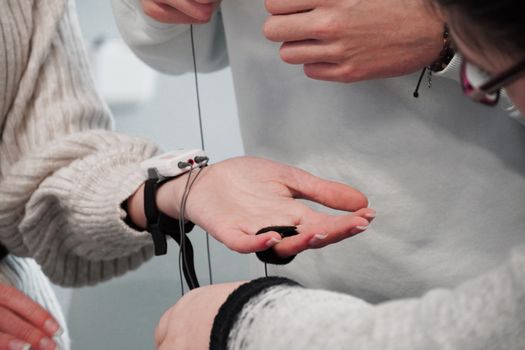
- Consistent fit tools: A snug strap for wrist devices, a properly sized finger sensor if applicable, or correct placement for chest/arm/earform factors. For optical sensors, fit matters as much as the device itself.
- Skin prep items: Soap and water (or alcohol wipes) to remove sweat/oils, plus a dry cloth. For long wear sessions, consider using a thin, compatible barrier only if your skin tolerates it.
- Charging and battery check: Low battery can reduce sampling quality or increase data gaps.
- Time and routine alignment: A stable sleep schedule helps HRV and SpO2 interpretation. For ODI (oxygen desaturation events), consistency in sleep timing is especially important.
- Optional reference checks: If you have clinical-grade SpO2 or a validated HRV source, use it only for sanity checks, not as a daily target.
Choose one “measurement window” to evaluate performance. For example: 7 nights of sleep data for HRV/SpO2/ODI plus 5–7 days of daytime activity. Keep the same window length each time you run the protocol.
Step-by-step wearable sensor accuracy protocol
- Standardize your tracking conditions for at least 24 hours
Start the day before your main data window. Wear the device consistently and avoid unusual variables: long travel with dehydration, new medications that affect autonomic tone, or intense exercise that you wouldn’t normally do. This isn’t about “perfect conditions”—it’s about reducing sudden shifts that make signal quality and physiology harder to interpret. - Verify device placement and fit using a repeatable method
For wrist optical sensors, place the device about 1–2 finger widths above the wrist bone and tighten until it stays put without pinching. Move your wrist through typical ranges for 30 seconds. If the sensor slides, readings will degrade, especially during sleep and low-motion periods. For finger and other optical placements, ensure the sensor covers the target tissue fully and remains centered. - Clean the skin and the sensor contact area
Before wearing, wipe the contact area to remove oils and dried sweat. For sleep, do this again if you notice residue buildup. Optical sensors rely on stable light transmission; grime and sweat films can alter signal quality and worsen SpO2 reliability. - Use a consistent wear duration and remove sources of motion artifacts
Motion artifacts are a major cause of poor photoplethysmography (PPG) signals. During daytime, keep the device in the same position and avoid “loose wear” during workouts. During sleep, ensure the strap is secure enough that it doesn’t rotate when you change positions. - Confirm the device is actually capturing high-quality data
In the app, check whether you’re getting continuous readings for HRV and SpO2 during the intended period. Look for gaps, unusually short sleep segments, or frequent “no signal” indicators. If your wearable supports a signal quality or sensor status view, use it. If it doesn’t, rely on continuity: multiple missing intervals across the same night is a sign the fit or sensor surface needs adjustment. - Capture a baseline rest day before trusting HRV trends
On a baseline day, aim for one calm session: for example, 20–40 minutes of seated rest in the late afternoon or early evening. Avoid caffeine within 6–8 hours before the rest session and avoid heavy meals right before. This helps you evaluate whether your HRV and resting HR signals are stable under low motion. - Collect sleep data under stable conditions for HRV, SpO2, and ODI
Start the sleep window at your normal bedtime. Keep room conditions consistent (temperature and brightness) and avoid long periods of wakefulness from late screen use. If you wake up frequently, note it in your log. ODI is sensitive to how you sleep and how well the sensor reads during micro-arousals. - Run a “signal quality check” on the first 2 nights
Review each night’s data for three practical indicators: (a) continuity of SpO2 coverage, (b) whether HRV estimates are present for the sleep window rather than sparse, and (c) whether ODI shows plausible event density rather than extreme spikes that appear only when the sensor likely slipped. If you see repeated issues, don’t continue blindly—adjust fit and skin prep and rerun for another night. - Establish your personal stability rules for activity metrics
For activity tracking, accuracy depends on motion detection. Before you evaluate training trends, do short controlled tests: walk at a steady pace for 10 minutes, then do a different movement type (stairs or cycling if your wearable supports it). Confirm that step counts, active minutes, and heart-rate-based intensity align with what you did. Use the same route and pace for repeatability. - Use consistency filters when reviewing HRV
HRV is sensitive to stress, sleep timing, alcohol, dehydration, and illness. For your wearable sensor accuracy protocol, apply a “data trust filter”: only compare HRV from nights that have similar sleep duration and similar sensor coverage quality. If one night has noticeably lower SpO2 continuity or a large gap in HRV reporting, treat that HRV estimate as lower confidence. - Validate SpO2 behavior during controlled situations
Do a quick daytime check: sit quietly for 5–10 minutes and watch SpO2 stability. Then compare to a light movement period (like gentle walking for 5 minutes). SpO2 can fluctuate slightly, but it should not show frequent dropouts. If it does, tighten the strap, clean the sensor area, and ensure the sensor is not over a bone or on a loose sleeve cuff. - Interpret ODI using event context, not only event count
ODI reflects oxygen desaturation events. Wearables can estimate these using SpO2 patterns and algorithmic thresholds. Review whether ODI events cluster during periods of poor signal (sensor slipping, gaps, or obvious motion). If events appear only when the sensor coverage looks compromised, they may be artifacts. If events persist across multiple nights with good signal continuity, they become more credible for trend analysis. - Log variables that affect signal quality and physiology
Create a simple daily log with: bedtime/wake time, alcohol (yes/no and approximate timing), caffeine timing, exercise duration/intensity, and any sensor issues (strap adjustment, skin irritation, device slipping). This helps you distinguish “sensor error” from “real physiology change.” - Repeat the protocol in cycles and compare like with like
After you optimize fit and baseline behavior, run the next cycle with the same measurement window. If accuracy improves after adjustments, keep those settings. If it worsens, revert to the last stable configuration and re-check skin prep and placement.
Common mistakes that reduce HRV, SpO2, ODI, and activity accuracy
- Wearing the device too loosely: A common cause of HRV dropouts and SpO2 instability during sleep. If the device shifts when you turn over, signal quality will suffer.
- Skipping skin cleaning: Oils, lotion, and sweat films can change optical transmission and increase noise.
- Changing device placement each day: Even small shifts on the wrist can affect the optical path and lead to inconsistent comparisons.
- Relying on a single night for ODI: ODI is event-based and can be affected by night-to-night sleep structure. Use multiple nights with good sensor continuity.
- Training hard immediately before sleep without accounting for recovery: HRV can drop due to exertion independent of sensor quality. If you compare HRV from a hard training day to a rest day, interpret carefully.
- Assuming “high numbers” always mean better accuracy: Some apps show confidence indicators; others don’t. A visually “busy” signal may still be noisy. Continuity and plausibility matter.
- Ignoring app updates: Firmware and algorithm changes can alter HRV and SpO2 processing. Record dates of updates.
- Not addressing skin irritation: If your skin becomes inflamed, you may get swelling or altered blood flow at the contact site, which affects optical readings.
Practical tips to optimize accuracy and data reliability over time
Optimize fit for optical sensors
For wrist devices, aim for a snug, stable position. Too tight can restrict circulation; too loose can cause micro-movement. After tightening, test by gently flexing your wrist and turning your arm as you would in sleep. If the sensor rotates or slides, adjust again before starting the sleep window.
Choose a consistent sleep strategy for ODI and SpO2
ODI is influenced by sleep position and airflow changes. If you consistently sleep in one position, you’ll get more comparable results. If you frequently change positions, keep your overall routine stable and focus on multi-night trends rather than single-night event totals.
Minimize confounders that alter HRV physiology
To make HRV comparisons meaningful, keep caffeine timing consistent, hydrate normally, and avoid alcohol close to bedtime. If you can’t avoid a confounder, log it and treat that data point as lower confidence for trend interpretation.
Use quality checks to decide when to trust the data
When reviewing a night, prioritize nights with continuous SpO2 coverage and stable HRV reporting. If your device shows multiple signal gaps, treat the night as an “evaluation night” for fitting rather than a “conclusion night” for health interpretation.
Calibrate your activity interpretation with short controlled sessions
Activity metrics can be evaluated with repeatable movement patterns. Do a short routine (for example, a 10-minute walk at your usual pace) and compare step counts and active minutes across days. If you notice systematic undercounting, check strap position and ensure your wearable is snug and aligned.
Manage battery and maintenance
Keep firmware updated when you’re ready to run a new measurement cycle. Clean the sensor area regularly and replace worn straps when the fit becomes inconsistent. Battery degradation can contribute to data gaps that look like sensor failure.
When to escalate beyond wearable data
If ODI trends remain elevated across multiple nights with good signal continuity, or if you experience symptoms such as persistent daytime sleepiness, loud snoring, or morning headaches, treat the wearable output as a prompt to discuss with a clinician. Wearables are not diagnostic tools, but they can help you decide when professional evaluation is warranted.
Putting it all together: a simple runbook you can reuse
Use this condensed runbook when you want to repeat the wearable sensor accuracy protocol:
- Day -1: Wear consistently; clean sensor area; confirm snug placement.
- Day 0: Do a calm rest session to check HRV stability; verify SpO2 continuity during quiet sitting.
- Night 1–2: Sleep with strict fit consistency; review continuity and sensor status indicators; adjust if you see gaps or frequent dropouts.
- Night 3–7: Collect data under stable routine; log caffeine, alcohol, exercise, and any sensor issues.
- Day 3–8: Validate activity metrics with a repeatable movement routine; compare across days only when sensor wear and placement were consistent.
Following this workflow improves the odds that HRV, SpO2, ODI, and activity metrics reflect your actual physiology and behavior rather than preventable measurement artifacts.
11.01.2026. 15:13