

Best Air Quality Monitor PM2.5 CO2 VOC: Buying Guide for Clean Air

Why you need an air quality monitor for PM2.5, CO2, and VOC

If you’re trying to breathe easier at home, the problem is rarely one single pollutant. A “bad air day” can be driven by PM2.5 from cooking, smoke, or outdoor traffic. It can also be driven by indoor air that’s stale and poorly ventilated, which shows up as elevated CO2. Then there are VOCs—volatile organic compounds—from paints, cleaning products, adhesives, fragrances, and even some furniture or building materials.
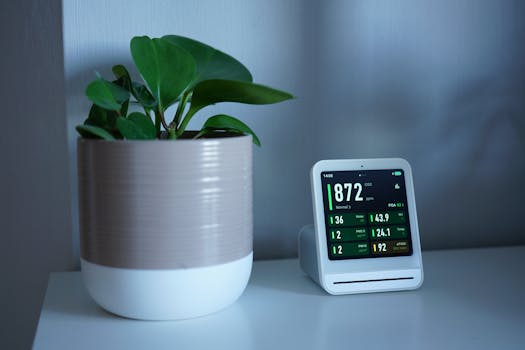
That’s why the best air quality monitor PM2.5 CO2 VOC combo is so useful: it helps you connect what’s happening in your space with what you can do about it. Instead of guessing, you can track trends over time and make targeted changes like improving ventilation, changing cleaning habits, or addressing sources of odors and chemical emissions.
But not all monitors measure the same way. Some are good for “directional” awareness, while others can be genuinely reliable for decisions like when to run an air purifier or when to ventilate after using certain products. Your goal is to buy a monitor that matches your real needs, your room size, and how you plan to act on the data.
Key features to look for in the best PM2.5, CO2, and VOC monitor
1) PM2.5: sensor quality and real-world responsiveness
PM2.5 (particles smaller than 2.5 microns) is one of the most actionable indoor pollutants. Look for monitors that specify the sensor type and sampling behavior. In practice, you want:
- Optical particle sensing for PM2.5, typically with laser or LED-based detection.
- Clear measurement range (for most homes, 0–500 µg/m³ is common; higher ranges are useful near wildfire smoke).
- Update rate around 1–10 seconds for faster event detection (cooking spikes can rise and fall quickly).
- Calibration or at least sensor quality notes from the manufacturer. If they only say “accurate” without describing anything, be cautious.
Real-world scenario: You start cooking onions. Within 1–3 minutes, the PM2.5 reading jumps and then drops as you turn on the range hood and ventilate. A monitor that updates slowly may miss the peak and make you think your air purifier or ventilation isn’t working.
2) CO2: NDIR measurement and what numbers mean
CO2 isn’t a toxin in the way carbon monoxide is, but it’s a strong proxy for ventilation and occupancy. When CO2 climbs, it usually means fresh air is insufficient. For CO2, prioritize:
- NDIR CO2 sensor (Non-Dispersive Infrared). This is the standard for consumer monitors and is generally more reliable than electrochemical alternatives.
- Typical accuracy around ±50 ppm (some models claim better; you’ll see it in specs).
- Measurement range that covers everyday indoor levels (commonly up to 5000 ppm).
- Auto-baseline behavior or clear guidance for calibration.
In daily life, many people treat roughly 800–1000 ppm as “reasonable” for a well-ventilated home, while sustained readings above 1200–1500 ppm often indicate you should ventilate more—especially in bedrooms where people sleep for 6–8 hours.
Important: CO2 can be influenced by outdoor air conditions. If you live in a cold climate and keep windows closed for days, CO2 may never “reset” on its own.
3) VOC: understand what “VOC” actually measures
VOCs are tricky because “VOC” is a broad category. Many monitors don’t identify individual chemicals; they detect changes in total volatile organic compounds using a sensor that responds to a range of compounds. When you’re choosing a VOC-capable monitor, look for:
- Sensor type (commonly metal-oxide or similar gas-sensing technology). The exact type matters because it affects stability and drift.
- How VOC is reported: some show “TVOC” (total VOC) in arbitrary units, while others provide an index or calibrated scale.
- Stability time: many gas sensors need warm-up, and VOC readings can drift. If the manufacturer mentions warm-up time (often 30–60 minutes) and recommended placement, that’s a good sign.
- Response to common household sources: ideally the monitor shows spikes after activities like using cleaning sprays or applying air freshener.
Practical example: After you spray a glass cleaner or use a scented disinfectant, VOC readings should rise noticeably within minutes. If your VOC channel stays flat, either the sensor isn’t sensitive enough, or it’s not responding to the compounds you’re using.
4) Display, app, alerts, and data logging
Buying a monitor is only half the job. You need to act on it. Look for:
- On-device display for quick checks (especially for children’s rooms or bedrooms).
- Mobile app with trend charts so you can see patterns over days and weeks.
- Smart alerts tied to thresholds (for example: “Ventilate when CO2 > 1200 ppm for 10 minutes” or “Run purifier when PM2.5 > 35 µg/m³”).
- Data export or history if you want to verify improvements after changes.
Even a simple feature—like a 24-hour history—helps you learn whether your room is consistently stale or only spikes during certain activities.
5) Placement guidance and airflow sensitivity
Monitors can be affected by where you place them. If the manufacturer provides placement guidance, take it seriously. Generally, you should avoid:
- Direct airflow from HVAC vents.
- Cooking zones (unless you’re intentionally measuring that area).
- Near open windows where outdoor air dominates the reading.
- High-traffic spots where you’ll bump the device or where your breath constantly affects the sensor.
If you want meaningful room-level data, place the monitor at about 1–1.5 meters from the floor in a spot that represents how people actually use the space. For bedrooms, that often means near the bed area but not directly under a fan.
6) Power and connectivity
Most home buyers want stable operation. Consider:
- USB power vs. battery: USB is usually better for long-term logging.
- Wi‑Fi vs. Bluetooth: Wi‑Fi helps with remote monitoring, while Bluetooth can be fine if you’re always nearby.
- Offline behavior: if your Wi‑Fi drops, does the monitor keep logging?
What you should prioritize before you buy
Match the monitor to your “why”
Start with your primary goal:
- Wildfire smoke or outdoor pollution concerns: prioritize responsive PM2.5 performance and clear reporting.
- Stuffy rooms, headaches, or poor sleep: prioritize NDIR CO2 accuracy and meaningful alerts for ventilation.
- Odors, new furniture, cleaning habits, or chemical sensitivity: prioritize VOC sensitivity and sensor stability (and understand that VOC readings are often relative).
Then choose a monitor that performs well in those categories rather than chasing every feature at once.
Don’t overtrust a single number—watch trends
Even good sensors vary. The most useful habit is to look for changes:
- Does PM2.5 rise after cooking and fall after you run ventilation or a purifier?
- Does CO2 drop after you crack a window or run an ERV/HRV?
- Do VOC spikes match the times you use sprays, candles, or new products?
If the readings behave logically, you can trust them to guide actions—even if absolute values differ slightly from a lab-grade instrument.
Plan for calibration and warm-up
CO2 sensors often benefit from baseline adjustments. Many manufacturers recommend exposing the sensor to outdoor air periodically or using an auto-baseline feature when conditions allow.
VOC sensors may require warm-up and may drift over time. If you see VOC values trending upward over days with no changes at home, check whether the manufacturer recommends “resetting” the sensor or letting it stabilize.
Choose the right size and quantity for your home
One monitor can help you understand one room very well. If you want whole-home coverage, you may need multiple devices. For example:
- Bedroom monitor: focus on CO2 and PM2.5 overnight.
- Living room monitor: focus on cooking-related PM2.5 spikes and VOCs from daily activities.
- Office monitor: focus on CO2 during work hours (often 6–10 hours).
If you only buy one device, place it where you spend the most time. If you place it in a hallway, you’ll likely get diluted readings that don’t reflect what’s happening in your actual breathing zone.
Common purchasing mistakes and misunderstandings
Buying “VOC” without understanding sensor limits
Many buyers assume VOC monitors identify specific chemicals. They usually don’t. They measure a combined response to a range of compounds. That still can be useful, especially for detecting changes after cleaning or new product use, but it’s not a substitute for chemical testing if you’re dealing with a serious exposure concern.
Assuming CO2 means “air is toxic”
CO2 is primarily a ventilation indicator. High CO2 can correlate with stale air, but it doesn’t automatically mean you’re in danger. If your CO2 is high, your best move is usually ventilation—open windows briefly, run mechanical ventilation, or improve airflow.
Placing the monitor too close to sources
If you put the monitor near a kitchen hood, you’ll mostly measure the hood’s effect, not the room. If you put it next to a scented candle, you’ll chase spikes that don’t represent your overall environment. Placement is a bigger factor than most people expect.
Ignoring update rate and response time
Slow PM2.5 sampling can miss short events like wildfire smoke gusts or cooking peaks. If you want to evaluate whether your purifier is working quickly, choose a monitor with a reasonably fast update rate and responsive behavior.
Not setting thresholds or alerts
If you buy a monitor but never set alerts, you’ll end up checking it manually. That defeats the point for busy households. A good monitor should help you act—like ventilating sooner when CO2 stays above a threshold.
Practical buying checklist and decision framework
Step 1: Decide which channel matters most
- PM2.5 priority: confirm sensor type (optical particle), measurement range, and responsiveness.
- CO2 priority: confirm NDIR sensor and check stated accuracy and range.
- VOC priority: confirm sensor type and whether VOC is reported as TVOC or an index, plus warm-up guidance.
Step 2: Verify specs that affect real usability
- Update rate for PM2.5 (aim for fast enough to catch cooking or smoke spikes).
- History charts in the app (at least 24 hours, ideally longer).
- Alert thresholds you can customize (CO2 and PM2.5 are especially useful).
- Power method (USB for continuous use; battery if you truly need portability).
- Connectivity (Wi‑Fi if you want remote monitoring).
Step 3: Plan placement before checkout
- Choose a breathing-zone location (about 1–1.5 m high).
- Avoid direct HVAC drafts and direct cooking fumes.
- For bedrooms, keep it stable and not too close to the bed where your breath constantly affects readings.
Step 4: Test your monitor in week one
For the first 7 days, run a simple “source-to-reading” test:
- Cook a meal you normally cook and note PM2.5 changes.
- Use a common cleaner or spray you use occasionally and note VOC spikes.
- During a work-from-home period, monitor CO2 and try a ventilation action (like cracking a window for 10–15 minutes) and verify CO2 drops.
If the channels respond in a logical way, you’re likely buying a monitor that’s useful for your decisions.
Step 5: Use the data to drive actions
- When PM2.5 spikes: run the air purifier, use range hoods, or close windows temporarily.
- When CO2 rises: ventilate or improve mechanical ventilation.
- When VOC spikes: reduce the source, switch products, and ventilate until readings stabilize.
Final buyer guidance and recommendations for your clean-air setup
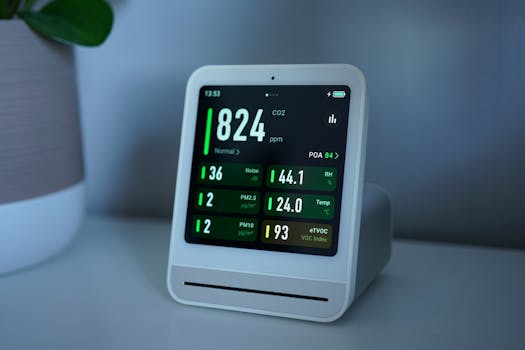
Choosing the best air quality monitor PM2.5 CO2 VOC isn’t just about buying a device with three numbers on the screen. It’s about matching sensor quality and reporting to how you live. If you want actionable results, prioritize NDIR CO2 for trustworthy ventilation insights, responsive PM2.5 for fast pollution events, and VOC sensing that’s stable enough to track changes after real household activities.
If you’re building a home clean-air routine, consider pairing your monitor with a practical response plan. For example, when PM2.5 rises during cooking, you should be ready to run your air purifier and use mechanical ventilation. When CO2 climbs during long work sessions, open a window or run ventilation for short intervals (often 10–20 minutes can make a noticeable difference). When VOC spikes after using sprays, ventilate and avoid repeating the same product until you understand the source.
For monitors that are designed for home use with clear apps and multi-sensor reporting, you’ll typically find brands such as Airthings and Atmotube that offer PM/CO2/VOC-capable models depending on the configuration you choose. If you’re also considering an air purifier, look for models that integrate with air quality data or at least support fast filtration for fine particles—this combination often gives you the most noticeable improvement in day-to-day comfort.
Before you commit, double-check the exact sensor specs, warm-up and calibration guidance, and how VOC is reported in that specific model. Then place the monitor correctly and test it within the first week. That process will tell you more than any marketing claim—and it will help you choose a monitor you’ll actually use.
15.03.2026. 04:24