Mold Risk: Humidity, Condensation, and Hygrometer Thresholds
When humidity readings don’t match what you see
Mold risk often starts quietly. You notice a musty smell in a closet, a faint dark spot near a window, or damp drywall after a cold snap. Sometimes your hygrometer shows “normal” numbers, and you wonder if the mold problem is real—or if the meter is wrong.
This is a common troubleshooting trap: mold doesn’t require constant high humidity. It requires the right combination of moisture, time, and surface conditions. Condensation on cold surfaces can create a damp film even when overall indoor humidity looks acceptable.
In this guide, you’ll work through humidity and condensation checks using practical thresholds, then isolate the most likely causes. You’ll also learn when the issue is best handled by repair work (not just monitoring), and when replacement or professional help is necessary.
Overview of problem symptoms you may experience
Use these signs to decide where to start:
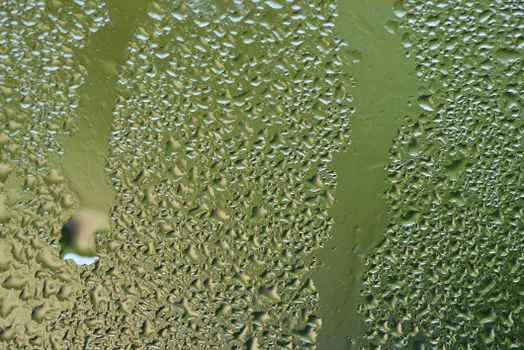
- Visible condensation on windows, mirrors, shower doors, or exterior walls during mornings or after showers.
- Musty odors that are stronger in closets, behind furniture, under sinks, or on exterior walls.
- Dark spots or staining on drywall seams, around window frames, in HVAC returns, or on ceiling corners.
- Peeling paint, bubbling, or soft drywall near an exterior wall or above a bathroom ceiling.
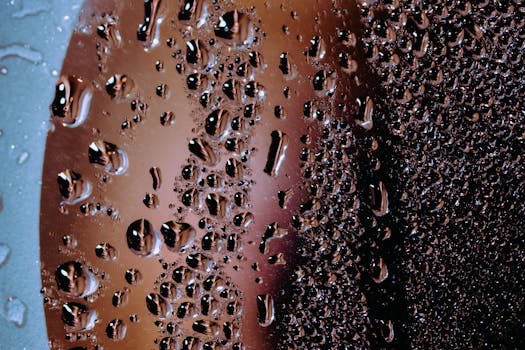
- Condensation on HVAC ducts in unconditioned spaces (attics, crawlspaces, basements), sometimes with water droplets.
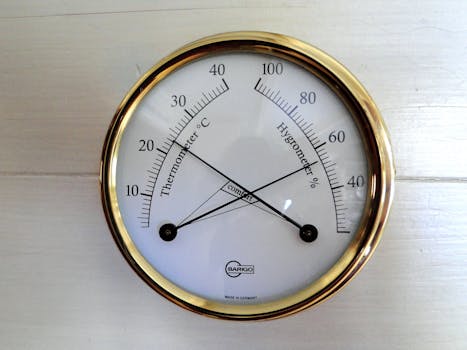
- Hygrometer “drift”: readings that swing wildly, differ between rooms, or change after you move the device.
A real-world scenario: During winter, you might keep your thermostat at 70°F (21°C). Your hygrometer reads 45% relative humidity in the living room. Yet you still see condensation on the bedroom window at night and notice a faint odor near the baseboard. The overall RH can be misleading because the window glass and nearby wall surfaces are colder, allowing local condensation even when the average room humidity looks safe.
Explanation of the most likely causes
Most mold risk humidity condensation issues come from one of these pathways. Your job in troubleshooting is to determine which pathway matches your measurements and observations.
1) Condensation from cold surfaces
Condensation occurs when the air’s moisture content meets a surface at or below the dew point temperature. Even if your indoor RH is not extreme, cold window glass, poorly insulated exterior walls, or metal ducts can drop below the dew point.
In practical terms: when surfaces are colder than you expect, condensation becomes likely. This is why the “same” humidity level can be safe in one room and risky in another.
2) High indoor humidity from moisture sources
Common moisture sources include:
- Showering and bathing without adequate exhaust
- Cooking without ventilation
- Drying laundry indoors
- Leaky plumbing, wet crawlspaces, or basement seepage
- Humidifiers set too high
- Wet materials from a recent leak or flood that haven’t been fully dried
If a moisture source is active, indoor RH can rise quickly—often within hours—especially in smaller rooms or during colder seasons when ventilation rates drop.
3) Poor ventilation and air exchange
When you reduce fresh air (closed windows, tight building envelope, or a malfunctioning exhaust fan), moisture has fewer routes to leave. You can end up with RH that slowly creeps upward, even if you don’t see condensation right away.
4) HVAC problems (or the wrong air movement)
Dusty supply registers, imbalanced airflow, undersized returns, or a poorly functioning dehumidification cycle can leave some areas stagnant and cooler. Mold risk increases where air doesn’t circulate and surfaces stay colder for longer.
Also watch for:
- Air handler running without adequate fresh air intake
- Condensate drain issues (water backing up in the pan)
- Leaky ductwork in unconditioned spaces
5) Hygrometer inaccuracies and placement errors
Many hygrometers are “good enough” for trend monitoring, but not precise enough for strict decisions. Placement matters. A device near a window, on an exterior wall, above a vent, or in direct sun can read higher or lower than the rest of the room.
Calibration also matters. Digital sensors can drift over time. If you’re using thresholds to decide whether to act, you need confidence in the readings.
Step-by-step troubleshooting and repair process
Work in a logical sequence: verify the measurement, map where condensation occurs, then address the moisture pathway. Don’t jump directly to remediation without confirming the cause—otherwise you may remove visible mold while the humidity or condensation source continues.
Step 1: Confirm where condensation is actually happening
Start with direct observation. Look for moisture on:
- Window glass and frames
- Exterior wall corners
- Ceiling corners after showers or cooking
- Baseboards near exterior walls
- HVAC supply or return areas
- Under sinks and around plumbing penetrations
Use a flashlight in the early morning when condensation is most likely. If you can, also check after a high-moisture activity (a shower, cooking with the lid off, or running a dryer indoors).
Step 2: Use hygrometer thresholds that match mold risk reality
Relative humidity thresholds are useful, but they’re not magic numbers. Still, they guide action:
- 40–50% RH: generally a lower mold-risk range for many indoor environments when surfaces are not condensing.
- 50–60% RH: increases risk, especially if you have cool surfaces or poor ventilation.
- Above 60% RH: this is a high-risk zone. Mold can begin to develop if the elevated RH persists for days, not just minutes.
Condensation is a separate trigger. If you see condensation, you have a localized moisture event regardless of the room’s average RH. That means your “threshold” should include surface behavior, not just air RH.
Step 3: Verify your hygrometer readings with placement control
Do this before you change anything expensive:
- Place the hygrometer 3–5 ft (1–1.5 m) from exterior walls and away from windows, vents, and direct sunlight.
- Keep it not on an exterior wall or next to a cold window frame.
- For 24 hours, note the RH at the same times each day (morning, afternoon, evening).
If you have two hygrometers, compare them. If one consistently reads 10–15% RH higher than the other in the same spot, trust the trend but treat the numbers cautiously. In that case, consider calibration or replacement (more on that later).
Step 4: Calculate dew point behavior using temperature and RH
Condensation happens when the air’s dew point is at or above the surface temperature. You don’t need a complex instrument to understand the logic:
- When indoor air is ~70°F (21°C) and RH rises, dew point rises.
- Cold surfaces in winter (windows, exterior wall sheathing, metal ductwork) can easily be below dew point.
If your bedroom has cold window glass, dew point can reach the glass temperature overnight, creating condensation even when the living room hygrometer reads 45–50% RH.
If you have a thermometer/temperature probe, measure the surface temperature of the window glass or wall corner. If it feels “much colder” than the room by several degrees, condensation risk increases. A non-contact infrared thermometer can help, but even careful hand-touch comparison (briefly, safely) can guide you to the coldest areas.
Step 5: Identify moisture sources through activity-based testing
Run a short, controlled check:
- Pick a suspected source (bathroom shower, cooking, laundry).
- Measure RH before (baseline) and then again 30–60 minutes after the activity.
- Observe whether condensation appears on the nearest cold surfaces during that window.
If RH spikes and stays elevated, you likely have a ventilation or exhaust problem (or a leak). If RH doesn’t spike but condensation appears, focus on surface temperature and insulation/air sealing.
Step 6: Inspect for hidden water intrusion and HVAC condensate issues
Check areas that commonly create persistent dampness:
- Bathroom fans: Are they venting outdoors? Do they run long enough?
- HVAC condensate line: Is there standing water, clogs, or a slow drain?
- Plumbing penetrations: Look for staining around supply lines and under sinks.
- Basement/crawlspace: Look for wet insulation, damp concrete, or water in sumps.
- Exterior wall penetrations: Dryer vents, plumbing vents, and window/door flashing issues.
Even a small leak can keep RH elevated in one area without dramatically raising whole-house RH.
Solutions from simplest fixes to more advanced fixes
Start with the lowest-risk, highest-impact actions. Then move toward targeted repairs if the problem persists. You’re aiming to reduce both air moisture (RH) and condensation risk on surfaces.
Fix 1: Improve exhaust and reduce indoor moisture generation
If condensation appears after showers or cooking, exhaust performance is often the culprit. Take these steps:
- Run the bathroom fan during the shower and for 15–30 minutes after you finish.
- Use the fan’s “timer” or switch it to a longer run mode if available.
- During cooking, use the range hood and keep it on while simmering—steam continues after you turn the burner off.
- Reduce indoor laundry drying if possible. If you must dry indoors, use a vented dryer or improve ventilation and monitor RH closely.
After changes, watch RH behavior at the same times for at least 2–3 days. Mold risk depends on persistence, not a single measurement.
Fix 2: Manage airflow so moist air reaches ventilation routes
Stagnant air can keep surfaces cooler and create localized condensation. Try:
- Ensure doors to bathrooms and closets are not blocked from airflow.
- Use ceiling fans or gentle circulation to avoid “dead zones.”
- Check that HVAC supply registers aren’t blocked by furniture or curtains, especially near exterior walls.
In many homes, a simple rearrangement (moving a bookcase a few inches from an exterior wall) can reduce condensation behind it by improving air exchange.
Fix 3: Calibrate or replace unreliable hygrometers
If your readings don’t align with what you see, don’t treat the numbers as truth.
- Check placement first (away from vents, windows, and direct sun).
- Compare devices in the same spot for a day. If they disagree significantly, treat the measurement as uncertain.
- Consider calibration if your device supports it. If not, replacement may be the practical route.
In practice, a $20–$40 hygrometer can still be useful for trends, but if you’re using thresholds to decide on remediation, accuracy matters. A more reliable digital hygrometer with a stable sensor and documented accuracy can reduce decision errors.
Fix 4: Reduce condensation with insulation, air sealing, and thermal improvements
If you see condensation even when RH is moderate, the issue is often surface temperature. Address the cold spots:
- Seal air leaks around windows, baseboards, and penetrations. Drafts bring moist air to cold surfaces.
- Improve insulation in exterior walls and ceilings where feasible.
- Use window treatments that don’t block airflow across the glass (avoid thick barriers that trap cold air).
- For older homes, consider targeted window upgrades or storm windows if condensation is persistent.
Real-world example: A tenant in a small apartment reported “safe RH” readings of 48% in the living room, but the bedroom window always fogged overnight. The fix wasn’t a dehumidifier—it was adding weatherstripping and addressing a drafty window frame. After sealing, condensation stopped and the musty smell faded over the following weeks.
Fix 5: Use dehumidification when RH is the driver
If RH stays elevated (for example, frequently above 55–60% RH for extended periods), dehumidification can reduce overall moisture load and slow mold risk.
Key points:
- Run dehumidification during the periods when humidity rises (often evenings or after moisture-generating activities).
- Target a stable indoor RH in the 40–50% range when possible.
- Use the correct sized unit for your space. Oversized units can cycle too quickly; undersized units may struggle to reach targets.
Also ensure the dehumidifier’s drainage is reliable. A unit with a full tank or an improperly connected drain can fail silently.
Fix 6: Repair leaks and dry affected materials properly
If you find evidence of water intrusion—staining, wet insulation, damp drywall, or a recurring odor—monitoring alone won’t solve it.
- Stop the water source first (plumbing repair, roof flashing repair, or fixing a failing seal).
- Remove wet porous materials if they’re contaminated or remain wet beyond 24–48 hours.
- Dry the structure thoroughly with controlled drying methods. Surface drying is not the same as drying the full material thickness.
If the affected area is large or the materials are heavily contaminated, professional drying and mold assessment may be necessary.
Fix 7: Address HVAC condensate and duct moisture
Condensate problems can create ongoing dampness with minimal visible leaks. Troubleshoot:
- Check the condensate drain line for clogs or improper slope.
- Inspect the drain pan and ensure it drains fully.
- If you have a crawlspace or attic, inspect ductwork for condensation and insulation gaps.
If you find water in HVAC components, the repair may require service. Many systems involve electrical and refrigerant safety considerations.
When replacement or professional help is necessary
You can often resolve humidity condensation hygrometer thresholds issues through measurement verification and moisture control. But there are clear times to escalate.
Replace or recalibrate your hygrometer when
- Two hygrometers disagree by more than about 10% RH in the same spot for multiple hours.
- Your readings change drastically when you don’t move the device (sensor instability).
- There’s no logical relationship between your observations and the readings (for example, repeated window condensation while the hygrometer consistently reads very low RH with stable temperature).
- The device is old and no calibration information is available.
Replacement isn’t about chasing perfection. It’s about avoiding false confidence. If you can’t trust your numbers, you’ll likely under-correct the moisture problem.
Call a professional when you suspect hidden water damage
- You see recurring dampness or staining that returns after attempts to dry.
- Drywall feels soft, swollen, or delaminating.
- You suspect a leak behind walls, under floors, or in ceilings.
- There’s a strong musty odor that persists after humidity control improvements.
Professionals may use moisture meters, thermal imaging, and controlled drying equipment to identify the true extent of the problem. This matters because mold risk can persist behind surfaces even after the visible spot is gone.
Get HVAC help when condensate, drainage, or ventilation fail
- You find standing water in an HVAC drain pan or evidence of a backed-up condensate line.
- Your system cycles incorrectly or you can’t maintain stable indoor conditions despite correct RH targets.
- You suspect duct leakage into unconditioned spaces.
HVAC repairs often require safe access and correct diagnosis. A service technician can verify airflow, condensate drainage, and dehumidification performance.
Seek mold remediation guidance when contamination is more than minor
If mold growth is extensive, returns quickly, or involves porous materials that can’t be reliably cleaned, professional remediation and assessment are typically the safer route. Mold cleanup without addressing the moisture pathway can become a recurring cycle.
Putting it all together: a decision workflow you can follow
Use this sequence to keep troubleshooting focused:
- Observe condensation first. If you see it, treat it as a moisture event regardless of the hygrometer’s single reading.
- Verify RH readings by correct placement and device comparison for at least 24 hours.
- Check activity-based RH spikes after showers, cooking, or laundry.
- Identify moisture sources (exhaust, leaks, humidifier settings, laundry drying).
- Address thermal drivers (drafts, insulation gaps, cold window frames) when condensation appears despite moderate RH.
- Dehumidify or repair depending on whether RH is persistently elevated or the main issue is surface coldness and condensation.
When you follow this approach, your “mold risk humidity condensation hygrometer thresholds” become a practical tool rather than a source of confusion. You’ll act based on what the room is doing—air moisture, surface temperatures, and time—rather than chasing a number that may not explain the underlying physics.
05.02.2026. 21:02