Water Filter Maintenance Checklist: Replace Timers, Flush Rules, Media Fails
Why water filter maintenance matters
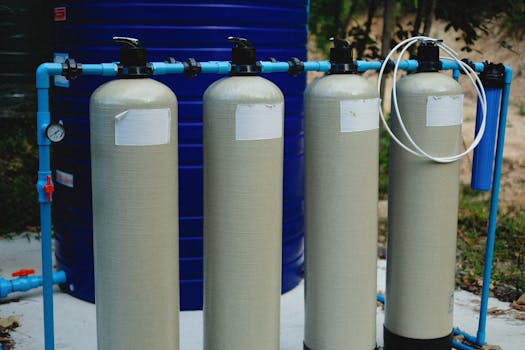
Water filtration systems protect your home by reducing sediment, chlorine taste/odor, scale-forming minerals, and other contaminants. But filters do not “set and forget.” Over time, flow rates drop, pressure increases, and the filtration media can become exhausted or fouled. When maintenance slips, water quality can degrade—sometimes gradually, sometimes suddenly after a clog or media failure.
A good approach is to follow a practical water filter maintenance checklist that covers three critical areas: (1) replacing the right components on schedule (including timers if your system uses them), (2) flushing properly to clear accumulated debris, and (3) recognizing early signs of media problems so you can act before performance drops.
Step-by-step: cleaning and maintenance process you can repeat
Use this process as your baseline routine. Adapt the details to your system type (sediment, carbon, whole-house, RO, or multi-stage), but keep the order of operations consistent.
1) Confirm safe conditions and gather tools
- Turn off the water supply to the filter unit if your system requires service access.
- Have replacement parts ready if you’re performing a scheduled change (cartridges, filters, gaskets, and any timer batteries or modules).
- Use clean containers and keep parts away from dusty work areas.
- Keep a notepad for dates, pressure readings, and any unusual observations.
2) Check the system’s pressure and flow behavior
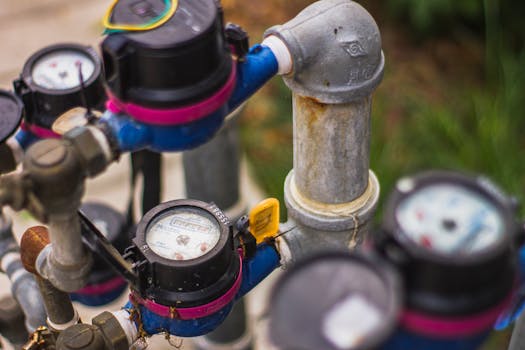
- Record inlet and outlet pressure if your system has gauge ports. Even if you can’t measure precisely, note whether water flow has noticeably slowed.
- Listen for abnormal sounds during operation (gurgling, banging, or persistent air release).
- If your system includes a flush cycle, verify that it is occurring at the correct time and duration.
3) Follow flush rules before replacing media
Flushing is not just a “nice to do.” It helps remove fine sediment, trapped air, and accumulated particulates that can interfere with filtration performance. The exact flush method depends on whether your system is set up for backwashing, periodic rinse, or manual flushing, but the principle is the same: clear the system before reintroducing fresh water through new media.
- If the system supports backwashing or rinse cycles, run the cycle according to the manufacturer’s procedure.
- If manual flushing is required, open the appropriate valve slowly and flush until the discharge runs clear (or until the system’s recommended duration is reached).
- Do not rush the process. Sudden high-flow flushing can stir up sediment and create temporary turbidity.
- After flushing, return valves to the operating position and confirm there are no leaks.
4) Replace media and cartridges correctly
- Replace cartridges or filter elements at the interval you’ve established for your water conditions (more on schedules below).
- Inspect housings and seals. Replace O-rings if they are flattened, cracked, or hardened.
- Clean the inside of the housing if the system design allows it and if maintenance instructions permit. Remove sediment buildup without scratching sealing surfaces.
- When installing new media, ensure proper seating and alignment. A slightly mispositioned cartridge can bypass water around the media.
5) Inspect connections, gaskets, and bypass paths
- Check all threaded connections for tightness and signs of moisture.
- Confirm any bypass valves are set correctly. A partially open bypass is a common reason for poor filtration despite “fresh” cartridges.
- Verify that tubing runs are secure and not kinked.
6) Manage timers: verify operation and replace batteries/modules
If your system uses a timer to trigger flush or regeneration cycles, treat the timer as a maintenance item. A timer that drifts or fails can prevent flushing at the exact time your system needs it.
- Check that the timer is set to the correct schedule and time zone (if applicable).
- Confirm the system is initiating the flush cycle when expected.
- For battery-powered timers, replace batteries before they reach end-of-life. If you can’t verify battery age, replace on a routine interval and log it.
- For systems with electronic controller modules, inspect for error indicators and verify cycle counts if your unit provides them.
Recommended maintenance schedules and routines
Schedules should reflect your water conditions—especially sediment load, chlorine/chloramine levels, and household usage. Use these intervals as starting points, then adjust based on observed performance and local water behavior.
Daily or every use (quick checks)
- Observe flow rate and any sudden changes in taste/odor or cloudiness.
- Look for leaks around housings, filter heads, and connection points.
- For systems with timed flushes, confirm that the flush cycle occurs as expected (you don’t need to watch it constantly, but you should verify periodically).
Weekly (light inspection)
- Check pressure gauges (if present) for noticeable shifts.
- Inspect drain lines or discharge areas to ensure flush water is flowing properly and not restricted.
- Verify that the system is not cycling repeatedly due to a sensor or valve issue.
Every 30–60 days (routine cleaning where appropriate)
- Clean external surfaces and remove dust from the filter head area so leaks and seepage are easier to detect.
- Confirm that drain lines are clear and routed correctly (no pinching, kinks, or trapped siphons).
- If you have a sediment pre-filter stage, inspect it and plan earlier replacement if it clogs quickly.
Every 3–6 months (scheduled media and timer verification)
- Replace carbon or taste/odor media based on performance, not just calendar time. If water taste/odor returns early, shorten the interval.
- For sediment stages, replace when pressure drop indicates reduced flow or when flow slows noticeably.
- Inspect and test flush operation. If your system has a timer, confirm the schedule and cycle duration.
- Replace timer batteries on a predictable interval (commonly every 6–12 months depending on usage and battery type) and record the date.
Every 12 months (deeper service and media health review)
- Inspect O-rings and seals for wear; replace at least annually if your system sees harsh conditions or frequent cycling.
- Review your logs: pressure readings, replacement dates, and any unusual events.
- Check for internal buildup in housings, especially if you flush infrequently or have high sediment.
- For systems with multiple stages, verify that each stage is still doing its job by checking water clarity and taste/odor behavior after changes.
Prevention methods that reduce future problems
The best way to avoid media failures and performance drops is to prevent fouling, avoid bypass mistakes, and maintain consistent flushing.
Use flush rules consistently
- Flush at the frequency your system requires, not only when you notice problems.
- Do not skip flush cycles to “save time.” Skipping can allow sediment to accumulate and compress within media.
- Ensure the discharge path is correct so flushed water actually leaves the system. Restricted drains can cause backflow or incomplete cleansing.
Control sediment before it reaches finer media
- If you have a sediment pre-filter stage, treat it as your first line of defense. Replace it before it becomes fully clogged.
- After plumbing work, water main disruptions, or heavy seasonal sediment changes, inspect and replace pre-filter components sooner.
Keep timers accurate and fail-safe
- Replace timer batteries before they fail, and verify settings after power outages.
- If your system has status indicators, address alerts immediately rather than waiting for the next scheduled filter change.
- Confirm that the timer is triggering the correct cycle type (some systems have multiple modes).
Maintain the seals and housing cleanliness
- Lubricate or handle seals only according to the system’s instructions. Incorrect lubricants can degrade some elastomers.
- Replace worn O-rings rather than trying to stretch or reuse damaged seals.
Common maintenance mistakes and how to avoid them
Many filtration problems are not caused by the filtration media itself, but by maintenance shortcuts. Avoid these frequent errors.
Replacing media without flushing first
If sediment and trapped debris remain inside the housing, the new media can foul faster than expected. Always follow the flush rules your system requires before installing new cartridges or media.
Ignoring timer drift or battery failure
A timer that stops triggering flush cycles can lead to accelerated clogging and media exhaustion. If your system uses timers, verify operation regularly and replace batteries or controller components on schedule.
Installing cartridges incorrectly
- Misalignment can cause bypass flow where water avoids the media.
- Skipping seal inspection can lead to leaks and inconsistent treatment.
- Forcing cartridges into housings can damage housings or seals. If it doesn’t seat smoothly, stop and check alignment and compatibility.
Over-relying on the calendar instead of performance
Two homes can have the same filter and different results because sediment load and water chemistry vary. Use a maintenance plan that considers both time and symptoms like pressure drop, flow reduction, and changes in taste/odor.
Not logging maintenance dates and pressure changes
Without records, it’s hard to detect trends that predict media failures. Keep a simple log: replacement dates, flush cycle observations, and any pressure or flow changes.
Forgetting about drain line restrictions
Flush cycles depend on a clear discharge path. A blocked drain line can prevent proper rinsing, leaving fouling behind. Inspect and keep drain routing correct.
Leaving bypass valves partially open
This can look like “the new media isn’t working,” when the true issue is that untreated water is mixing in. Verify bypass settings after every service event.
When media fails: signs to act quickly
Media failures can present as gradual decline or abrupt performance loss. Acting early often prevents scale buildup, severe clogging, and costly downstream issues.
- Water tastes or smells unpleasant sooner than expected after a filter change.
- Flow rate drops noticeably or pressure rises.
- Water appears cloudy after flush cycles or after maintenance (especially if flushing was incomplete).
- Your system runs flush/regeneration cycles more frequently than normal.
- Gauges show persistent pressure imbalance between inlet and outlet.
When you see these signs, return to the checklist: verify timer operation, confirm flush rules are being followed, inspect seals and cartridge seating, and replace the affected stage if performance doesn’t recover after flushing.
Maintenance routine summary you can follow
To keep your system reliable, build your routine around a few repeatable actions: verify flush operation, replace timer components before they fail, follow flush rules before media changes, and inspect seals and bypass paths every time you service the system. With consistent checks and timely replacements, you reduce the likelihood of media fouling and avoid the performance swings that come from missed maintenance.
09.12.2025. 05:00