

How to Calibrate Wearable HRV for More Reliable Readings

Why you should calibrate wearable HRV
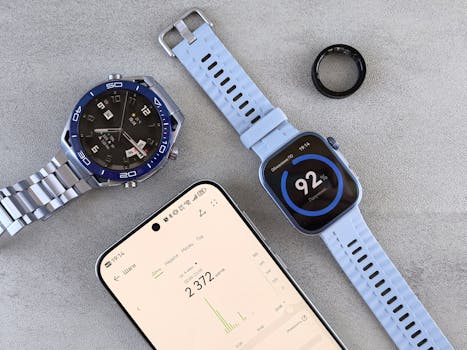
HRV (heart rate variability) is sensitive to small changes in your body and environment. That’s why two people can wear the same device and see different numbers, even if they’re both “doing everything right.” Calibration helps you turn raw HRV readings into something you can trust for trends—especially if you use HRV for recovery, training load, or stress monitoring.
When you calibrate your wearable HRV properly, you’re not trying to make the value match a medical-grade ECG. You’re aiming to reduce noise, standardize your routine, and establish a baseline your device can reproduce day after day. Over time, your HRV trend becomes more actionable.
What you need before you start
Before you calibrate, set yourself up for consistency. HRV is easier to calibrate when you control the variables that most affect readings: fit, timing, posture, breathing, sleep quality, and measurement conditions.
Wearables and accessories
- Your wearable HRV-capable device (watch or chest strap). If you’re using a watch, make sure it supports HRV metrics in its app.
- Optional but helpful: a chest strap with HR measurement if your watch struggles with signal quality. Many users calibrate better with a strap because the signal is more stable.
- Charging cable and app login, so you can verify settings and firmware updates.
Setup checklist
- Update firmware and the companion app. If the device has had a recent HRV algorithm update, your calibration should be done after the update.
- Confirm HRV measurement mode (nightly, daily, or “during sleep”). Use the same mode throughout calibration.
- Enable any “sleep tracking” features you plan to rely on for HRV. HRV is often most stable during sleep.
- Prepare a simple notes method (phone notes or a spreadsheet) to record unusual events: late caffeine, missed sleep, illness, alcohol, travel, or heavy training.
Timing targets
Pick a consistent measurement window. For most people, this is either:
- Morning: within 5–15 minutes of waking, before you get up.
- During sleep: using the device’s nightly HRV metric.
Choose one approach and stick to it for at least 10–14 days during calibration. If you switch windows mid-process, your baseline will drift.
Step-by-step: how to calibrate wearable HRV
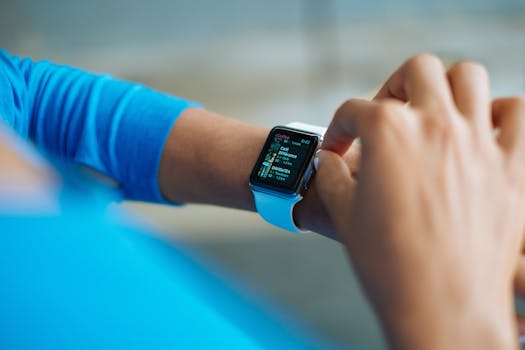
Follow these steps in order. You’ll build a baseline, verify signal quality, and then lock in a routine that produces repeatable trends.
Step 1: Ensure the sensor fits the same way every time
HRV calibration fails most often because the sensor fit changes from day to day.
- Wear the device snugly but not painfully. You should be able to fit a finger under it lightly without the sensor shifting.
- Position it consistently (for watches, typically 1–2 finger widths above the wrist bone). If your device has a recommended placement, follow that.
- Check after 10 minutes of wear that the sensor is still making good contact. If it slides or spins, readings will fluctuate.
- If your wearable supports it, enable “skin contact” or “continuous HR” settings and keep them on during the calibration period.
Practical example: If you remove your watch for workouts and then put it back on later, your next HRV reading may reflect different fit and signal quality. During calibration, keep the placement routine consistent or use the same device placement timing each day.
Step 2: Start with a clean baseline measurement day
Choose one day to begin your calibration window. The goal is to reduce confounding factors.
- Keep your caffeine intake moderate and finish it by mid-afternoon (for example, stop at least 6–8 hours before sleep).
- Avoid alcohol on the first day and the following 48 hours if possible.
- Keep your training light-to-moderate for the first 24 hours (especially avoid a very hard interval session the night before your first baseline readings).
- Go to bed at a consistent time. Aim for a 7–9 hour sleep window if your schedule allows.
Step 3: Pick one HRV source and stick to it
Many wearables show multiple HRV-related metrics (for example, nightly HRV, “morning readiness HRV,” or HRV during sleep stages). Calibration should use one consistent metric.
- Open your device app and identify the HRV metric you will track (e.g., nightly HRV average).
- Disable or ignore other HRV readouts you’re not using for calibration.
- Use the same metric for the entire 10–14 day period.
This reduces confusion and prevents your baseline from mixing apples and oranges.
Step 4: Collect data for 10–14 days with consistent conditions
Calibration is not a one-day task. Your wearable needs repeated measurements under similar conditions.
- Record your HRV daily using your chosen metric.
- Keep your measurement window consistent. If you measure in the morning, try to do it at the same time after waking (within about 30–60 minutes).
- Note major variables in your notes app. Include: illness, travel, late meals, alcohol, hard workouts, and unusually poor sleep.
- Try to keep room temperature comfortable at night (extremes can affect sleep and HRV). If you can, keep it within a typical comfort range.
Real-world scenario: You have a busy work week. You usually wake at 6:30 a.m., but on weekends you sleep until 8:30 a.m. During calibration, treat weekend readings carefully: either keep wake time within 1 hour of your weekday pattern or tag weekend data so you don’t confuse your baseline.
Step 5: Identify and remove obvious outliers
Not every low or high HRV value is meaningful for your baseline. Some values come from measurement issues or unusual stressors.
- Review your HRV trend in the app for the calibration period.
- Mark days with poor sensor contact (if your app flags it), missing data, or HRV spikes/drops that coincide with obvious factors (fever, late-night alcohol, missed sleep).
- Do not “smooth away” everything. Keep a few unusual days, but don’t treat them as baseline.
- After the 10–14 days, calculate your baseline as the typical range excluding the clearly abnormal days. Many people use the middle 50–70% of values as a practical baseline band.
If you don’t want to calculate manually, many apps already show a personal baseline or “normal range.” Calibration still matters because your personal baseline only makes sense if your measurement conditions are consistent.
Step 6: Confirm sensor stability with quick checks
After your baseline period, verify that you can reproduce similar readings under similar conditions.
- Choose two low-stress days (for example, a day with light training and normal sleep).
- Repeat your measurement routine exactly (same posture, same time window, and same sensor placement).
- Compare the HRV values. If your HRV swings wildly despite similar sleep and routine, refit the sensor and check for signal problems.
- If your wearable allows it, enable “high accuracy” HR mode for calibration days. Then see if HRV becomes more stable.
If you’re using a watch and you consistently see unstable HRV, consider testing a chest strap for a week. You’re not permanently switching devices—you’re diagnosing whether signal quality is the limiting factor.
Step 7: Lock in your calibration routine
Once you have a baseline band and your readings look repeatable, keep your routine stable so the wearable can learn your patterns.
- Set a consistent bedtime/wake schedule as much as possible.
- Keep caffeine timing consistent (for example, no caffeine after 2 p.m.).
- Keep morning measurement posture consistent. If you measure right after waking, stay seated or lying down as you normally do—don’t stand up and start moving.
- Use the same activity restrictions before measurement (for instance, avoid intense training within 6 hours of your morning HRV window).
Common mistakes that ruin wearable HRV calibration
Even with good intentions, these issues can make your HRV baseline unreliable.
- Changing sensor fit mid-week: A slightly different strap tightness or placement can alter readings enough to look like recovery changes.
- Measuring at different times: HRV varies across the day. If you measure one day at 6:30 a.m. and another at 10:30 a.m., you’re comparing different physiology.
- Using mixed HRV metrics: If your wearable shows both “nightly HRV” and “readiness HRV,” don’t calibrate using both unless your app explicitly defines them as equivalent.
- Ignoring sleep context: Short sleep (for example, 5–6 hours) often shifts HRV. If you don’t note it, your baseline will be pulled around.
- Hard workouts right before baseline: A heavy interval session can legitimately change HRV, but it also makes baseline identification harder. Keep the first 24–48 hours relatively calm.
- Assuming “more data” fixes it: If sensor contact is inconsistent, more days won’t fully solve the problem. Fit and signal quality come first.
Additional practical tips to optimize calibration
These steps help you get better repeatability and turn HRV into a useful signal rather than random noise.
Use a repeatable pre-measurement routine
Think of calibration like taking measurements in a lab. You want the same setup each time.
- For morning HRV: stay still for 2–3 minutes before the device records your metric (if your app requires a short “rest” period, follow it).
- Keep breathing natural. Don’t force slow breathing unless you’re specifically trying to measure breathing-related HRV changes.
- Avoid checking your phone immediately after waking if it makes you move or stress. Simple, quiet stillness helps.
Track the “why” behind changes
HRV responds to more than training. If you want your calibration to stay meaningful, keep notes for things that often move HRV:
- Illness symptoms or even the start of a cold
- Late meals (especially large meals within 2–3 hours of bed)
- Alcohol or cannabis use
- Travel and jet lag
- Stressful workdays
After a few weeks, you’ll recognize patterns. Your wearable may show lower HRV during the same scenario each time. That’s not “bad calibration”—that’s useful information.
Calibrate during a stable lifestyle phase
Best results come when your life is relatively stable for 2–3 weeks. If you’re in a period of major changes (new job schedule, moving homes, intense travel), expect your HRV baseline to shift. You can still calibrate, but your “normal range” may be broader.
Consider device settings that improve signal quality
Many wearables offer options like “continuous heart rate,” “sleep tracking,” “skin temperature,” or “accuracy modes.” For calibration:
- Turn on sleep tracking so nightly HRV is captured reliably.
- Use the highest accuracy HR mode that doesn’t drain your battery too quickly for your calibration period.
- Make sure the device is charged enough to avoid missing data.
If you’re using a watch, you may also find that tighter placement during sleep improves HRV stability. Just avoid overtightening that reduces comfort or causes skin irritation.
Soft-check your wearable against a known routine
You can’t “calibrate” against an ECG at home, but you can check whether your device behaves logically.
- On a restful day with good sleep and light activity, HRV should generally be in your baseline band.
- On a night with poor sleep, HRV often dips. If it doesn’t change at all across multiple obvious sleep disruptions, you may have signal or tracking issues.
- On a day after a very hard workout, HRV may drop the next morning or during the following night. If you never see any training-related pattern, revisit fit and measurement consistency.
How to use your calibrated HRV day-to-day
Once calibration is complete, use HRV as a trend signal rather than a single-number verdict.
- Look at your personal baseline band you established during calibration.
- When HRV is consistently below your baseline for multiple days, treat it as a recovery warning and consider reducing intensity.
- When HRV is consistently above baseline, you may have more readiness—still respect how you feel and how your training schedule is structured.
- If a single day is outside your baseline, check your notes first. Often the explanation is sleep duration, stress, illness, or sensor contact.
This approach helps you avoid overreacting to normal day-to-day variability.
A practical calibration plan you can follow this week
If you want a simple schedule, use this 14-day plan.
- Days 1–2: Wear the device consistently, confirm placement, and keep training light. Start your notes.
- Days 3–7: Maintain your usual routine but avoid major lifestyle disruptions. Keep caffeine timing consistent.
- Days 8–10: Continue tracking. If you notice any missing HRV data, refit the sensor immediately and restart your consistency checks.
- Days 11–14: Use two or three “normal” days to verify repeatability. Your HRV values should cluster around your baseline band.
At the end, review your HRV chart and identify the typical range. Then keep your routine stable for the next month so the baseline stays relevant.
When you should recalibrate
Recalibration isn’t something you must do constantly. But you should repeat the process if conditions change.
- You switch devices or update the wearable’s HRV algorithm.
- You change how you wear it (different wrist, different strap style, or different tightness habit).
- Your lifestyle changes significantly (new work schedule, frequent travel, major training block).
- You notice persistent sensor issues such as frequent missing data or unstable readings.
If any of those apply, run a shorter 7–10 day calibration window to re-establish your baseline.
Soft recommendations for choosing the right HRV measurement approach
If you’re deciding between measurement methods, focus on reliability first.
- If your watch HRV frequently shows “low signal” warnings or looks erratic, a chest strap can be a useful temporary tool to improve signal quality while you calibrate.
- If your main HRV use is recovery tracking, prioritize nightly HRV or your app’s morning readiness metric and don’t mix multiple sources.
- If you’re comparing HRV across training blocks, keep your measurement routine consistent so changes reflect your body, not your setup.
Many popular wearables (from mainstream sports watches to recovery-focused devices) can produce good HRV trends when you calibrate them properly. The device matters less than your consistency and sensor fit.
18.05.2026. 17:46