Validate Wearable SpO2 ODI Accuracy: Home Protocol
Goal: confirm whether your wearable’s SpO2 ODI looks trustworthy at home
You want more than “it seems accurate.” You want a home protocol that helps you validate whether your wearable’s SpO2 oxygen desaturation index (ODI) is consistent with what you’d expect and with your own repeated measurements. This is especially important if you’re using ODI trends to make decisions about sleep, travel health, or possible breathing issues.
This guide walks you through a practical, repeatable method to validate wearable SpO2 ODI accuracy at home. You’ll check signal quality, compare your wearable to a more reliable reference measurement, and verify that ODI events behave realistically across nights and conditions.
Important note: home validation can’t replace clinical testing. But you can detect obvious problems (poor sensor contact, unstable readings, ODI overcounting, or data gaps) and improve confidence in what your wearable is reporting.
Preparation: what you need before you start
Before you begin, set up your protocol so the wearable and reference measurements are as consistent as possible. The goal is repeatability, not one perfect night.
Required tools and setup
- Your wearable SpO2 device (the one you want to validate). Make sure the app is up to date.
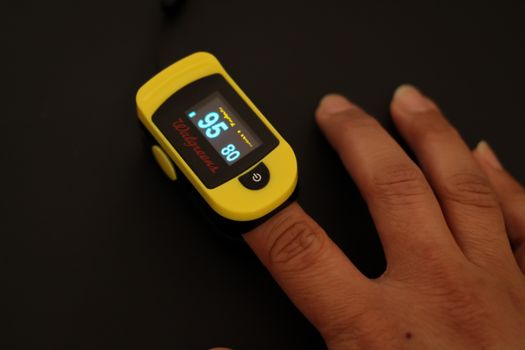
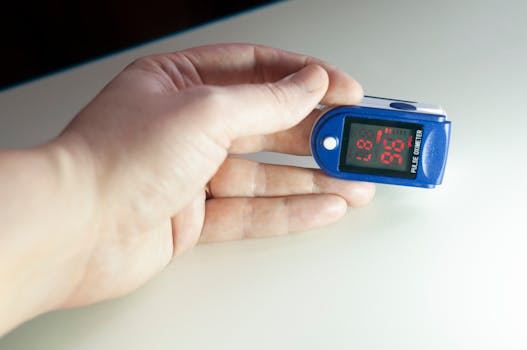
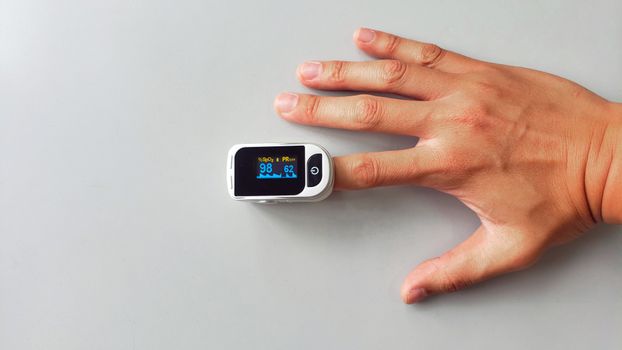
- A reference pulse oximeter you can place on the same general time window. A fingertip oximeter is often easiest for home use. Choose one that shows SpO2 and has stable waveform behavior (if it provides it).
- Extra batteries or a charging plan so neither device dies mid-night.
- A notebook or spreadsheet for logging: sensor placement, sleep position, room temperature, and any events (wake-ups, mask on/off, alcohol, illness).
- Clock synchronization: ensure both devices/app timestamps are correct. If your wearable app uses phone time, confirm your phone time is accurate.
- Clean skin and consistent placement: avoid lotions on the measurement area. If your wearable uses a wrist sensor, keep that area dry.
- Optional but helpful: a pulse oximeter stand or a way to stabilize the reference on your finger (so you don’t “chase” the sensor during sleep).
Decide your validation window
ODI depends on the definition used by your wearable (commonly based on desaturation thresholds like 3% or 4% drops). Your wearable may show ODI for different thresholds. Choose the one your device reports as its primary ODI metric.
Also plan to validate across at least 3 nights (more is better if you can). One night is too sensitive to motion, cold hands, or a single artifact burst.
Choose your “reference conditions”
Pick a baseline night where you can control variables:
- A typical bedtime and wake time (within 60 minutes of usual).
- Normal room temperature (avoid very cold rooms).
- No new medications specifically affecting breathing unless you’re already taking them and can log it.
- Avoid alcohol on at least one validation night if possible.
If you’re validating because you suspect sleep-disordered breathing, you can still do it. Just log what you changed so you can interpret what you see.
Step-by-step: run a home validation protocol for SpO2 ODI accuracy
Follow these steps in order. Don’t skip the early steps—most “inaccuracy” complaints come from sensor contact and data quality issues rather than the device’s core algorithm.
1) Check each device when you’re awake
Start with a quick awake stability test. This helps you separate sensor problems from true reading differences.
- Wear the wearable as you normally would.
- Place the reference fingertip oximeter on your finger.
- Sit quietly for 5 minutes.
- Record both SpO2 values at 1-minute intervals (minute 1, 2, 3, 4, 5).
- Move nothing. Keep your hand relaxed and warm.
What you’re looking for: the reference should stay relatively stable (no large swings every few seconds), and your wearable should not be wildly unstable. If either device jumps frequently while you’re still, you’ll likely see ODI distortion at night.
2) Confirm sensor placement and signal quality
Now set up for sleep. The wearable’s placement and contact quality matters more than people expect.
- Clean the sensor area with dry wipes (no lotion residue).
- For wrist wearables, tighten the strap enough to prevent slipping, but not so tight that it causes discomfort.
- For reference oximetry, ensure the fingertip sits fully in the sensor well.
- Before lying down, do a 30–60 second check and confirm you see stable SpO2 readings on both devices.
- If your wearable app shows a signal-quality indicator (some do), note whether it stays “good” for most of the test period.
Practical example: if you have cold hands, warm them for 2–3 minutes before starting. Cold extremities often cause lower perfusion and more artifact pulses, which can trigger false desaturation events.
3) Synchronize the start of recording
ODI counts desaturation “events” over time. If your devices aren’t aligned, you’ll misinterpret differences.
- Set both devices’ clocks to the correct local time (use your phone for the wearable companion app).
- Start the reference oximeter first.
- Then start the wearable sleep tracking (or ensure it will begin recording when you go to bed).
- Note the exact time you go to sleep.
- Write down any wake-ups and approximate times you got up.
Tip: if possible, include a short “awake window” where both devices are recording. For example, sit for 2 minutes after starting the reference and before lying down. That gives you a clear alignment anchor.
4) Collect at least 3 nights of data with consistent conditions
Don’t validate on a single night. Instead, build a small dataset you can interpret.
- Run your protocol for 3 nights minimum.
- Keep bedtime within 60 minutes of your usual time.
- Maintain similar room temperature.
- Log anything that could affect breathing or oxygenation: illness, nasal congestion, alcohol, heavy exercise late, travel, new mattress height, or sleeping position changes.
- For each night, record the wearable’s ODI value for the selected threshold and any “desaturation event” summaries the app provides.
Real-world scenario: you’re traveling and sleeping in a hotel bed. Your wearable reports a much higher ODI than usual. By repeating the test on another night in the same hotel (or on a home night immediately after), you can tell whether it’s a genuine trend or a sensor artifact caused by a different sleeping position and colder hands.
5) Perform a “signal artifact check” on each night
Before you compare ODI numbers, look for data quality red flags. Many wearable ODI “errors” are actually artifact-driven.
- Review the wearable’s SpO2 trend graph if it provides one.
- Look for long stretches of missing data or flat lines.
- Note if there are sudden drops that immediately recover within 10–20 seconds repeatedly (some devices interpret brief motion artifacts as desaturation).
- For the reference oximeter, check whether it showed stable readings and whether it flagged poor signal (if your model does).
- Mark nights with obvious sensor issues as “lower confidence” in your log.
You don’t need perfect data to validate. You need to know which nights are likely contaminated by motion or poor contact.
6) Compare ODI patterns, not only ODI totals
Once you have multiple nights, compare behavior rather than obsessing over one exact number.
- For each night, note wearable ODI total for your selected threshold (for example ODI-3% or ODI-4%).
- From the reference oximeter, identify obvious desaturation episodes manually or using its software if it exports data.
- Check whether the reference shows desaturation episodes during the same portion of the night (you can use timestamps and your wake-up notes).
- Look at consistency: if the wearable reports a high ODI one night and then extremely low ODI the next with similar conditions, investigate sensor quality and sleep position.
How to interpret: a wearable that consistently “overcounts” events compared to reference may be overly sensitive to motion artifacts. A wearable that “undercounts” may be missing brief events due to averaging or filtering. Your goal is to find a pattern you can trust.
7) Run a controlled test: change one variable at a time
After 3 baseline nights, validate whether your wearable ODI is sensitive to common real-world factors. Do this only if you already have decent signal quality.
- Choose one variable to adjust for 1 additional night (not all at once).
- Examples of single-variable changes:
- Sleeping with your wrist in a slightly different position (e.g., not tucked under your pillow).
- Warming your hands before bed.
- Changing strap tightness by one notch.
- Sleeping on your back vs. side (log it).
- Keep everything else the same.
- Record ODI and note any visible differences in the SpO2 waveform quality.
Practical example: you notice your ODI is high on nights when you sleep on your side with the wrist pressed into the mattress. On the controlled night, you keep your wrist free (or switch to a different placement strap if your device supports it). If ODI drops substantially and the SpO2 graph becomes smoother, you’ve identified a sensor-contact artifact pathway.
8) Decide whether your wearable is “good enough” for your purpose
After you run your baseline and controlled nights, make a simple decision based on consistency and confidence.
- If wearable ODI tracks your reference desaturation episodes in timing and the SpO2 signals look stable, your wearable may be suitable for trend monitoring.
- If ODI changes drastically without corresponding changes in reference behavior and your wearable signal shows artifacts, treat ODI as low-confidence.
- If you see repeated ODI spikes with clear motion artifacts (brief drops and immediate recoveries), prioritize sensor improvements before changing anything else.
For most people, “good enough for trends” is the realistic goal. If you’re investigating a medical concern, you should use these results to guide conversations with a clinician—not to self-diagnose.
Common mistakes that ruin SpO2 ODI validation at home
These are the issues that most often lead to misleading conclusions. Avoid them and your validation becomes much more meaningful.
- Using only one night of data. ODI is sensitive to sleep fragmentation and artifacts. Three nights gives you a sanity check.
- Ignoring sensor placement and strap tension. A slightly loose strap can cause intermittent loss of contact and false desaturation events.
- Comparing devices without time alignment. If your devices start recording at different times, “event matching” becomes guesswork.
- Validating during illness or heavy congestion without logging it. If your reference shows real changes, that’s not a wearable fault. It’s physiology.
- Cold hands or poor peripheral perfusion. This increases reference and wearable artifact. Warm up before starting your validation.
- Assuming ODI is the same across devices. ODI definitions vary by threshold and event criteria. Your wearable’s ODI metric may not match the reference’s event counts unless you use the same threshold logic.
- Reading ODI totals while ignoring signal quality. A noisy SpO2 graph often produces unreliable ODI totals.
- Moving during the reference measurement period. If you adjust the oximeter or reposition your finger frequently, you can create artifacts that look like desaturations.
Additional practical tips to improve accuracy and confidence
Once you’ve done the core validation steps, you can optimize your setup so your wearable’s ODI becomes more consistent and meaningful.
Improve sensor stability for wrist wearables
- Wear the strap snug enough that it doesn’t slide during sleep. A strap that moves a few millimeters can cause waveform instability.
- Avoid sleeping with your wrist directly under your head or under your body weight. Compression can reduce perfusion and increase artifact.
- If your wearable allows it, consider whether the sensor location can be adjusted slightly (some designs tolerate minor placement changes better than others).
Optimize reference oximeter measurement quality
- Use the reference on the same finger each night.
- Keep your finger warm and relaxed. Don’t grip the covers tightly.
- Don’t remove and reapply mid-night unless you’re prepared for alignment issues.
Use a simple logging template to interpret results
In your notebook or spreadsheet, track these fields for each night:
- Date
- Bedtime / wake time
- Sleep position (side/back) and whether you changed positions
- Room temperature (rough estimate is fine)
- Alcohol yes/no (or “none”)
- Illness/congestion yes/no
- Wearable ODI value (and which threshold, like 3% or 4%)
- Signal quality notes (good/medium/poor, based on what you see in the app)
This makes it easier to see whether ODI changes are physiological or sensor-related.
Choose a realistic target: trend monitoring beats single-number obsession
If your validation shows that your wearable ODI is consistent across nights under stable conditions, treat it as a trend tool. For example, you might look for sustained increases over multiple weeks rather than one-off spikes.
If your validation shows poor reliability, focus on improving sensor quality first (strap tension, wrist position, warmth). Then re-run the 3-night baseline.
When to take results seriously and escalate
If you repeatedly observe high ODI along with symptoms (morning headaches, loud snoring, choking/gasping awakenings, marked daytime sleepiness), it’s worth discussing with a clinician. Even if your wearable is imperfect, consistent patterns can still be a useful signal.
Use your validation log to support the conversation: “On three nights with good sensor signal, ODI remained elevated and the SpO2 trend showed repeated desaturation episodes.” That’s more actionable than “my device says so.”
Soft product integration: what to look for if you’re validating a wearable or reference
If you’re choosing a wearable for ODI monitoring, prioritize models that provide clear SpO2 waveform review, signal quality indicators, and consistent recording. For reference oximeters, look for stable readings and the ability to review stored data if available.
In practice, people often pair a wrist wearable with a fingertip oximeter from a reputable medical accessory brand for reference checks. You don’t need to buy anything new to validate your current setup, but if you already own a reference device, use it. If you don’t, selecting a reference that behaves stably when you’re awake will save you time during validation.
Practical example: a full home validation run in real life
Here’s what your week might look like if you follow this protocol:
- Day 1 (awake check): You test both devices for 5 minutes while seated. Your wearable reads within a few percentage points of the fingertip reference and doesn’t fluctuate wildly.
- Night 1 (baseline): You wear the wrist sensor snugly, warm your hands, and keep the wrist free from pillow pressure. Your wearable reports ODI-3% of 10.
- Night 2 (baseline): Similar conditions. ODI-3% again reads around 11. The SpO2 graph shows fewer abrupt dips.
- Night 3 (baseline): You log a mild cold and congestion. ODI-3% rises to 16. The reference shows more frequent desaturation episodes too. You mark this night as “physiology-influenced,” not sensor failure.
- Night 4 (controlled change): You keep wrist position more neutral and avoid tucking your arm. ODI-3% drops back to 11. Your wearable’s waveform looks smoother. You conclude that placement and motion artifacts matter for your device readings.
That outcome doesn’t just tell you whether the device is “accurate.” It tells you how to use it responsibly and how to interpret ODI changes.
Final checklist before you trust ODI
- You ran at least 3 nights with consistent conditions.
- You checked awake stability and confirmed sensor contact quality.
- You synchronized recording times and logged wake-ups.
- You checked for obvious artifact patterns (short, repeated spikes, missing data).
- You compared ODI behavior to reference desaturation timing, not just totals.
- You improved sensor stability when you saw motion-related problems.
If you can say “yes” to most of those, you’re not guessing. You’re validating.
03.02.2026. 19:05