

Validate Wearable SpO2 ODI Accuracy Protocol (Step-by-Step)

Goal: validate your wearable SpO2 ODI accuracy protocol for desaturation events
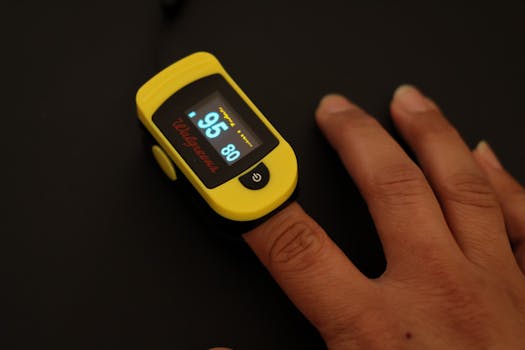
You’re not just trying to see a SpO2 number. You’re trying to trust the ODI—the oxygen desaturation index—derived from that SpO2 stream. A good validate wearable SpO2 ODI accuracy protocol helps you confirm that your device’s desaturation events match what a reference system would report, and that the ODI you’ll use for sleep or respiratory tracking is consistent across nights.
In practice, you’ll validate three things:
- Signal quality (is SpO2 stable and believable when you’re still?)
- Event detection (does the device correctly identify desaturation drops?)
- ODI calculation (do the counts and timing align with your chosen ODI definition, such as 3% or 4% drops?)
Because wearable sensors vary in how they handle motion, perfusion changes, and skin tone, you’ll get the best results by validating under realistic conditions—then tightening the protocol until your results are repeatable.
Preparation: what you need before you start validating
Before you run any test nights, assemble your setup so you’re not guessing later. Your protocol should be repeatable and documented. If you can’t reproduce it, your “validation” becomes anecdotal.
Required equipment and setup
- Wearable device you want to validate (finger clip, wrist sensor, or patch—whatever you’re evaluating).
- Reference SpO2 source with event timing you can compare against. Common options include a clinical-grade pulse oximeter and recordings that provide time-synchronized data. If you’re doing this in a sleep lab, use their standard monitoring chain.
- Data logging from both systems. Aim for at least one-second resolution. If your wearable logs at 2–5 seconds, note that limitation because it affects event timing.
- Time synchronization method (manual sync at start, or a trigger that both systems capture). Even a 10–20 second offset can complicate event matching.
- Consistent measurement location: same finger/hand position and same sensor placement each run.
- Warm-up and stable conditions: room temperature roughly 20–24°C, low airflow, and a few minutes of rest before recording.
- Consumables if needed: alcohol wipes for skin prep, replacement sensor bands, and a way to secure the sensor to reduce micro-motion.
Define your ODI rules before you validate
ODI isn’t one universal thing. You must decide what counts as a desaturation event.
- Choose the desaturation threshold: commonly 3% or 4% drops from a baseline.
- Choose the event duration rule: many algorithms require the drop to persist for a minimum time (often ~10 seconds, but it varies by definition).
- Set the minimum time between events (to avoid double-counting a single episode).
- Confirm whether ODI is computed per hour (ODI per recording duration) or per total sleep time.
Write those rules down. When you compare wearable ODI to your reference, you’re validating the entire pipeline, not just the SpO2 reading.
Step-by-step: run a validation session that you can repeat
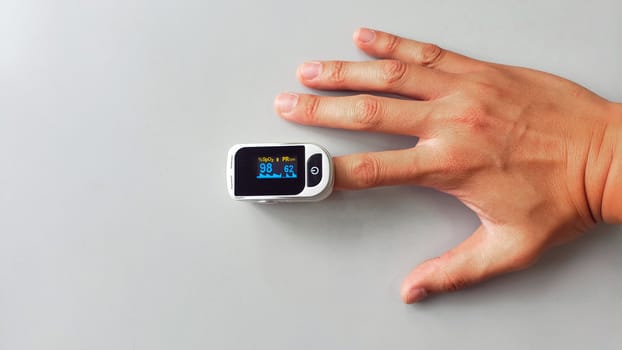
Use a controlled approach first. Then add real-world complexity. The goal is to isolate where errors come from: sensor physics, motion artifacts, or ODI computation assumptions.
1) Perform a baseline stability check (5–10 minutes)
Start with a quiet baseline. Sit or lie still. Keep your hand relaxed and at heart level if possible.
- Attach the wearable sensor using the manufacturer’s placement guidance.
- Place the reference sensor on the same or comparable site (if you can’t share the same finger, keep the measurement sites consistent across runs).
- Wait 2–3 minutes for the wearable to stabilize.
- Record at least 5 minutes of steady breathing and minimal movement.
What you’re looking for:
- SpO2 values that don’t “walk” by several points when you’re motionless.
- Fewer sudden spikes or drops that don’t match the reference.
Practical example: If your wearable shows frequent 1–2% oscillations during stillness but the reference remains stable, that’s a sign the wearable may be sensitive to micro-motion or perfusion changes. You’ll still be able to validate ODI, but you’ll want to tighten your motion-control steps later.
2) Synchronize time between devices (within 1–5 seconds)
Time alignment matters when you match desaturation events. Do a simple sync procedure:
- Start both recordings.
- At the same moment, create a visible event in both systems. For example, perform a brief finger flex or a controlled breath hold (if safe for you) that creates a small, temporary change in the signal.
- Note the approximate offset and adjust during analysis.
If you can’t create a detectable event, you can still sync by timestamps, but you should verify the offset by checking the first stable segment.
3) Validate event detection using controlled desaturation trials (if appropriate and safe)
In some protocols, you can validate ODI detection by inducing controlled, mild desaturation. This must be done carefully and only if it’s safe and appropriate for you. If you’re not in a clinical setting, avoid anything that could be risky.
A safer alternative is to use natural desaturation episodes (sleep nights, or monitored sessions) rather than induced tests.
Regardless of method, the goal is to capture multiple desaturation events:
- At least 10–20 events across your recording so you can compute agreement and see patterns.
- Events that include both “clean” drops and “messy” drops where motion or weak perfusion might degrade the signal.
If you have access to a sleep environment or clinical data where desaturation is expected, that’s ideal. If not, you can still validate using nights with known variability (for example, after alcohol, in typical sleep positions, or during nasal congestion) while ensuring you remain safe.
4) Capture at least two nights with consistent sensor placement
Do not validate from a single night. Wearables can behave differently as skin temperature changes and as you move more or less.
- Run one session with “best effort” conditions: secure placement, minimal motion, stable room temperature.
- Run a second session with normal conditions: you sleep as you normally would, but keep the sensor placement method identical.
Keep a simple log:
- Sensor placement notes (left/right, exact height on finger, strap tightness).
- Any sensor warnings (low signal, motion detected).
- Sleep position changes and any times you removed the sensor.
5) Extract ODI from both systems using the same ODI definition
This step is where many validations go wrong. You must ensure you compute ODI the same way for both the wearable and reference.
- Use the same desaturation threshold (e.g., 3% drops).
- Apply the same minimum duration rule for counting an event.
- Use the same minimum separation between events.
- Compute ODI per the same time basis (per hour of recording or per hour of sleep, depending on your definition).
If your wearable has a built-in ODI report, you can compare it to your reference ODI computed with the same rules. If your wearable provides raw SpO2 but not raw event markers, you’ll need to run an event-detection algorithm on the wearable SpO2 stream.
Real-world scenario: Suppose you want ODI3% for a sleep tracking app. Your wearable reports “ODI 3% events per hour.” Your reference system might not provide ODI in the same way. You should compute ODI3% from the reference SpO2 using the same event rules, then compare counts. If you compare wearable ODI3% to a reference ODI4%, you’ll think the wearable is inaccurate when it’s really a definition mismatch.
6) Perform event-by-event matching (don’t rely only on ODI totals)
Totals can hide issues. A wearable might undercount events but still produce a similar ODI if it compensates elsewhere. Event-by-event matching reveals the real behavior.
For each desaturation event in the reference:
- Search for a corresponding event in the wearable within a tolerance window (commonly ±5 to ±15 seconds, depending on your logging resolution).
- Record whether the wearable detected the event, missed it, or detected an extra event.
- Measure the magnitude of the drop (e.g., reference drop size vs wearable drop size).
For example, if your reference shows a 4% drop lasting 12 seconds, but your wearable only drops 2.5% and never crosses the threshold, that explains missed events.
7) Quantify agreement and signal quality metrics
At minimum, you’ll want these outputs:
- ODI difference between wearable and reference (absolute and percent difference).
- Event detection rate: how many reference events were correctly detected.
- False event rate: how many wearable events didn’t match a reference event.
- SpO2 bias during stable segments (average wearable SpO2 minus reference SpO2).
- Drop magnitude error: average difference in desaturation depth for matched events.
You don’t need advanced statistics to start, but do keep the numbers consistent across sessions.
8) Repeat with controlled motion and perfusion stress (optional but useful)
If your wearable will be used during everyday movement, you should test motion sensitivity. You can do this without inducing medical risk:
- Record a short session where you gently move your hand for 2–3 minutes, then rest for 2–3 minutes. Repeat 3–4 cycles.
- Record another session where you slightly change perfusion conditions in a safe way (for example, warm up before, then cool down slightly with a consistent environment). Avoid anything extreme.
What to look for:
- Does SpO2 become unstable during movement?
- Do desaturation events appear that are not present in the reference?
- Does ODI inflate due to artifact-driven drops?
This optional step helps you decide whether you should recommend using the wearable only during low-motion sleep windows or whether it performs acceptably during typical wear.
Common mistakes that break SpO2 ODI validation results
Even with good intentions, validations often fail for predictable reasons. Avoid these pitfalls.
1) Comparing different ODI definitions
If one system uses 3% and the other uses 4% (or different event duration rules), your results will look “wrong” even if both devices are consistent with their own definitions.
2) Ignoring time offsets
A consistent time lag can cause event mismatches. If your wearable logs every 2 seconds and your reference logs every 1 second, you still need a synchronization check and an event matching tolerance plan.
3) Using only ODI totals
Totals can match by coincidence while the wearable is missing specific event patterns. Event-by-event matching is the difference between “it looks close” and “it’s accurate.”
4) Testing with poor sensor contact
Loose straps, cold fingers, or inconsistent placement can degrade signal quality. If you don’t control these variables, you’ll validate the variability of your setup rather than the wearable’s performance.
5) Not accounting for logging resolution
If your wearable updates SpO2 every 5 seconds, it may miss short desaturations or shift event timing. Your reference might capture them more precisely. This impacts event matching and ODI computation.
6) Forgetting skin tone and tissue differences
Wearables can behave differently across users and across sessions. If you validate only once on one condition, you might overestimate performance for other real-world scenarios.
7) Over-cleaning or over-wiping the sensor area
Skin prep matters, but excessive wiping can dry the skin or change contact conditions. Use a consistent prep method each session.
Additional practical tips and optimisation advice
Once you’ve run your first validation, you’ll likely see patterns. Use these tips to improve reliability and make your protocol more actionable.
Improve sensor contact consistency
- Use the same placement height on the finger each time (mark it lightly on a placement guide if you need a reference).
- Secure the strap to reduce micro-motion, but avoid overtightening that can reduce perfusion.
- Let the sensor settle for 1–2 minutes before you consider the data “valid.”
Control the environment for comparability
- Keep room temperature stable within a few degrees.
- Avoid drafts (fans, air conditioning vents) that cool the hands.
- Keep bedding and clothing consistent so the wearable doesn’t shift.
Use a “data quality gate” for ODI reporting
Many wearables provide a signal quality indicator. If your device flags poor signal, treat that segment carefully.
- During validation, record how many minutes were flagged.
- When computing ODI, consider excluding low-quality segments if your reference ODI computation also excludes them.
- At minimum, report ODI alongside the proportion of usable data.
This helps you interpret discrepancies: an ODI mismatch could be due to data quality, not event detection logic.
Validate across at least two positions
Sleep position changes can affect motion and sensor stability. If you can, validate in two common positions (for example, side vs back). Even a 2–3 minute difference in movement pattern can change artifact rates.
Document your algorithmic choices
If you compute ODI from raw SpO2 yourself, write down:
- How you define baseline (rolling average vs fixed baseline).
- How you handle missing samples.
- How you handle spikes (filtering rules).
Small changes in baseline or filtering can shift event counts. Your goal is not to “tune” until it matches, but to keep the protocol consistent and transparent.
Use a staged validation plan
Here’s a practical staged workflow you can follow:
- Stage 1 (Day 0): 5–10 minutes baseline stability + time sync check.
- Stage 2 (Day 1): one normal wear night, compute ODI using your predefined rules.
- Stage 3 (Day 2): one night with consistent placement and typical sleep motion.
- Stage 4 (Optional): short motion/perfusion stress session to understand artifact-driven false events.
This reduces wasted effort and makes it easier to pinpoint why ODI differs.
Practical example: validating ODI3% for a wearable you use nightly
Let’s say you’re validating a wearable finger sensor that reports ODI3% after sleep. You want to know if it’s reliable enough to track changes over weeks.
Here’s how you might run your protocol:
- Choose ODI definition: 3% drop, event duration ≥10 seconds, minimum separation ≥20 seconds.
- Run two nights. Night 1: secure strap, finger warm, minimal movement. Night 2: normal sleep.
- Use a reference pulse oximeter with synchronized recording. Confirm time offset using a brief controlled change at the start (or timestamps).
- Compute ODI3% from the reference using the same rules you’ll apply to the wearable data.
- Match events within ±10 seconds and label each reference event as detected, missed, or mismatched.
- Compare totals: if wearable ODI3% differs by, say, less than 10–15% and event detection rate is consistently high, you can treat it as directionally useful.
- If you see many false events during movement segments, you can add a wear recommendation: keep the sensor secure and avoid removing it during restless periods.
That’s not about claiming clinical accuracy. It’s about validating that your wearable’s ODI behaves consistently enough to support your use case.
Soft product integration: where wearables can fit best
Depending on your validation results, you can decide how to use the wearable responsibly. If your protocol shows strong agreement during stable segments but inflated false events during motion, you might still use the device for nightly trends—just be cautious about interpreting single-night spikes. If your validation shows consistent ODI event timing agreement and stable signal quality, you can be more confident tracking changes over time.
If you’re comparing multiple wearable models, validate each one separately using the same ODI rules and the same reference setup. Even small differences in sensor design and logging rates can change desaturation detection behavior.
Optimisation targets: what “good enough” looks like
You’ll set your own thresholds, but here are practical targets you can aim for when validating:
- Baseline bias: average SpO2 difference within about 1–2 percentage points during stillness.
- Event detection: high match rate for reference events that occur during high-quality signal segments.
- False events: low number of wearable-only events during periods where reference remains stable.
- ODI consistency across nights: similar ODI direction and reasonable magnitude difference when conditions are controlled.
When you meet these targets, you’ve validated the protocol well enough to make your wearable ODI actionable for trend monitoring.
Wrap your validation into a repeatable checklist
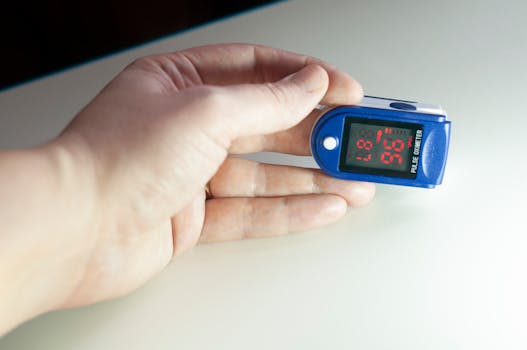
To keep your protocol useful, turn it into a checklist you can reuse. Before each session, verify: consistent sensor placement, time sync plan, ODI definition locked, and data quality logging. After each session, verify: event matching results, ODI computed with identical rules, and documented sensor warnings.
When you follow that process, you’re no longer “hoping the numbers are right.” You’re validating how the wearable detects desaturation events and how that detection turns into ODI. That’s the foundation for trusting your wearable SpO2 ODI accuracy protocol.
10.12.2025. 01:02