Validate Wearable HRV Accuracy at Home Protocol
What you’re trying to achieve
You want to know whether the HRV numbers from your wearable are trustworthy enough to guide training, recovery, and stress management. “Trustworthy” doesn’t mean perfect agreement with a lab device. It means your wearable can consistently track your personal HRV patterns and responds in a predictable way when you change conditions.
This at-home protocol helps you validate wearable HRV accuracy by comparing your wearable readings to (1) a higher-confidence reference method and (2) your own repeatability across time. If your wearable is accurate enough, you’ll see consistent HRV trends, tight repeat measurements during controlled conditions, and realistic changes after known HRV modifiers (like sleep loss or a short breathing session).
Follow this plan in a calm, structured way. The goal is not to “catch it wrong.” The goal is to understand how your device behaves under conditions that matter.
Preparation: what you need before you start
Before measuring, set yourself up so the data is comparable. HRV is sensitive to motion, skin contact, temperature, caffeine, hydration, illness, and even how you sit.
1) Choose your reference approach
You have two practical paths. Pick one based on what you can access at home.
- Reference option A (best for at-home validation): a chest-strap HR sensor or medical-grade HRV device that outputs inter-beat intervals (IBIs) or HRV metrics. Many “fitness” chest straps are more consistent than wrist devices because they read ECG-like signals.
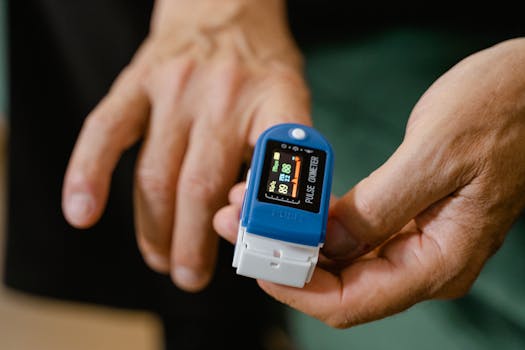
- Reference option B (good for trend validation): a validated finger pulse oximeter or fingertip HR sensor that can capture beat-to-beat timing closely enough for HRV estimates. This is usually less consistent than a chest strap, but it can still help you spot major mismatches.
If you already own a chest strap, you’re in a strong position. If you don’t, consider borrowing one for a week so you can validate before making decisions.
2) Use your wearable consistently
Pick one wearable and one measurement mode. Examples:
- Wrist HRV during sleep (most common)
- On-demand HRV “resting” sessions (some watches offer guided breathing or 2–5 minute measurements)
- Continuous HRV approximations that update throughout the day
For this protocol, you’ll get the most value from a repeatable “resting” session plus at least a few nights of sleep HRV.
3) Tools and setup items
- Your wearable (fully charged; ensure the band is snug)
- Your reference device (chest strap or fingertip HR sensor)
- A smartphone timer
- A quiet room with stable temperature (aim for roughly 20–23°C / 68–73°F)
- Optional but helpful: a notebook or notes app to log conditions (sleep hours, caffeine timing, stress level)
- Optional: a comfortable chair with back support
4) Choose a measurement window
Plan two types of sessions:
- Session type 1 (controlled resting, same conditions): 2–5 minutes of stillness, repeated on multiple days
- Session type 2 (sleep HRV): at least 5–7 nights, so you can see pattern stability
For most people, you can complete the resting validation in 3 days and the sleep validation in 1–2 weeks.
Step-by-step: validate wearable HRV accuracy at home
Follow these steps in order. Don’t skip the setup details—this is where most “validation” attempts go wrong.
Step 1: Standardize the day before your first measurement
Choose a “normal” day and keep variables consistent. For the 12 hours before each resting session:
- Avoid alcohol
- Keep caffeine consistent. A simple rule: finish caffeine by 2 pm (or keep it the same day-to-day)
- Avoid intense workouts within 6–8 hours of your session
- Don’t test right after a sauna, hot shower, or long bath—cool down first
Real-world scenario: If you typically drink coffee at 7 am, don’t switch to decaf on day 2. You want the validation to detect device behavior, not lifestyle changes.
Step 2: Fit and place sensors correctly
Sensor fit is one of the biggest determinants of HRV quality.
- Wrist wearable: place it about 1–2 finger widths above your wrist bone. Tighten enough to prevent sliding, but not so tight that it leaves marks or restricts circulation.
- Chest strap (if used): moisten the contact points if your strap requires it. Position it centered on your chest, snug enough that it doesn’t bounce when you breathe.
Wait 3–5 minutes after putting on the devices before you start measuring. This helps your wearable stabilize its signal quality.
Step 3: Pick a consistent resting posture
For the resting validation sessions, use the same posture each time:
- Sit in a chair with back support
- Feet flat on the floor
- Hands relaxed on thighs
- Eyes forward or gently closed
- Breathing naturally through the nose if comfortable
Avoid talking. Avoid crossing legs if it changes your circulation. Small movements can create HR detection issues and distort HRV.
Step 4: Run a synchronized measurement (same start time)
Do this on at least 3 separate days (Day 1, Day 2, Day 3). On each day, complete one measurement session that includes both your wearable and your reference device.
Use this sequence:
- 4 minutes baseline: sit quietly for 4 minutes without starting any recording yet.
- 1 minute “quiet breathing”: breathe naturally. Don’t force slow breathing.
- Start recording: start your wearable HRV measurement and start your reference device as close to the same time as possible.
Keep the measurement window consistent. If your wearable uses a 2-minute guided rest, use that exact mode every time. If it uses 5 minutes, do 5 minutes every time.
Step 5: Capture the same HRV metric type each time
HRV can be reported in different forms. Common ones include:
- RMSSD (often used for short-term HRV)
- SDNN (often longer-term)
- “Stress score” or proprietary composite metrics
For validation, choose the metric your wearable provides that best matches what your reference provides. If your reference outputs RMSSD from beat-to-beat intervals, use that. If it outputs a different metric, record both so you can interpret mismatches later.
Write down:
- Your wearable HRV value (and units if shown)
- Your reference HRV value
- Any “signal quality” or “measurement failed” notes
Do this immediately after each session so you don’t lose context.
Step 6: Check repeatability before you judge accuracy
After you complete Day 1–Day 3 resting sessions, look for repeatability in your wearable readings under the same conditions.
Repeatability means: when you do everything similarly, your wearable should not swing wildly without a reason.
Use a simple rule:
- If your wearable HRV changes by a small-to-moderate amount across the three days (for example, within a realistic personal range), that’s a good sign.
- If your wearable HRV jumps dramatically while you stayed still and followed the same process, you may have signal quality issues or an unsuitable measurement mode.
This step helps you avoid a common mistake: labeling the device “inaccurate” when it’s actually inconsistent due to fit, motion, or measurement timing.
Step 7: Validate trend response with a known HRV modifier
Once you have baseline repeatability, test whether your wearable responds in the expected direction after a controlled change.
Pick one modifier you can do safely at home. Two options work well:
- Option A: Guided slow breathing (2–5 minutes): For many people, slower breathing (e.g., ~5–6 breaths per minute) can increase HRV temporarily.
- Option B: Mild sleep restriction (one night only): Reduce sleep by about 1–2 hours compared to your normal night, then measure the next morning or compare next night’s sleep HRV.
Do not stack multiple stressors. One modifier is enough.
Example scenario: On Day 4, you repeat the same resting posture and start a 3-minute HRV session. Then you do a 3-minute slow-breathing protocol (5 breaths per minute) and run a second HRV measurement. If the wearable shows a noticeable HRV increase compared to baseline, that supports functional validity.
Step 8: Compare wearable vs reference across sessions (not just once)
After at least 3 synchronized resting sessions and one modifier test, compare patterns rather than obsessing over exact numerical match.
What you’re looking for:
- Direction agreement: when HRV rises or falls in your reference, does your wearable generally do the same?
- Consistency: repeated sessions show similar relationships (not one perfect day and then random days).
- No obvious signal failures: if your wearable frequently reports “low signal” or unstable readings, treat its HRV as low-confidence.
In many cases, wearable HRV values won’t match the reference exactly because they estimate HR intervals differently. But a wearable that tracks your personal changes reliably can still be useful.
Step 9: Validate sleep HRV stability for 5–7 nights
Wearables often perform differently at night than during on-demand resting sessions. For sleep validation:
- Wear your device the same way every night (same wrist, same tightness)
- Try to keep bedtime within a 60–90 minute window
- Record total sleep time (even roughly) and how you felt the next day
Collect at least 5 nights. If you can do 7 nights, even better.
Then check:
- Is your sleep HRV relatively stable on normal nights?
- Does it drop after a clear sleep disruption (like a late night)?
- Do nights with poor signal (cold hands, loose band, skin irritation) show erratic HRV?
If your wearable sleep HRV is stable on normal nights and changes in a believable way when sleep changes, that’s a practical validation.
Common mistakes that ruin HRV validation at home
Most problems aren’t your device—they’re the measurement setup. Watch for these.
1) Testing right after movement or stress
If you start HRV immediately after walking upstairs, talking, or rushing, you’re measuring recovery dynamics plus motion artifacts. Always include a 4-minute quiet baseline.
2) Loose or inconsistent sensor placement
A wrist device that slides even slightly can distort beat detection. Chest straps that are too loose can bounce. Fit your sensors the same way every session.
3) Changing breathing patterns without meaning to
During “baseline” sessions, breathe naturally. If you switch between mouth breathing and nasal breathing, HRV can change. Keep it consistent.
4) Comparing different HRV metrics
RMSSD vs SDNN vs proprietary “stress” scores behave differently. If you compare mismatched metrics, you’ll conclude the device is wrong when you’re really comparing different outputs.
5) Using only one measurement day
HRV has day-to-day variability. Validate with at least 3 resting sessions and several nights of sleep. One data point is not validation.
6) Expecting exact numeric agreement
Even good reference devices and wearables won’t always match precisely. What matters most is repeatability and trend tracking within your personal context.
Additional practical tips and optimisation advice
These steps improve signal quality and help you interpret what you see.
Optimise your measurement environment
- Temperature: keep your room comfortable. Cold skin can worsen wrist sensor contact and increase motion artifacts.
- Noise: avoid loud distractions that make you fidget. HRV is extremely sensitive to micro-movements.
- Timing: pick a consistent time of day for resting sessions, such as 9–11 am. Morning tends to reduce caffeine and meal variability.
Control caffeine and meals with a simple rule
For resting validation sessions, aim for:
- No caffeine for 6–8 hours beforehand (or keep it consistent day-to-day)
- A light meal or snack at least 2–3 hours before the session
- No heavy meal right before measuring
If you want a practical shortcut: choose a “caffeine-stable” time. For example, measure at 10 am every day and keep your last caffeine at 7 am.
Use a confidence mindset: signal quality matters
Many wearables show measurement confidence or signal quality. If your wearable reports low confidence, do not treat that value as a meaningful HRV result. Repeat the session after a short break.
If your reference device reports poor contact, fix it first. For chest straps, re-moisten contact points and reposition.
Consider a breathing protocol only after baseline validation
Breathing-based tests are great for checking functional responsiveness, but they can also confuse interpretation if you do them before you know your baseline repeatability.
Do baseline first. Then add breathing or sleep disruption once you know your wearable can produce consistent readings under calm conditions.
Soft tool integration: choose accessories that improve signal
Without pushing a purchase, here are product categories that often help:
- Chest straps with beat-to-beat output can improve accuracy for resting validation.
- Wrist straps designed for stable contact can reduce slipping during sleep.
- Fingertip sensors can help if you don’t have a chest strap, but expect more variability.
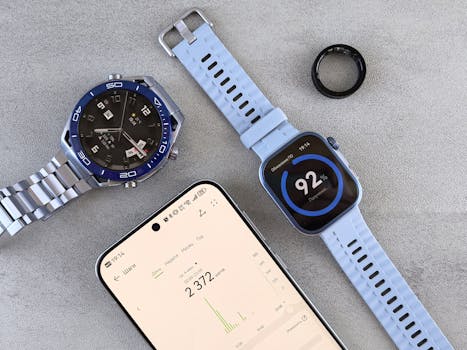
If you’re using a wearable that relies mainly on optical HR (photoplethysmography), validating against a chest strap for at least a week is one of the most practical ways to understand your device’s limitations.
Track your results in a simple log
You don’t need complex spreadsheets. Just log:
- Date and time
- Resting posture (always the same)
- Wearable HRV value
- Reference HRV value
- Sleep hours the prior night
- Any notable factors (fever, late meal, unusually stressful day)
This makes it much easier to spot patterns and identify outliers.
Decide how you’ll use HRV once validated
After validation, you’ll likely want a practical rule for decision-making.
- If your wearable shows stable repeatability and tracks your reference directionally, you can use it for trend-based recovery (e.g., “lower than my normal” over a 3-day window).
- If it’s inconsistent, reduce reliance on single-night HRV and focus on broader patterns like sleep duration, resting HR, and subjective readiness.
Validation is about reducing false confidence. If your wearable only works under certain conditions, use it that way.
Putting it all together: a realistic 10-day validation plan
If you want a concrete schedule, use this approach.
Days 1–3: Controlled resting validation
- Same time each day (e.g., 10 am)
- Same posture and sensor fit
- One synchronized HRV measurement each day
- Log wearable and reference HRV values
Day 4: Functional response test
- Baseline resting session
- 3 minutes slow breathing (~5–6 breaths per minute)
- Second HRV measurement
- Log values and note whether HRV changes in the expected direction
Days 5–10: Sleep HRV stability
- Wear the wearable all nights
- Keep bedtime within a 60–90 minute window
- Record sleep time and morning feel
By Day 10, you should have enough information to answer two questions: “Does my wearable HRV behave consistently?” and “Does it respond in a believable way to changes?”
How to interpret results and what “good enough” looks like
Here’s a practical way to judge your validation outcome.
- Good enough for personal trends: your wearable values are repeatable on baseline days and follow the reference direction after a modifier.
- Needs improvement: your wearable values are noisy, frequently show low confidence, or don’t respond directionally even when your reference does.
- Not reliable for HRV decisions: the wearable is inconsistent across controlled sessions and produces HRV values that don’t align with any plausible changes.
If you fall into the “needs improvement” category, rerun the protocol with tighter sensor fit, a consistent measurement posture, and better pre-measurement conditions (no caffeine spikes, no immediate post-exercise testing).
Refine your protocol for ongoing use
Once you’ve validated, you can make your future measurements faster without losing quality.
- Keep a consistent measurement time (morning is often easiest)
- Use the same posture and measurement mode
- Don’t interpret single values—interpret patterns across 3–7 days
- Revalidate monthly if you change wearables, band size, or sensor type
That’s how you turn HRV from “a number on a screen” into a reliable signal you can actually use.
14.12.2025. 12:26