

Productivity Wearable Setup for Data Quality Sensor Drift Checks

When your wearable data looks “off”: why drift checks matter
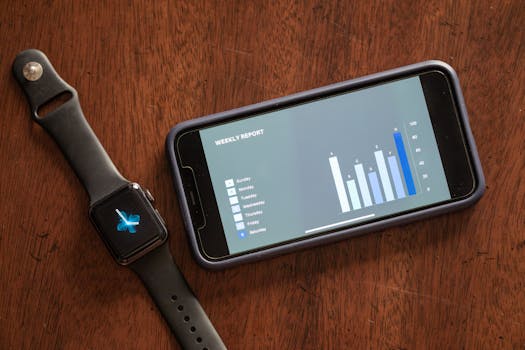
You can have the best sensors on paper, yet still end up with unreliable data in real life. The usual culprit isn’t the sensor itself—it’s the setup. A wearable can shift on the body by a few millimeters, rotate slightly, or loosen over a long shift. That tiny change can be enough to degrade signal quality and make your downstream metrics look inconsistent.
This is where a productivity wearable setup for data quality sensor placement drift checks becomes practical. Instead of assuming your placement is “good enough,” you build a setup that helps you detect drift early, document it, and correct it without derailing your workflow.
Whether you’re tracking movement for safety analytics, monitoring workload proxies, validating a machine-learning model, or simply trying to keep your data clean across multiple days, your buying decisions should support one goal: repeatable placement and measurable drift checks.
What “drift checks” actually mean in a wearable workflow
Drift checks are small verification steps you can run to confirm that your sensors are still positioned and measuring correctly. In plain terms, you’re checking two things:
- Placement drift: the sensor moves on the body (or changes angle) since the last verified check.
- Signal drift: the sensor readings shift in a way that suggests the placement changed, the skin contact changed, or the environment affected performance.
In a production or research setting, you typically do drift checks at predictable intervals. For example, you might verify placement at the start of each shift, then again after 2 hours of wear, and then at the end of the day. If you’re running longer sessions (like 6–10 hours), you’ll want a plan that fits the pace of your team—quick, repeatable, and easy to log.
Key features to look for in a productivity-first wearable setup
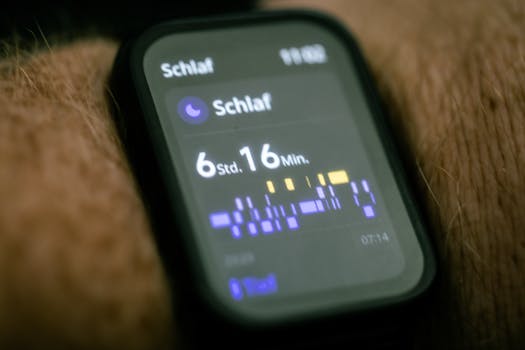
When you’re buying for drift checks, you’re not only buying sensors. You’re buying the whole system that makes verification fast and consistent.
1) Placement repeatability support (the “how it sits” layer)
Look for wearable designs and accessories that reduce variation between users and between days. Helpful features include:
- Adjustable straps with clear tension ranges (so you can hit the same tightness each time)
- Form factor stability (armbands, wraps, or mounts that resist rotation)
- Skin-contact consistency (good electrode/connector design, stable contact points, and predictable coupling)
- Marking or alignment aids (physical reference marks, placement guides, or mounting geometry that makes “same position” realistic)
If your setup requires careful manual “eyeballing,” drift checks will become inconsistent. The best setups make correct placement the default.
2) Sensor data quality signals you can use for checks
Drift checks work best when the system provides data quality indicators—not just raw measurements. For example, you want signals that help you detect:
- Contact quality (electrode contact, signal-to-noise changes, or impedance-like proxies)
- Motion artifacts (sudden changes that suggest a strap slipped)
- Orientation changes (if the system can estimate sensor orientation, it helps distinguish true movement from placement rotation)
Some teams also benefit from “confidence” metrics or quality flags. Even if you don’t automate everything, these indicators help you decide quickly whether to re-seat the sensor.
3) Sampling rate and timing consistency
For drift checks, timing matters. If your sensors stream at inconsistent intervals, your quality checks won’t behave the same way day to day.
When reviewing specs, prioritize:
- Stable sampling intervals (not just an advertised average rate)
- Enough bandwidth for the movements you care about (e.g., higher rates for fast motion or vibration monitoring)
- Time synchronization across multiple sensors if you’re using more than one
As a practical rule of thumb: if you’re checking placement drift using patterns in the signal, you need enough resolution to see subtle changes. If you’re only checking coarse trends, you can often tolerate lower rates. The right choice depends on what “drift” looks like in your use case.
4) On-device logging and straightforward export
You want drift checks that don’t require a separate IT project. Choose a system that supports:
- Time-stamped logs for checks (start/end of shift, re-seat events)
- Easy data export to your workflow (CSV, JSON, or a documented API)
- Consistent naming conventions so you can join drift events to sensor sessions
If you’re doing quality reviews weekly, you’ll care less about fancy dashboards and more about reliable exports you can analyze in 15 minutes, not 2 hours.
5) Battery life that matches your shift length
Drift checks are part of your routine. If charging interrupts sessions, you’ll either skip checks or rush them—both reduce data quality.
Plan for your actual wear time. For instance:
- If your shifts are 8 hours, target a wearable that can comfortably run for 10–12 hours to cover setup time and buffer.
- If you’re running 12-hour sessions, aim for 15+ hours runtime or a managed battery swap plan.
Also consider whether battery level affects signal quality. Some systems show degraded performance under low charge. If that’s in the specs, treat it as a drift-check risk.
6) Comfort and donning speed (because your team has a job)
Comfort isn’t a “nice to have.” It directly impacts drift. If the wearable is uncomfortable, straps get loosened, sensors shift, and people stop cooperating with your protocol.
Prioritize:
- Donning time: can you place it in 2–5 minutes consistently?
- Heat and sweat handling: breathable materials reduce strap loosening over time.
- Weight and bulk: less bulk often means fewer “adjustments” mid-shift.
A practical approach is to run a 3-person pilot. Time the setup. If your team routinely exceeds your target donning time by 50% or more, you’ll struggle to keep drift checks consistent.
What buyers should prioritize when building a drift-check workflow
Now that you know what to look for, the real question is what to prioritize. Here’s a buyer-focused way to decide.
Start with repeatability, not just sensor specs
It’s tempting to choose the sensor with the highest headline accuracy. But if your placement can’t be repeated, accuracy doesn’t matter. Your drift checks will either:
- trigger too often (creating workflow friction), or
- miss meaningful drift (creating hidden data problems).
Choose a setup where placement is mechanically constrained and easy to repeat.
Define what “drift” means for your data
Before you buy, decide what you’ll flag during drift checks. For example:
- If drift shows up as a change in signal quality or contact, you’ll prioritize quality indicators.
- If drift is mostly a rotation/shift issue, prioritize orientation estimation or alignment aids.
- If drift is subtle and affects model outputs, you may need more frequent checks and better logging.
This definition influences the hardware you need and the software you must have.
Choose the simplest logging approach that your team will actually use
Drift checks fail when logging becomes a burden. If your system requires manual steps in a separate app, people will skip them. Pick a setup that makes check recording natural.
For instance, if you’re running a shift-based study, you might use a single workflow:
- Start-of-shift placement check
- Two-hour check
- Re-seat event logging if the sensor slips
- End-of-shift check
In practice, that means you want a system that supports quick, time-stamped events.
Plan for re-seating, not just initial placement
Even with a great setup, some sensors will slip. Your drift-check workflow should include re-seating steps you can repeat. Look for:
- Accessories that make re-seating fast (replacement straps, stable mounts)
- Clear instructions for correct tension and angle
- Signal quality feedback that confirms the fix
When you design for re-seating, drift checks become a normal correction loop rather than an emergency.
Common purchasing mistakes and misunderstandings
These are the issues that most often cause buyers to regret their purchase after a pilot.
Buying only the sensor and ignoring the placement system
A wearable sensor without a stable mounting method is like a microphone without a stand. You’ll struggle to run drift checks because placement varies too much.
Assuming “calibration” solves placement drift
Calibration can help with measurement bias, but it can’t fully compensate for a sensor that’s physically moving. If you need drift checks, you likely need placement repeatability and quality indicators—not just a one-time calibration routine.
Overlooking the role of skin contact and wear time
Contact quality can change as sweat builds, skin dries, or straps loosen. A system that looks good in the lab may drift in the field. Treat wear time as part of your quality spec.
Choosing battery life that matches “minimum” runtime
If you buy hardware that barely covers an 8-hour shift, you’re building in failure. Setup time, charging habits, and unexpected delays will push you past the limit. That leads to rushed checks or skipped checks.
Not budgeting time for a pilot drift-check protocol
Many buyers expect to plug in and go. But drift checks require you to establish thresholds and confirm that your quality indicators correlate with real placement issues. Plan a short pilot—often 1–2 weeks—before scaling.
Practical buying checklist and decision framework
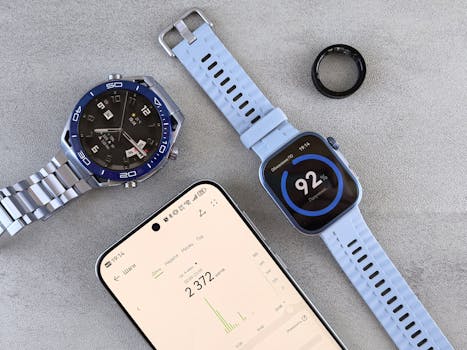
Use this checklist to decide what to buy and how to validate it quickly. If you can answer “yes” to most items, you’re likely on track.
1) Setup and placement
- Can you place the sensor in 2–5 minutes with consistent tension/angle?
- Does the mounting method resist rotation and slippage during typical movement?
- Are there physical alignment aids or mounting geometry that supports “same position”?
- Do you have a re-seating plan (replacement straps/accessories, quick adjustment steps)?
2) Data quality support
- Does the wearable provide contact quality or signal quality indicators?
- Can you detect motion artifacts or orientation changes that suggest placement drift?
- Are there time-stamped events or logs you can capture during drift checks?
3) Timing and data handling
- Is the sampling rate stable, and is timing consistent across sensors?
- Can you export data easily to your analysis tools (and in a format your team can use)?
- Do you get clear session metadata (wear start/end, device ID, timestamps)?
4) Operational fit
- Does battery life exceed your wear time buffer (e.g., 10–12 hours for an 8-hour shift)?
- Is the wearable comfortable enough to reduce mid-shift adjustments?
- Can you maintain consistent setup across different users (not just one operator)?
5) Pilot validation plan (don’t skip this)
- Run a pilot with at least 3–5 participants over 3–7 sessions.
- Perform drift checks at planned intervals (e.g., start, 2 hours, end).
- Define thresholds for “re-seat now” based on your quality indicators.
- Log re-seat events and compare signal quality before/after to confirm your drift check works.
Real-world scenario: shift-based drift checks without slowing your team
Imagine you run a facility where you want to track worker movement quality for safety and productivity insights. You outfit employees with a wearable setup at the start of a shift. In week one, you notice that one group’s data quality drops after lunch. You also see that straps loosen during warm periods and that sensor rotation increases during repetitive tasks.
To fix this, you update your setup in three ways:
- You choose a mounting method with improved rotation resistance and clear strap tension guidance.
- You enable data quality indicators so your drift checks can flag contact degradation or artifact spikes.
- You standardize a drift-check protocol: a quick placement verification at start and a re-seat decision at the 2-hour mark, logged with timestamps.
After 5–7 sessions, your drift checks catch most placement issues before they affect model outputs. The key wasn’t “more sensors.” It was repeatable placement plus quality signals that tell you when the setup is no longer stable.
Final buyer guidance: getting the right productivity wearable setup
If you’re shopping for a productivity wearable setup for data quality sensor placement drift checks, your best strategy is to treat drift checks as a workflow requirement, not an afterthought. Buy for repeatability, quality feedback, and operational fit—then validate with a short pilot.
Here’s what I’d recommend as your final decision approach:
- Prioritize mounting repeatability (adjustability, rotation resistance, alignment cues).
- Require data quality indicators you can use to decide “re-seat now.”
- Match battery life and comfort to your shift length so checks don’t get skipped.
- Plan a 1–2 week pilot to set thresholds and confirm your drift-check protocol works.
When you get these right, your data quality stops being a gamble. You’ll spend less time cleaning signals later, your team will follow the process consistently, and your productivity insights become more trustworthy.
FAQ
06.03.2026. 20:42