

Microbiome Test Results Troubleshooting: Fix Common Issues

What goes wrong when your microbiome test results don’t make sense

You spend time collecting a sample, submitting it, and waiting for results. Then you open the report and something feels off: the numbers look inconsistent, the diversity score changes dramatically between tests, or key taxa you expected to see are missing. Sometimes you also notice the report uses unfamiliar terms (e.g., genus vs. species, relative abundance vs. absolute counts), and it’s hard to know whether the problem is with your sample, the lab workflow, or your interpretation.
In microbiome testing, “wrong” usually means one of four things. First, the results don’t match your symptoms or dietary history. Second, repeated tests show large swings over a short timeframe. Third, certain measurements look implausible (e.g., extreme dominance of one group, unusual low read depth, or many “unknown” assignments). Fourth, the report’s interpretation seems to contradict itself (for example, a low diversity score paired with a “balanced” narrative).
This troubleshooting guide is designed to help you work through the most common causes in the order that usually saves time. You’ll follow a step-by-step process to check sample quality, review your pre-test conditions, and verify that the report is being interpreted correctly. You’ll also learn when it’s worth repeating the test and when you should involve a clinician or a genetics/microbiome professional.
Most likely causes of confusing microbiome test results
When microbiome results are hard to interpret, the root cause is often a combination of technical variability and human factors. Here are the most common reasons you’ll see patterns like “my results changed a lot” or “my results don’t match how I feel.”
1) Sample collection issues that affect sequencing quality
Microbiome testing depends on what happens from the moment you collect the stool to the moment it reaches the lab. Delay, temperature changes, or incomplete filling of the collection tube can reduce microbial DNA quality or shift the relative abundance signal. Even a few hours can matter if the sample isn’t stabilized properly.
Common collection problems include:
- Sample left at room temperature longer than the kit instructions allow (often 2–6 hours, depending on the stabilizer and ambient conditions).
- Using the wrong container, forgetting the stabilizing liquid, or not sealing the tube tightly.
- Collecting from water, toilet paper, or cleaning agents that contaminate the sample.
- Collecting only a small portion of stool when the kit expects a specific volume or multiple swabs/aliquots.
2) Pre-test diet, medications, and recent exposures
Your gut microbiome responds to short-term changes. Antibiotics, proton pump inhibitors, NSAIDs, bowel preps, and even heavy changes in fiber intake can alter composition within days. If you tested again after a lifestyle change, the shift may be real—but it can look dramatic.
Some examples that frequently explain “unexpected” results:
- Antibiotics within the last 30–90 days (timing varies by antibiotic and individual recovery).
- High-dose probiotics or synbiotics started immediately before the test.
- Switching to a low-fiber diet for several days.
- Travel with different food, water, and sleep patterns.
- Recent gastrointestinal illness (even if you feel better).
3) Test type and measurement differences (relative abundance vs. absolute)
Many microbiome reports are based on 16S rRNA or shotgun metagenomics. Most common reporting is relative abundance, meaning the data are percentages of the community—not the absolute number of organisms. If one group increases, others may “decrease” even if their absolute levels didn’t change.
Also, different labs and panels use different databases for taxonomic assignment. A genus might appear in one report and be labeled differently in another. If you compare across kits, you may be seeing measurement and classification differences rather than true biological changes.
4) Sequencing depth and low-confidence taxa
Reports sometimes include metrics like read depth (sequencing coverage), percent of reads assigned, or confidence scores for taxa. Low read depth can increase noise. If a large proportion of taxa are “unclassified” or “unknown,” the report may be less reliable for fine-grained interpretation.
In many cases, the lab can’t fully control biological variability—your sample may simply have lower DNA yield. That doesn’t mean your results are useless. It does mean you should interpret broad patterns more cautiously.
5) Interpretation and expectation mismatch
It’s common to expect a direct link between a single microbe and a single symptom. The microbiome is not a one-to-one system. Symptoms can be driven by inflammation, bile acid metabolism, gut barrier function, stress, motility, or diet effects that aren’t captured cleanly by taxonomic profiles.
So if your report shows “low beneficial bacteria,” but you feel better than expected, the mismatch may be due to what the test actually measures (composition) versus what you’re experiencing (function). Some tests include functional predictions; others do not.
Microbiome test results troubleshooting: a step-by-step process

Use this sequence. If you complete each step, you’ll usually narrow down whether the issue is technical, behavioral, or interpretive. Take notes; you’ll need them if you contact the lab or consult a professional.
Step 1: Re-check the collection timeline and conditions
Start with the basics that most often explain “off” results. Compare what you did to the kit’s instructions.
- How long was the sample at room temperature before stabilization? If you’re unsure, estimate conservatively.
- Did you mix stool thoroughly with the stabilizer (if provided)?
- Did the tube stay upright and sealed during transit?
- Was the sample exposed to heat (e.g., leaving it in a car) or freezing conditions?
- Did you collect from a clean surface without disinfectants?
Real-world scenario: You collect a sample on a Sunday night, but shipping is delayed until Tuesday. Your kit allows 24 hours at room temperature with stabilizer, but you left the tube in a warm hallway for most of Monday. Your results show unusually low diversity and a heavy dominance of a few taxa. In this case, temperature stress and delayed stabilization are plausible causes. The fix is not “change your diet first”—it’s repeat the test with stricter handling.
Step 2: Confirm you’re comparing the same type of output
Look at what the report provides. Are you comparing:
- Relative abundance (%) by genus/species?
- Alpha diversity metrics (e.g., Shannon index) or beta diversity?
- Predicted functions (if shotgun or functional inference is used)?
- Read depth / sequencing coverage figures?
If your first test used one platform and your second test used another, the “difference” could be a measurement artifact. Even within the same platform, the lab may apply different thresholds for confidence or classification.
Step 3: Review the 2–4 week window before each test
Write down everything you changed in the 14–28 days before sample collection. Start with the biggest drivers.
- Antibiotics, antifungals, or antivirals (and when you finished).
- Probiotics, prebiotics, synbiotics, or fermented foods started or stopped.
- Fiber changes (especially moving from <10 g/day to >25 g/day or vice versa).
- Diet pattern shifts (plant-heavy vs. ultra-processed; high-fat vs. low-fat).
- Medications that affect gut motility or acid (PPIs, metformin, laxatives).
- Major illness, fever, or a stomach bug.
Then interpret your results using the timeframe. Many composition shifts are visible within days, but stable changes and recovery after antibiotics often take weeks to months. If your second test was taken 10 days after stopping antibiotics, a large swing is not automatically a “bad” outcome—it may reflect the microbiome rebuilding.
Step 4: Check report quality indicators (if shown)
Find any lab-provided quality metrics. Not every report includes them, but if yours does, use them to guide troubleshooting.
- Sequencing depth/read counts: very low numbers can reduce confidence.
- Percent of reads assigned to taxa: low assignment can increase “unknown” categories.
- Replicate consistency: some labs run internal checks.
- Low-confidence taxa labels: treat those as tentative.
If your report quality indicators are poor, the most practical next step is often to repeat the test with improved handling rather than making major diet changes immediately.
Step 5: Validate whether the symptoms you’re tracking have a non-microbial driver
If you expect the test to explain symptoms like bloating, constipation, diarrhea, or pain, confirm whether any red flags exist. A microbiome test is not a substitute for medical evaluation when symptoms are severe or persistent.
Also consider that symptoms can be influenced by factors that won’t show up clearly in taxonomic profiles:
- Food intolerances (e.g., lactose) and FODMAP triggers
- Gallbladder or bile acid issues
- Medication side effects
- Stress-related motility changes
- Inflammatory conditions
If your symptoms don’t line up with timing of diet or medication changes, interpretation may require a broader clinical lens.
Solutions from simplest fixes to advanced fixes
Start with the smallest intervention that addresses the most likely cause. The goal is to avoid overreacting to noise.
1) Re-collect and repeat under stricter handling (often the fastest repair)
If you suspect collection timing, shipping delays, or temperature exposure, repeating the sample is frequently the best troubleshooting move. Aim for consistency:
- Follow the kit’s stabilization instructions precisely.
- Ship the same day if possible; otherwise, choose the fastest shipping option.
- Collect at a time when you can control storage temperature.
- Use the kit’s full collection method (multiple aliquots if required).
Practical guidance: Repeat after you’ve returned to your baseline routine for 7–14 days, assuming you’re not actively treating an outbreak or using antibiotics. If you recently changed diet, pick a new “steady state” window before retesting.
2) Standardize your pre-test routine for 10–14 days
If your results fluctuate, reduce variables. Choose a consistent diet and medication schedule for at least 10–14 days before the next test.
You don’t need perfection. You do need repeatability. Keep:
- Fiber intake relatively stable (track approximate grams if you can).
- Fermented foods and probiotics consistent (either both maintained or both stopped, depending on your goal).
- Alcohol intake stable.
- Meal timing and sleep broadly consistent.
This helps you distinguish “microbiome change from your routine” versus “microbiome change from the test process.”
3) Pause newly started supplements if they were introduced right before testing
If you began a probiotic, prebiotic, or fiber supplement within 3–7 days of collection, the results may reflect that immediate shift rather than your longer-term baseline. Troubleshoot by aligning timing.
Two common approaches:
- If you want baseline: stop or standardize supplements and retest after you reach a steady routine (often 2–4 weeks).
- If you want to measure response: keep the supplement constant and retest on a consistent schedule (e.g., 4–6 weeks after starting).
Don’t stop prescription medications without medical guidance. But for non-prescription supplements, timing alignment is often the key troubleshooting step.
4) Interpret relative abundance correctly before making conclusions
If your report shows a “drop” in one taxon after another increases, remember relative abundance is compositional. A microbe can remain stable in absolute terms while its percentage changes because the community changed.
To troubleshoot interpretation:
- Look for trends across multiple related taxa rather than one genus.
- Focus on directionality and consistency across tests.
- Use diversity metrics cautiously; they can change with transient diet shifts.
If your report provides predicted functional pathways, use those to guide hypotheses about diet and symptom changes, but treat them as estimates rather than direct measurements.
5) Reconcile taxonomic naming differences across labs
If you used two different companies or sequencing methods, taxonomic assignment might not match. Troubleshoot by mapping results to the closest shared level (genus or family) and avoid overinterpreting species-level differences.
Also check whether the report includes confidence levels. Low-confidence assignments should not drive major decisions.
6) Check for antibiotic or illness timing effects and allow recovery windows
If you took antibiotics, the microbiome can shift for weeks to months. Recovery is variable. If you tested too soon, you may be reading the “rebuild phase.” Troubleshoot by comparing tests spaced far enough apart to show direction rather than immediate disturbance.
A practical rule of thumb: if you’re troubleshooting post-antibiotic results, consider retesting at a minimum of 6–8 weeks after the last dose (unless your clinician advises otherwise). For illness recovery, wait until symptoms and diet stabilize.
7) Use a functional or targeted approach when composition doesn’t match symptoms
If your microbiome composition looks “reasonable” but symptoms persist, troubleshooting requires shifting from “which bacteria” to “what is the gut doing.” Some labs offer additional outputs such as functional predictions, metabolite panels, or short-chain fatty acid inference. These can help when taxonomic profiles don’t align with symptoms.
If your current test doesn’t include functional measures, you can still troubleshoot by correlating symptoms with dietary patterns (fiber type, fat intake, and fermentable carbohydrates) and by tracking stool frequency/consistency using a consistent scale over 2–3 weeks. That symptom pattern can guide the next test type or clinical evaluation.
When replacement testing or professional help is necessary
Replacement testing isn’t always required, but there are clear situations where you should act rather than keep guessing.
Repeat testing is warranted when
- Your report quality indicators are poor (very low read depth, high unclassified fraction, or missing key metrics).
- You suspect collection mishandling (temperature exposure, delayed shipping beyond kit guidance, or contamination risk).
- You see extreme outliers that don’t match your routine and you can’t explain them via diet/medications.
- You changed multiple variables right before the test and you can’t interpret which factor caused the change.
In these cases, repeat the test after you standardize your pre-test routine for 10–14 days and improve handling. If the second test still looks implausible, escalate troubleshooting rather than continuing to retest indefinitely.
Professional help is necessary when
- You have red-flag symptoms such as blood in stool, unexplained weight loss, persistent fever, severe abdominal pain, or anemia.
- Symptoms persist beyond 4–6 weeks despite stable diet changes and a consistent routine.
- You’re considering stopping or changing prescription medications that affect the gut microbiome.
- Your results suggest inflammatory or infectious concerns that require clinical evaluation (a microbiome test is not a definitive diagnostic tool for pathogens in the same way stool cultures are).
- You have complex medical history (IBD, immunosuppression, recurrent infections) where interpretation needs clinical context.
In professional settings, a clinician may order targeted stool tests, blood work, or imaging based on your symptom profile. Microbiome results can complement that work, but they shouldn’t delay appropriate diagnosis.
Contacting the lab makes sense when the problem is technical
If your report includes quality metrics and they look abnormal, or if you suspect a processing error, contact the lab. Provide your collection date, shipping details, and any deviations from the kit instructions. Ask whether they can confirm sample acceptance criteria (e.g., DNA yield thresholds) and whether repeat testing is recommended.
Some labs can also clarify how they handle low-confidence taxa, sequencing depth cutoffs, and classification updates. That can resolve confusion without repeating the test.
Putting it all together: a practical troubleshooting pathway
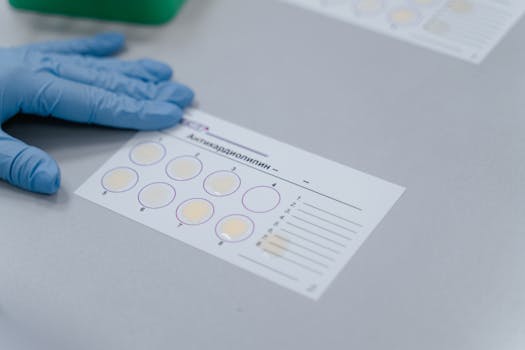
Here’s a realistic example of how you might troubleshoot microbiome test results without getting lost in noise.
You took a microbiome test because you had bloating and irregular stools. The report shows low diversity and a high relative abundance of a couple of genera. You started a fiber supplement immediately after receiving results and retested 3 weeks later. This time, diversity increased, but your symptoms didn’t improve. The mismatch leads you to wonder if the second test is “wrong.”
Following the troubleshooting steps:
- You review collection: the first sample was shipped with a 1-day delay; the second sample was shipped overnight. The collection difference could contribute to variability.
- You review pre-test routine: you started the fiber supplement within the 3–7 days before the second sample. That could explain the compositional shift.
- You interpret correctly: relative abundance changes can occur even if absolute function isn’t improving. Also, symptoms can lag behind diet changes or be driven by intolerance to fermentable fibers.
- You check report quality: the second report shows higher read depth than the first, increasing confidence in its composition.
- You decide on the next move: you standardize your diet for 10–14 days, track stool consistency daily, and retest at 6 weeks after the supplement start (or switch to a different fiber type with clinician guidance if symptoms worsen).
That approach avoids the common trap: repeatedly changing multiple variables based on a single report. Instead, you repair the likely causes—handling, timeframe, and interpretation—before drawing conclusions.
Key checks you can do before you change anything major
If you want a short diagnostic checklist to guide your next actions, use this order:
- Confirm sample handling matched the kit instructions (timing, temperature, stabilization, cleanliness).
- Verify you’re reading relative abundance and understand what it means.
- Align your pre-test routine for 10–14 days before retesting.
- Account for antibiotics, illness, and medication timing over the last 30–90 days.
- Check report quality indicators (read depth, percent assigned, confidence categories).
- Match interpretation to symptoms using a timeframe-based lens, not a single snapshot.
If you follow these checks and the results still seem inconsistent, the best troubleshooting move is usually either a properly repeated test or professional clinical review—especially if symptoms persist.
28.04.2026. 05:23