

Best CO2 Monitor for Sleep: What to Buy and How to Use It

Why CO2 in your bedroom matters for sleep
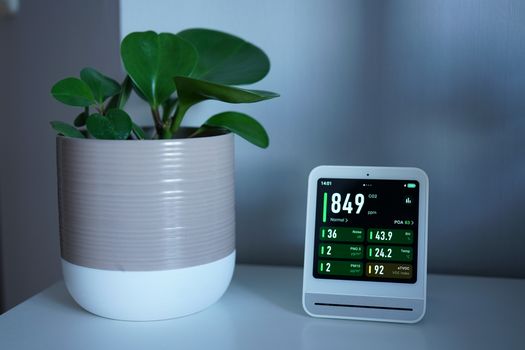
If you wake up groggy, with a dry mouth or a headache, the problem isn’t always your mattress or your bedtime routine. One common culprit is elevated carbon dioxide (CO2) in the room—especially if you sleep with the door closed, in a small bedroom, or in a home with limited fresh-air exchange.
CO2 is not usually “toxic” at typical bedroom levels. But it’s a strong proxy for ventilation quality. When CO2 rises, it usually means the air is getting stale. That can correlate with poorer sleep comfort and, in some people, worse symptoms like morning headaches and congestion.
That’s why choosing the best CO2 monitor for sleep is less about chasing scary numbers and more about getting reliable feedback you can act on. With the right monitor, you can test whether your room is ventilating well—then adjust windows, fans, or HVAC settings to improve your sleep environment.
Key features and specifications to look for
Not all CO2 monitors are equal. Some are fine for general awareness, while others are built for accuracy and long-term use in bedrooms. Here’s what you should prioritize.
Sensor type: NDIR is the standard you want
For sleep use, you’ll typically want an NDIR (non-dispersive infrared) CO2 sensor. NDIR sensors are widely used in indoor air monitors because they’re stable and don’t rely on chemistry that can drift quickly over time.
When you compare devices, look for wording like “NDIR sensor” in the specifications. If a listing doesn’t clearly state sensor type, treat it as a red flag—especially if you’re relying on the readings to make ventilation decisions.
Accuracy and calibration expectations
CO2 accuracy matters because you’ll often interpret changes over hours. A monitor that drifts can convince you that your ventilation is improving or worsening when it isn’t.
Look for stated accuracy (commonly something like ±(30–50) ppm or similar, depending on the range). Also check whether the unit supports calibration or “fresh air calibration.” Some monitors require periodic calibration (for example, using outdoor air conditions), while others use automatic baseline features. Either approach can work, but you should understand what the device expects from you.
Practical tip: if you’re using the monitor nightly, aim for a model with clear calibration instructions and a reputation for long-term stability. If calibration is vague or hidden behind complicated steps, you may end up ignoring the device or misreading trends.
Measurement range that fits bedroom reality
Bedroom CO2 usually falls in a broad band depending on occupancy, window habits, and room size. Many monitors cover at least 0–5,000 ppm. Some go higher. For sleep decisions, you generally don’t need extreme ranges, but you do want a sensor that can handle typical nighttime peaks without saturating.
If your home is particularly tight (newer airtight construction, closed windows, or multiple people sleeping in one room), you’ll want confidence the monitor will still read accurately at those higher levels.
Sampling rate and response time
CO2 doesn’t jump instantly; it rises gradually as you breathe, and it drops after ventilation. Still, response time matters because you’ll want to see the effect of opening a window or running a fan.
Look for a measurement update every 10–60 seconds. If the device updates only every few minutes, you may miss the real timing of ventilation changes. For sleep, that’s less about minute-by-minute tracking and more about seeing a clear trend over the night.
Display and readability in a dark room
Most people won’t want a bright screen glowing all night. Prioritize a monitor that offers a dim mode, night mode, or a screen you can turn off while it continues measuring.
Also consider where you’ll place it. If the monitor has a small display, you may need to view it from the doorway or bedside. If it’s wall-mountable or has flexible placement options, you’ll get more consistent readings.
Noise and power: sleep-friendly design
Even if CO2 readings are accurate, a monitor with a loud fan or audible alerts will sabotage your goal. Choose a device that runs silently and doesn’t rely on frequent audible alarms.
For power, decide whether you prefer plug-in (often more convenient for overnight use) or battery operation (useful for placement flexibility). If you use battery power, check battery life expectations—some models may need replacement every few weeks if they have continuous display or Wi-Fi.
Data logging and app support
For sleep optimization, you’ll benefit from data history. A monitor that stores readings (for example, hourly averages) or offers app-based graphs helps you connect CO2 patterns with your ventilation habits.
Look for features like:
- Data logging (on-device or in the cloud)
- Time-stamped history so you can compare nights
- Export options if you want to review trends later
- Multi-sensor support for temperature and humidity (helpful for comfort)
Many buyers start with “I just want to see CO2.” Then they realize the real value is the trend. A monitor with a clear history makes it easier to adjust your routine and verify results.
Alerts and thresholds you can actually use
Alerts can be useful, but you don’t want them beeping every night. Choose a monitor that lets you set thresholds—or at least adjust alert behavior.
In practice, you might want to know if CO2 rises above a level that suggests poor ventilation. Some people aim to keep bedroom CO2 under roughly 1,000–1,200 ppm during sleep, while others use higher thresholds depending on their comfort and tolerance. Your monitor should support the threshold style you plan to follow.
Also check whether alerts are visual, audible, or both. Visual-only alerts are often better for uninterrupted sleep.
What you should prioritise before you buy
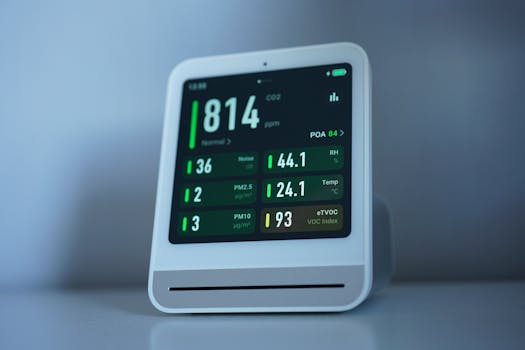
Buying the right device is about matching the monitor to how you’ll use it. Use these priorities to narrow your choices quickly.
1) Prioritise accuracy you can trust over flashy features
It’s tempting to choose a monitor that also includes “smart” features like automation, voice control, or lots of extra sensors. Those can be helpful. But if the CO2 number isn’t reliable, the rest won’t matter.
Start with NDIR sensor type, clear accuracy specs, and understandable calibration. Then consider extras.
2) Decide where it will live in your bedroom
Placement affects readings. If the monitor is near a doorway, a vent, or a drafty window, it may show lower values than the air you actually breathe.
A practical approach: place the monitor in the breathing zone area—often roughly 1–2 meters from where you sleep, not directly next to the bed or right against a wall. Avoid placing it right next to heaters, fireplaces, or areas with unusual air movement.
If you live in a studio or have a shared sleeping area, you’ll need to consider occupancy and room mixing. Your monitor should help you understand that pattern, not just provide a single number.
3) Make sure it supports overnight use without irritation
Before buying, check for night mode, dim display, and silent operation. If the unit has frequent audible alarms, you may end up turning it off or ignoring it.
Also check connectivity. Wi-Fi monitors can be convenient, but if the app is unreliable or requires constant setup, you may lose historical data when you need it most.
4) Use temperature and humidity as supporting context
Many CO2 monitors also show temperature and humidity. Those aren’t direct indicators of ventilation, but they influence comfort and can affect how you feel in the morning. If your bedroom is cold and dry, you might blame CO2 when the real issue is air dryness.
Look for consistent readings and a stable sensor for those parameters as well.
5) Consider whether you need “sleep mode” behavior
Some monitors are designed for bedroom use with dim displays and low-disturbance alerts. If you’re sensitive to light or sound, this is a major buying factor.
For example, if you share a room with someone who sleeps lightly, you’ll want a device that doesn’t flash or beep. A monitor that supports quiet operation will get used consistently—which is what makes it valuable.
Common purchasing mistakes and misunderstandings
Most CO2 monitor problems come from expectations that don’t match reality. Avoid these common traps.
Mistake: treating CO2 as a “health gas” test
CO2 is best understood as an indicator of ventilation. A higher CO2 reading usually means you need more fresh air exchange. It doesn’t automatically mean the room is dangerous.
Think of CO2 as a “ventilation scoreboard.” Your goal is better air quality and comfort, not panic.
Mistake: relying on one reading instead of nightly trends
CO2 changes over time. If you check the monitor once at bedtime, you’ll miss what happens during the night when you’re breathing continuously.
Instead, look at how CO2 rises after you go to sleep and how quickly it drops in the morning or after ventilation. Data logging helps you do this accurately.
Mistake: placing the monitor where it can’t represent your breathing zone
If the monitor is near an open window, it might show “good” CO2 even while the air around your bed stays stuffy. Conversely, if it’s in a corner with poor airflow, it might show higher levels than the rest of the room.
Move it once, then leave it for a few days. Don’t keep relocating it nightly, or you’ll lose the ability to compare results.
Mistake: ignoring calibration and sensor drift
Some monitors require periodic calibration. Others use automatic methods. Either way, you should follow the manufacturer guidance.
If you never calibrate and the sensor drifts, your “before and after” ventilation experiments can become misleading.
Mistake: buying a monitor with loud alerts for “sleep use”
A monitor that beeps when CO2 crosses a threshold might be fine in a living room. In a bedroom, it can wake you up at the exact moment you’re trying to stay asleep.
Choose visual alerts or quiet thresholds, and confirm how alerts behave overnight.
Practical buying checklist and decision framework
Use this checklist to decide quickly and confidently. It’s designed for your specific goal: better sleep through better ventilation feedback.
- Sensor type: Confirm NDIR CO2 sensor.
- Accuracy: Look for a stated accuracy spec and clear calibration expectations.
- Range: Ensure it covers typical bedroom levels (often up to at least 5,000 ppm).
- Update rate: Prefer readings every 10–60 seconds so trends are visible.
- Night usability: Check for dim display, night mode, and silent operation.
- Alert behavior: Choose adjustable thresholds and non-disruptive alerts.
- Data logging: Make sure you can review history (on-device or app).
- Placement flexibility: Consider size, mounting options, and where you can position it.
- Power: Decide between plug-in convenience and battery autonomy.
- Comfort context: If possible, choose a monitor that also measures temperature and humidity.
If you’re unsure where to start, begin with the first four items. They determine whether the monitor can guide your ventilation decisions. Then choose the features that make it easy to live with every night.
Real-world scenario: adjusting ventilation using your monitor
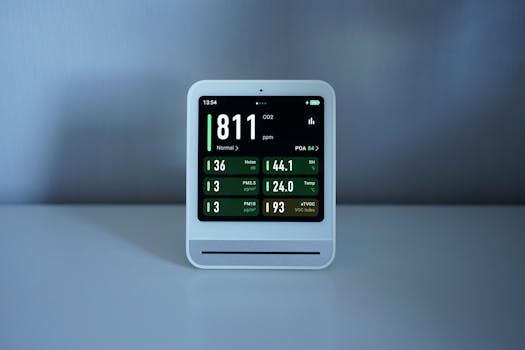
Imagine your bedroom is closed at night. You go to bed at 11:30 p.m. and wake up at 7:00 a.m. You notice you feel tired and sometimes get a mild headache. You buy a CO2 monitor and place it about 1.5 meters from your bed.
On the first night, CO2 climbs steadily and peaks around 1,600–2,000 ppm by the early morning. The next night, you try a small change: crack a window for ventilation for the last 2 hours of sleep. On the third night, you run a bathroom fan briefly before bed (if your home setup supports it) and crack the window slightly earlier.
Because your monitor logs data, you can see the difference. CO2 may peak lower and drop faster in the early morning. Even if you don’t “feel” it instantly, the trend gives you confidence that your ventilation strategy is working. Over a week, you can settle on the approach that improves comfort without making your room too cold or too noisy.
Final buyer guidance and recommendations
When you’re shopping for the best CO2 monitor for sleep, your best outcome comes from a simple mindset: buy a device you’ll use consistently, with measurements you can trust, and features that won’t disrupt your sleep.
Here’s how to translate that into purchasing decisions:
- If you want straightforward bedroom use: choose an NDIR monitor with a dim/night mode and silent operation. Look for a clear display that won’t light up your room all night.
- If you want to optimize your routine: prioritize data logging and a readable history in an app. You’ll learn more from nightly trends than from a single peak number.
- If you need long-term confidence: choose a model with transparent calibration guidance and stable sensor performance. This reduces drift risk over months.
- If you’re budget-conscious: don’t pay extra for features you won’t use. Spend on accuracy, night usability, and data history.
In terms of product fit, you’ll often find that CO2 monitors from established indoor air brands are designed for ongoing use and include NDIR sensors and app-based history. Models like the Awair (which combines multiple indoor air metrics) and Govee CO2 monitors (often popular for home monitoring) can be suitable depending on their specific sensor specs, night mode behavior, and how you plan to view data. If you’re considering any particular model, verify the sensor type (NDIR), calibration approach, and the display/alert settings before you commit.
Finally, remember that your monitor is a tool. The goal is to make practical changes—like adjusting window time, improving air exchange, or tuning HVAC runtime—so your room stays comfortable and ventilated. Once you find a routine that keeps CO2 from climbing too high overnight, you’ll usually see the sleep benefits show up quickly.
Choose the monitor that helps you act. Accuracy plus sleep-friendly design is the winning combination.
28.01.2026. 05:25