How to Read an EMF Meter: A Practical Step-by-Step Guide
Goal: get accurate EMF readings you can trust

Learning how to read an EMF meter is less about memorizing numbers and more about controlling the measurement conditions. EMF meters can show very different results depending on distance, orientation, background noise, and whether you’re measuring near a specific source or scanning a room. This guide walks you through a reliable workflow—setup, measurement, interpretation, and verification—so your readings reflect what’s actually happening in your space.
Preparation: what to set up before you switch the meter on
Before taking readings, prepare your environment and your device. This reduces “false alarms” caused by movement, transient signals, or inconsistent meter settings.
- Choose the right meter type for your goal. Some meters are designed for electric fields (E-field), others for magnetic fields (B-field), and many consumer meters detect broader RF/EM radiation. Check your meter’s labels and sensor type.
- Let the meter stabilize. If the meter has a warm-up time, follow it. If it doesn’t, still wait 1–2 minutes after turning it on so readings settle.
- Pick consistent measurement locations. Use a marked spot on the floor or wall and keep your hand position consistent. If you’re testing near a bed or desk, measure at the same height each time.
- Record baseline conditions. Write down the current room reading before you approach any potential sources (router, phone charging, power strips, appliances).
- Remove obvious confounders. Turn off items you’re not testing (space heaters, hair dryers, microwaves) so you can isolate specific sources later.
If your meter is a model with selectable modes (for example, E-field vs B-field, or RF vs broadband), decide which mode you’re using and keep it consistent for the steps below.
Required tools and setup items

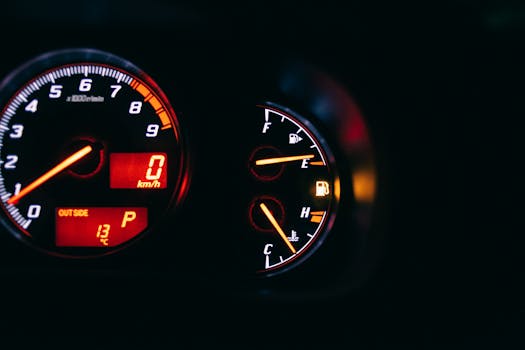
- EMF meter with known frequency range and units (often V/m for electric field, µT/mG for magnetic field, or µW/m²/mW/m² for power density).
- Notebook or phone notes to log readings, time, distance, and mode.
- Measuring tape or ruler to keep distance from sources consistent (for example, 0.5 m, 1 m, 2 m).
- Optional: a tripod or holder to keep the meter still during each reading. Even a small hand wobble can change results.
- Optional: a power strip you can switch to turn specific devices on/off while keeping the rest stable.
Step-by-step: how to read an EMF meter in a controlled way
Follow these steps in order. They’re designed to help you interpret the meter output correctly and avoid misleading readings.
1) Identify what your meter is measuring
Look at the display and the meter’s manual or labels. Common indicators include:
- E-field (electric field): often shown in V/m or kV/m.
- B-field (magnetic field): often shown in µT or mG.
- RF/EM radiation: may show power density, field strength, or a “signal strength” style reading.
- Units and scaling: some meters show “over range,” “OL,” or use different ranges depending on the mode.
Write down the units your meter uses before you start. If you don’t know the unit, you can’t reliably compare readings to anything else.
2) Select the correct mode and range
If your meter has multiple modes or sensitivity settings:
- Choose the mode that matches the source you’re testing. For example, a magnetic field meter mode is more relevant near currents (wiring, transformers), while RF modes are more relevant for Wi‑Fi, cellular, and broadcasting.
- Use the default range if you’re unsure. If the meter offers auto-ranging, keep it on until you confirm how it behaves.
- Turn off any “hold” or “peak” features unless you intend to measure peaks. Some meters default to “peak hold,” which can inflate the number compared with an average reading.
3) Establish a baseline reading
Stand in the general area you plan to test, holding the meter at the height you’ll use for later measurements (for example, 1.0 m above the floor or at desk height).
- Hold the meter steady.
- Wait 10–20 seconds for the reading to stabilize.
- Log the value, the unit, the mode, and the approximate time.
Baseline helps you tell the difference between background EMF and a specific device’s contribution.
4) Measure at a consistent distance from a known source
Pick one device you can control easily (for example, a Wi‑Fi router, a phone charger, or a lamp with a predictable on/off state). Use consistent distance increments.
- Turn the device off, then measure baseline nearby.
- Turn the device on, then measure at the same location.
- Repeat at 0.5 m, 1 m, and 2 m (or your meter’s practical range).
In your notes, record: distance, device state (on/off), and meter reading. This is one of the most practical ways to confirm that your measurement is responding to the source rather than random background variation.
5) Control orientation and sensor direction
Many meters have directional sensors. If your meter uses a probe or antenna-like component, the reading can change depending on how it faces the source.
- Keep your feet and body still.
- Rotate the meter slowly in place (for example, 90 degrees left/right) and note the highest stable value.
- After finding the orientation that produces the strongest reading, record that reading and then rotate back to the “standard” orientation for subsequent measurements.
This step is especially important for magnetic field measurements and for RF meters that rely on antenna orientation.
6) Distinguish “peak” from “average” behavior
EMF readings can fluctuate due to pulsed transmissions, Wi‑Fi traffic, or appliance cycling. If your meter supports different display behaviors:
- If it shows peak hold: record the peak value only if you intend to evaluate maximum exposure during activity.
- If it shows a live value: take note after the reading stabilizes for 10–20 seconds.
- If it has both: capture both peak and approximate steady-state readings.
When you compare readings, compare like with like. A peak reading and a steady reading are not directly interchangeable.
7) Confirm the meter reacts when you change the source
To verify your measurement is meaningful, do a simple validation:
- With the device on, note the reading.
- Turn the device off and wait a few seconds.
- Measure again at the same spot.
A well-functioning setup should show a noticeable change (or at least a consistent decrease) when the source turns off. If the reading barely changes, you may be measuring background, or the device may not emit strongly at the meter’s detection range.
8) Measure common high-contribution areas using a repeatable pattern
If your goal is to understand your home environment, use a consistent scan pattern rather than random checks.
For example, if you’re assessing a bedroom:
- Measure near the head of the bed (same height each time).
- Measure near the nightstand and any chargers.
- Measure near the power outlets and along the wall where cables run.
- Measure near the router or any nearby electronics (including those in adjacent rooms if the meter can pick up signals through walls).
Log each location. Then, turn off likely sources one by one (router, charging blocks, TV, desk lamp) and re-check the same locations to see which sources drive the changes.
9) Record readings with context, not just numbers
When you write down a value, include:
- Meter mode and unit
- Distance from source
- Height and orientation (if you found a directional peak)
- Device state (on/off) and activity (for example, “phone connected to charger,” “Wi‑Fi traffic active”)
- Approximate time (some sources vary by schedule)
This context is what turns your notes into actionable information. Without it, you can’t reproduce or interpret results later.
10) Interpret what you see using the meter’s unit and behavior
Once you have stable, source-linked readings, interpret them by how the meter responds and what the unit means.
- If the reading rises when you switch a specific device on: that device is likely contributing to the meter’s detected field.
- If the reading changes only slightly across distances: you may be measuring background or multiple overlapping sources.
- If the reading is unstable or jumps around quickly: the source may be pulsed or variable, or your meter may be saturating near a strong signal.
- If you see “over range” or the display indicates saturation: the meter may be beyond its measurement capability; you’ll need a different range/mode or a meter with appropriate specifications.
In practice, the most useful interpretation is often relative within your own home: where the higher readings occur, which devices cause them, and how changing distance or device state affects the readings.
Common mistakes that lead to misleading EMF readings
Even careful users can get confusing results. Watch for these issues:
- Measuring while holding the meter in a moving hand. Motion can alter orientation and proximity to your body, affecting readings.
- Comparing values from different modes or units. A reading in V/m is not the same type of measurement as one in µT.
- Forgetting peak-hold or averaging settings. Peak hold can make normal conditions look extreme.
- Testing too close to multiple sources at once. If several devices are on, you may not know which one is driving the reading.
- Not establishing baseline. Without baseline, you can’t tell if a reading is background or source-driven.
- Ignoring distance and height. EMF fields often vary with distance and can change quickly near sources. Inconsistent placement makes your results unreliable.
- Using a meter outside its intended frequency range. Some consumer meters are not sensitive to certain bands. If your meter doesn’t react to a known active source, it may not detect what you think it detects.
- Assuming the highest number is always the “worst” exposure. If you’re trying to understand typical exposure, peaks may not represent the usual condition.
Additional practical tips for better measurements and optimization
Once you can read your meter consistently, you can use the readings to reduce exposure to specific sources in a practical, targeted way.
Use a simple measurement routine for every device
For each device you test, follow the same mini-routine:
- Baseline with device off
- Device on
- Measure at one fixed distance (for example, 1 m)
- Measure at a second distance (for example, 0.5 m)
- Log the difference
This consistency makes it easier to identify which devices matter most in your environment.
Reduce noise by turning off unrelated electronics
If you’re trying to isolate one source, temporarily switch off other potential emitters. You don’t need to shut down everything—just remove the biggest overlapping sources so your meter can “see” the one you’re testing.
Measure during typical use, not just at idle
Wi‑Fi and cellular signals can vary with network activity. If you’re evaluating a router or a smart device, take readings during the times you actually use them (for example, while streaming or downloading). For chargers, check both idle and active states.
Pay attention to power-related sources separately
When measuring near wiring, transformers, or appliances, treat power-related tests differently from RF tests. If your meter has both electric and magnetic field modes, measure in the mode that matches the likely field type. Keep the same orientation and location for repeat checks.
Use device placement changes and re-measure immediately
If your goal is to lower readings near a specific spot (like a bedside area), make one change at a time:
- Move the device farther away
- Change its position (for directional sensors)
- Switch it off or unplug it temporarily
Then re-check the same point with the same meter mode. This turns your meter into a feedback tool rather than a one-time measurement.
Choose a meter that matches your measurement needs
Some meters are better suited for general screening, while others provide more reliable readings for specific field types and frequency ranges. If you frequently test near RF sources (routers, cordless phones, cellular hotspots), prioritize a meter that clearly specifies its RF detection range and units. If your focus is magnetic field screening near power wiring, look for a meter that explicitly supports magnetic field measurement with appropriate units and range control.
When a meter is properly matched, it becomes easier to interpret changes when you turn devices on and off—an essential part of learning how to read an EMF meter accurately.
How to keep your results consistent over multiple days
EMF environments can change with weather, network activity, and neighbor transmissions. To maintain consistency:
- Use the same meter mode, unit range, and orientation each day.
- Measure at the same times you measured previously (morning vs evening can differ).
- Log any changes in nearby devices (new chargers, new routers, smart home updates).
- Re-check baseline before each session.
With this approach, you’ll be able to identify persistent high-reading locations and the devices that consistently drive them.
Putting it all together: a practical example workflow
Here’s a simple, repeatable workflow you can follow in a bedroom:
- Step 1: Set the meter to the mode you want to evaluate (RF or field type) and record the unit.
- Step 2: Take a baseline reading near the head of the bed with the router and chargers off.
- Step 3: Turn the router on and measure at the head of the bed at 0.5 m and 1 m.
- Step 4: Rotate the meter to find the orientation that gives the highest stable reading, then record it.
- Step 5: Turn the router off and confirm the reading drops.
- Step 6: Turn on the phone charger and repeat the same distance measurements near the nightstand.
- Step 7: If a charger increases the readings, unplug it and re-check immediately to confirm causality.
- Step 8: Repeat for any other devices (TV, smart speaker, laptop docking station) that are used in the same area.
By the end, you’ll have a clear map of which devices meaningfully affect the meter readings at your chosen locations—and you’ll know how to reproduce the measurements if you revisit later.
faq_html
13.12.2025. 14:11