

Water Flosser vs Interdental Brushes vs Floss: How to Choose

Choosing the right interdental cleaner when your routine keeps failing
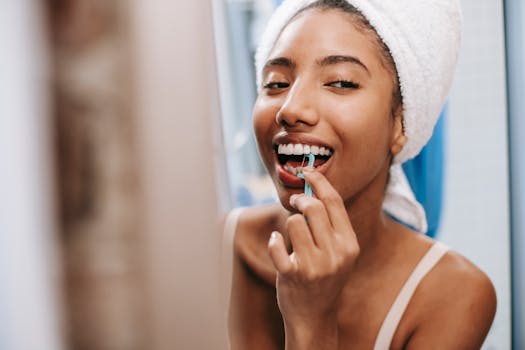
If you’ve ever looked in the mirror after flossing and still noticed plaque along the gumline, you’re not alone. Many people start with floss, then stop because it’s fiddly, uncomfortable, or they simply can’t keep up with the time it takes. Others switch to a water flosser because it feels easier, then wonder if it’s “as good” as brushing and flossing. And then there are interdental brushes, which can feel like overkill—until you realize they’re one of the most effective options when they fit your gaps properly.
This guide is built for the buying moment: you’re trying to choose between a water flosser vs interdental brushes vs floss, and you want a practical answer you can use on real teeth, real gums, and real schedules.
Here’s the core truth: no single interdental tool is perfect for everyone. The best option depends on your gum health, how tight your contacts are, whether you have braces or bridges, and how consistently you’ll actually use the product.
Start with the basics: what each option is designed to do
Before you compare features, it helps to understand what each tool is trying to remove.
Water flosser (pulsed water to disrupt plaque)
A water flosser uses a reservoir of water and a pump to deliver controlled pulses. The stream helps dislodge food debris and biofilm from between teeth and along the gumline. It’s especially useful if you struggle with traditional flossing due to dexterity issues, sensitivity, or braces/implants where flossing can be awkward.
Look for models that allow pressure adjustment—many people need a lower setting at first, then increase gradually over 1–2 weeks as gums adapt.
Interdental brushes (mechanical cleaning in the gap)
Interdental brushes are small bristle cylinders or tapered brushes designed to slide into the space between teeth. They physically sweep plaque out of the interdental area. When the size matches your gaps, they can be extremely effective and efficient.
The key is fit. A brush that’s too large won’t go in comfortably; a brush that’s too small may not reach the plaque zone. Most people need to experiment with sizes to find the right “just fits” option.
Floss (a thin strip to scrape the contact area)
Floss is a thin material that wraps around each tooth to clean the contact area where two teeth meet. It’s designed to remove plaque and food trapped where brushes and water streams may not reach as effectively.
Different floss types exist—waxed, unwaxed, tape-style, and floss picks. Your success depends heavily on technique: you need to curve the floss around the tooth and move under the gumline gently, not snap it between teeth.
Important features and specifications to look for
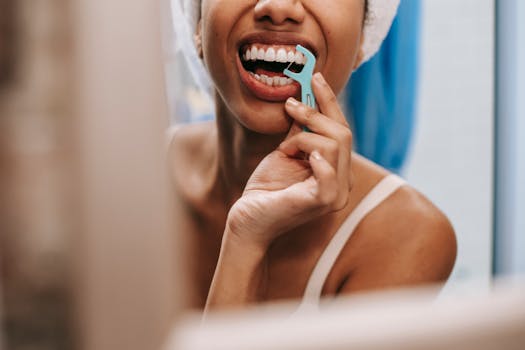
The right buying decision comes down to a few measurable specs and practical design choices. Here’s what to check before you buy.
For water flossers: pressure control, reservoir size, and tip system
1) Pressure settings: Aim for a model with at least 5–10 intensity levels or a clearly adjustable range. More importantly, choose a unit where the lowest setting is genuinely gentle. If you start too strong, you can irritate gums and stop using it.
2) Pulse type and consistency: Many devices advertise “pulses per minute” or “oscillation.” You don’t need the highest number, but you do want consistent output. If possible, consider reviews that mention steady flow without sputtering.
3) Reservoir capacity: If you’re cleaning 10–20 teeth surfaces, you’ll want enough water for a full session without refilling. A common practical range is around 200–500 mL for countertop units. Travel models tend to be smaller, which may mean multiple refills if you have extensive work like crowns or bridges.
4) Tip variety: Tips matter. Look for tips designed for gumline cleaning and for your situation (orthodontic use, plaque removal around implants, or general use). If you have braces, a tip designed for orthodontics can make the routine faster.
5) Ease of cleaning and maintenance: If you don’t want to deal with messy parts, choose a model with removable tips and a tank that’s easy to rinse. Stagnant water is a legitimate concern—especially if you store the device in a humid bathroom.
For interdental brushes: size range, flexibility, and handle comfort
1) Size selection (diameter): Interdental brushes come in sizes that typically range from very slim (often around 0.4–0.6 mm) to larger options (often 0.8–1.2 mm and beyond). Your goal is to choose a size that enters with light resistance. If it bends or hurts, it’s too big. If it slides through without contacting the sides, it’s too small.
2) Length and reach: Bristles should reach the plaque zone between teeth and near the gumline. If you have deep contacts or molars that are hard to access, longer handles or angled designs can help.
3) Handle style: If you have limited hand dexterity, consider ergonomic handles or longer handles that reduce wrist strain. For people who hate “mess,” choose brushes designed to be used quickly and disposed of without fuss.
4) Bulk packaging: Interdental brushes are small and used frequently. Buying refills in multi-packs can reduce cost per use and keep you from running out mid-routine.
For floss: floss type, strength, and user-friendly options
1) Waxed vs unwaxed: Waxed floss tends to glide more easily between tight contacts. Unwaxed can be better for some people who prefer a “grip” feel, but it may be harder to thread.
2) Tape-style floss for wider gaps: Tape floss can be useful if you have larger spaces or if standard floss feels too thin and doesn’t clean effectively.
3) Floss picks vs traditional: Picks can improve consistency for people who struggle with winding floss. The trade-off is that picks may clean slightly differently depending on the design, so your technique still matters.
4) Fraying resistance: Some floss breaks or frays quickly. You want a material that stays intact long enough to clean each tooth surface properly.
What you should prioritise based on your mouth and your habits
Instead of choosing based on hype, choose based on friction—what makes you stop using it. The “best” tool is the one you’ll use correctly most days.
Prioritise gum sensitivity and comfort
If your gums bleed easily or feel tender after flossing, you may need a gentler starting point.
- Water flosser: Often easier to tolerate because you can start on a low setting and adjust gradually over 7–14 days.
- Interdental brushes: Can be comfortable once you find the right size. Too-large brushes cause irritation fast.
- Floss: Can be uncomfortable if you snap it between teeth or dig too hard under the gumline. Technique matters more than people think.
Prioritise accessibility: tight contacts vs open spaces
Tooth spacing changes everything.
- Tight contacts: Floss (especially waxed or glide-friendly types) can be more practical than brushes that struggle to enter.
- Open or irregular spaces: Interdental brushes often outperform floss because they can physically sweep plaque where water and floss can miss.
- Mixed mouth: Many people need a combination—brush in the larger gaps, floss in the tight areas, and water flosser for overall gumline cleanup.
Prioritise braces, bridges, implants, and crowns
Real-world scenario: you have braces and you’re trying to keep up during orthodontic visits.
In this situation, flossing can be frustrating because brackets block access and floss can shred. A water flosser with an orthodontic tip can make it faster to clean around brackets and along the gumline. Interdental brushes can work too, but only if the spaces allow brush entry without bending brackets or causing discomfort. Often, the best routine becomes a mix: a water flosser for consistent daily cleaning, plus interdental brushes where they fit, and floss where you can safely thread it.
For bridges and implants, you’ll want a tool that can reach under the pontic or around the abutment. Interdental brushes (with the right size) can be very effective. A water flosser can help maintain cleanliness along the gumline, especially when you’re tired and want a fast routine.
Prioritise time and consistency (the “2-minute rule”)
Buying the perfect device won’t matter if you don’t use it. Think in terms of realistic daily time.
If you can spend about 2–3 minutes daily, you can often make a water flosser or interdental brush routine stick. If you need something quicker, floss picks might help you stay consistent. When you’re shopping, ask yourself: “Which option will I actually do on the days I’m busy?”
For many people, consistency improves after switching to a tool that feels easier and less painful. That alone can improve gum health over 3–6 weeks.
Prioritise your learning curve
Every tool has a technique. The best choice is the one you can learn without frustration.
- Water flosser: You’ll adjust pressure and angle. Most people find the learning curve manageable within a week.
- Interdental brushes: You’ll need to find the right size. That can take a few tries, but once dialed in, it’s straightforward.
- Floss: You’ll need to practice wrapping and sliding gently along the tooth. If your technique is off, you may not remove as much plaque as you expect.
Common purchasing mistakes and misunderstandings
These are the mistakes that cause returns, wasted money, and routines that never start.
Buying a water flosser without pressure adjustability
If the device only has one power level, it can be too intense at first. Look for adjustable pressure so you can start low and build tolerance. A too-strong stream can also make you skip sessions, which defeats the purpose.
Choosing interdental brush size based on “looks” instead of fit
Interdental brushes should feel like they belong. If you feel sharp resistance or pain, it’s too large. If it barely touches the sides of the teeth, it’s too small. The correct size is often the one that cleans with light guidance, not force.
Assuming floss is automatically better than water or brushes
Floss can be excellent when used correctly, but it’s not magic. If you’re rushing, using the wrong technique, or skipping areas because you can’t thread it, the “better” tool won’t help. A water flosser or interdental brushes may remove more plaque simply because you use them more reliably.
Overlooking the need for a starter routine
New users often go too hard. For example, if you jump from no interdental cleaning to max pressure on a water flosser, you can inflame gums. Plan a gradual start over 7–14 days.
Not considering replacement tips and brush refills
Many buyers focus on the initial cost and forget ongoing consumables. Tips for water flossers and replacement brush packs add up. Check how often tips should be replaced (many manufacturers recommend periodic replacement, often every 3–6 months depending on use). Budget for it.
Ignoring storage and hygiene
Countertop water flossers need rinsing and proper drying. If you leave water sitting in the tank, you’re inviting unpleasant buildup. If you travel, check whether the unit is easy to clean quickly and whether it packs securely.
Practical buying checklist and decision framework
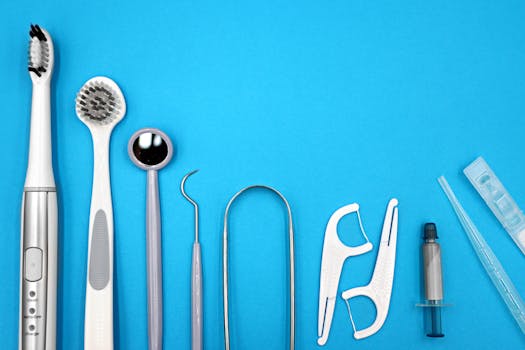
Use this checklist like a quick decision tree. You’ll end up with a tool choice that matches your mouth and your lifestyle.
Step 1: Identify what you struggle with most
- Threading floss is difficult: Consider a water flosser and/or floss picks, and use interdental brushes where they fit.
- Gums bleed or feel sore: Prioritise adjustable water pressure or smaller interdental brush sizes; use gentle technique.
- Food traps between teeth: Consider interdental brushes (fit-dependent) and a water flosser for daily gumline cleanup.
- You have braces or dental work: Look for orthodontic tips for water flossers and brush sizes that won’t damage appliances.
Step 2: Match the tool to your spacing
- Tight contacts: floss (often waxed) or floss picks.
- Wider spaces or after orthodontics: interdental brushes can be a high-impact option.
- Mixed spaces: plan a combined routine (water flosser + targeted brushes or floss).
Step 3: Decide how much time you can realistically give
- Under 2 minutes: floss picks or a quick water flosser routine at a moderate pressure.
- 2–3 minutes: interdental brushes plus a water flosser “top-up” can be ideal.
- 3–5 minutes: you can combine brushing, flossing/brushes, and water flosser more thoroughly.
Step 4: Choose based on comfort and learning curve
- Want minimal technique stress: water flosser is often easiest to start.
- Want maximum mechanical cleaning where it fits: interdental brushes excel when sizes are correct.
- Want contact-area cleaning: floss is still valuable, especially with tight contacts and good technique.
Step 5: Check ongoing costs and refills
- Water flosser: replacement tips and any cleaning accessories.
- Interdental brushes: refill sizes that match your mouth (you may need multiple sizes).
- Floss: cost per box and availability of your preferred type (waxed, tape, picks).
Final buyer guidance and recommendations for a smarter routine
When you’re choosing between water flosser vs interdental brushes vs floss, think of it as building a routine that you can repeat without dread. Here’s how to translate that into practical recommendations.
If you want the easiest daily routine and you’ve struggled with floss
Choose a water flosser with adjustable pressure and a tip system suited to your needs. Start on the lowest setting and work up over 1–2 weeks. Use it consistently—even if you can’t floss every day. Pair it with brushing twice daily and consider adding interdental brushes if you have gaps that clearly accept them.
Many buyers find that adding a water flosser helps them keep up during busy weeks, especially when braces or crowns make flossing feel like a chore.
If you have noticeable gaps or you’re tired of floss snapping or skipping areas
Choose interdental brushes and focus on size accuracy. Buy a small starter assortment if you’re unsure which size fits. Your goal is gentle entry and contact with the sides of the teeth. Once you find the right diameter, you’ll often feel more confident because the brush visibly cleans the space.
A good approach is to use brushes where they fit comfortably, then use floss only in the tightest contact areas where brushes don’t enter well.
If you have tight contacts and you can commit to technique
Choose floss (waxed for tight spaces is a common starting point). Consider floss picks if you struggle with threading, but still use gentle motion and curve the floss around the tooth. If your gums bleed, slow down and focus on technique rather than increasing force.
Floss can be extremely effective when you do it properly, but it’s also easy to do “almost right.” If you’re not confident in your technique, a water flosser can be a helpful companion to improve overall interdental cleanliness.
A combined approach often wins in real mouths
Most people don’t have one perfect interdental problem. They have tight contacts in some areas, wider spaces in others, and occasional dental work that changes how the routine feels. In those cases, the most effective plan is usually a combination:
- Water flosser for consistent daily gumline cleaning and for areas that are difficult to floss.
- Interdental brushes for spaces where they fit comfortably and can mechanically sweep plaque.
- Floss for tight contact points where brushes can’t reach effectively.
If you’re shopping right now, start by choosing one “anchor” tool you’ll use daily. Then add the second tool only where it solves a specific problem—like a stubborn trap spot, a tight contact, or a hard-to-reach area near molars.
Finally, give yourself a realistic adjustment period. For many people, you’ll notice less bleeding and less irritation within 2–6 weeks of consistent interdental cleaning, assuming you’re using gentle technique and the tool fits correctly. If bleeding persists beyond that or you feel ongoing pain, it’s worth checking in with your dental professional to confirm you’re cleaning the right areas safely.
Practical example: what to buy if your situation is “I floss sometimes, but it hurts”
Let’s say you floss 2–3 times per week, but your gums bleed and you dread the process. You want something you’ll actually do daily.
- Buy a water flosser with adjustable pressure and a gentle lowest setting. Use it daily for 7–14 days at low intensity.
- Once your gums calm down, add interdental brushes in the areas where there are obvious gaps. Start with smaller sizes and only move up if the brush slides in comfortably and cleans well.
- Keep floss for tight contacts where brushes don’t enter, but don’t force it when you’re irritated. Focus on technique and gentle movement.
This plan reduces friction while still targeting plaque. Over time, you’re more likely to build a routine that supports healthier gums.
07.02.2026. 20:11