Scalp Inflammation Routine for Itch, Flaking & Shedding
Goal: calm scalp inflammation so itch, flakes, and shedding settle
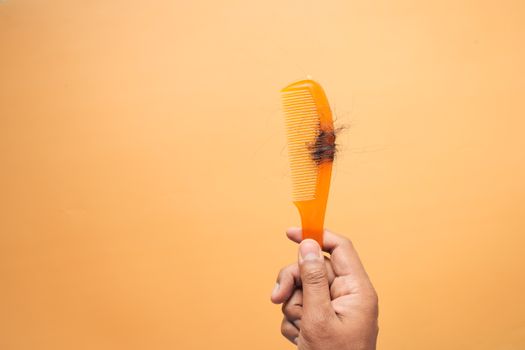
If your scalp feels irritated, itchy, or “tight,” and you’re dealing with flaking and increased shedding, you’re not imagining it. Inflammation can disrupt the scalp barrier, disturb the scalp microbiome, and make hair feel looser at the root. The goal of a scalp inflammation routine for itch flaking shedding is simple: reduce irritation consistently, clear scale gently, and support the scalp environment so hair shedding becomes less noticeable over time.
You’ll follow a short daily routine plus a weekly “reset.” You’ll also learn how to adjust based on what your scalp is doing—because the same routine doesn’t work equally well for everyone.
Preparation: what you need before you start
Before step one, set up your routine so you can be consistent for at least 4–6 weeks. Consistency matters more than perfection.
Gather your tools and supplies
- A gentle shampoo for non-treatment days (fragrance-light if possible).
- A treatment shampoo you’ll use on a schedule (examples below).
- A scalp-friendly conditioner (apply to hair lengths, not the scalp).
- A soft scalp brush (optional, but helpful for gentle mechanical clearing).
- Clean towels and a way to dry hair without rubbing aggressively.
- A measuring habit: a phone note where you track itch (0–10), flake amount, and shedding days.
Choose a treatment category based on symptoms
You don’t need to diagnose yourself, but you do want your routine to match the most likely drivers. Consider one primary treatment category for the first month:
- Seborrheic dermatitis–leaning symptoms (greasy flakes, redness, itch around hairline/behind ears): look for shampoos with ketoconazole, zinc pyrithione, or selenium sulfide.
- Inflammation with stubborn scale: you may benefit from a shampoo with salicylic acid to help lift scale.
- Barrier irritation/dryness (dry, fine flakes, burning): prioritize gentle cleansing and consider switching to a less harsh treatment approach first; avoid stacking too many actives.
If you already own a product, use what you have, but keep the active ingredient consistent for the first 4 weeks so you can tell what’s helping.
Set expectations and timing
Plan for:
- Week 1–2: itching may start easing, but flakes can look worse briefly if scale is loosening.
- Week 3–4: you should notice less redness and fewer flakes between washes.
- Week 4–6: shedding often becomes less dramatic as scalp sensitivity drops.
Step-by-step: your inflammation-first scalp routine (daily + weekly)
Follow these steps exactly for the first 14 days, then adjust based on your notes.
Step 1: Start with a “scalp baseline” check (2 minutes)
Before you wash, part your hair in 4–6 sections and look at your scalp in good light. Note:
- Itch level (0–10)
- Flake type (dry/fine vs greasy/thick)
- Where it shows up most (hairline, crown, behind ears)
- Any tenderness or burning
Write it down. This makes later adjustments much easier.
Step 2: Wash with the right frequency for your scalp (choose one track)
Pick the frequency that lets you keep symptoms under control without over-stripping.
- Oily/greasy flakes or fast buildup: wash every other day for the first 2 weeks.
- Dry flakes or tight, easily irritated scalp: wash 2–3 times per week for the first 2 weeks.
Don’t “stretch” too long if you’re actively inflamed. Inflammation tends to feed on residue and irritation.
Step 3: Use the treatment shampoo on a clear schedule
On treatment days, do this:
- Wet your scalp thoroughly with warm (not hot) water.
- Apply a small amount of treatment shampoo to your scalp, not your ends.
- Use your fingertips to massage gently for 60 seconds (don’t scratch).
- Leave the shampoo on the scalp for 3–5 minutes.
- Rinse very well. Repeat once only if your scalp is heavily coated.
Schedule for most people:
- Weeks 1–2: treatment shampoo 2–3 washes per week.
- Weeks 3–4: reduce to 1–2 washes per week if itch and flakes improve.
If you’re using ketoconazole or similar actives, this timing is usually enough to see results without overdoing it.
Step 4: On non-treatment days, cleanse gently
Use your gentle shampoo on non-treatment days:
- Massage for 30–45 seconds.
- Rinse thoroughly.
- Skip harsh exfoliating scrubs.
Conditioner should stay on hair lengths only. If your conditioner touches your scalp repeatedly, it can worsen buildup-related flaking for some people.
Step 5: Dry carefully to reduce itch triggers
After washing:
- Pat with a clean towel for 30–60 seconds.
- If you use a blow dryer, keep it on a low-to-medium setting and keep it moving.
- Avoid leaving hair soaking wet for long periods.
Moisture trapped on the scalp can increase irritation for some people, especially when flakes are already present.
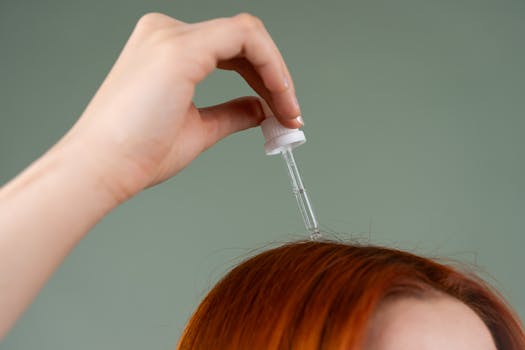
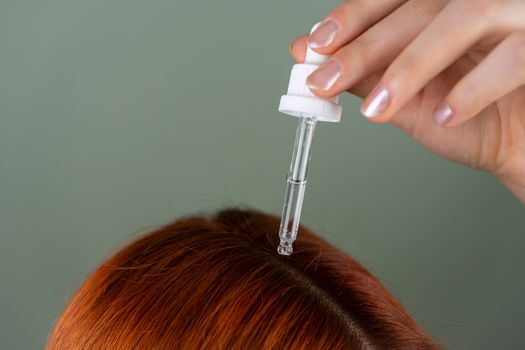
Step 6: Add a targeted scalp serum or anti-inflammatory option (optional, but useful)
If your scalp is still visibly irritated after the first week, consider a soothing scalp product between washes—lightweight and designed for the scalp.
Look for calming ingredients such as:
- Niacinamide
- Panthenol
- Allantoin
- Centella asiatica
How to use it:
- Apply to clean, dry scalp.
- Use a thin layer in 4–6 sections.
- Start 3 nights per week (not every night at first).
Soft recommendation: if you’re already using a treatment shampoo, choose one additional soothing step only. Stacking multiple new products at once makes it harder to know what’s helping.
Step 7: Weekly “scale reset” (once per week)
Once weekly, do a slightly more intentional reset to lift stubborn scale without harsh abrasion.
- Before your wash, apply a small amount of a scalp-friendly pre-wash oil or gel only if your flakes are dry and not greasy (skip oil if your scalp is oily/greasy).
- Leave for 15–20 minutes max.
- Shampoo with your treatment product and allow it to sit 3–5 minutes.
- Gently massage with fingertips. If you use a scalp brush, keep it light and limit to 60 seconds.
This step often reduces the “stuck flakes” that keep itch cycling between washes.
Step 8: Track shedding like a trend, not a single day
Shedding can spike from inflammation, product buildup, or stress. Instead of panicking, track:
- How many loose hairs you notice during wash
- Whether shedding is concentrated at the root (often scalp-related)
- How itch changes day to day
After 3–4 weeks, if itch and flakes are improving, shedding often follows.
Common mistakes that keep scalp inflammation going
Even a great routine fails when a few common habits slip in. Watch for these:
1) Scratching the scalp during itch spikes
It’s instinctive. But scratching creates micro-injury, which can prolong inflammation. Instead, press your fingertips lightly to the itchy area for 10–15 seconds, then wash or apply your soothing option.
2) Leaving treatment shampoo on for too short—or too long
Too short: it may not work as well. Too long: it can irritate. Aim for 3–5 minutes consistently on treatment days.
3) Using multiple active shampoos in the same week without a plan
Switching actives quickly can confuse your results. Choose one main treatment category for the first month. If you need to switch, do it after you’ve given the routine time.
4) Conditioning the scalp
If your conditioner touches your scalp, especially around the hairline, flakes may worsen. Keep conditioner on the last third of hair lengths.
5) Over-washing when your scalp is dry and sensitive
If your scalp is tight and burning, washing too often can worsen irritation. Follow the frequency track you chose in Step 2, and adjust only after 1–2 weeks.
6) Heat and friction after washing
Rubbing with a towel and frequent high-heat styling can aggravate inflammation. Pat dry and keep heat moderate.
Additional practical tips and optimisation advice
These actions make your routine more effective and easier to stick with.
Optimise your technique: part your hair and apply where it counts
Most people apply shampoo like they’re washing their body. Scalp care needs scalp placement.
As you shampoo, part your hair into sections and concentrate product on the scalp. This improves contact time and reduces the need for extra product.
Use lukewarm water and rinse thoroughly
Hot water can increase irritation. Thorough rinsing reduces residue that can trigger flakes. If you feel “film” after washing, you may need a longer rinse.
Manage “between wash” triggers
Small changes can help:
- Avoid heavy oils on the scalp if your flakes are greasy.
- Limit dry shampoo if it worsens flaking—use it sparingly and brush out well.
- Keep hats, helmets, and headbands clean.
- Change pillowcases 1–2 times per week if you’re actively flaring.
Practical example: what your week might look like
Here’s a realistic scenario. Suppose you have itchy scalp with flakes that show up within 1–2 days of washing, and shedding feels heavier during showers.
- Monday: Treatment shampoo (3–5 minute contact). Gentle conditioner on ends only.
- Wednesday: Treatment shampoo again.
- Friday: Gentle shampoo only.
- Saturday night: Optional soothing scalp serum 2–3 nights that week.
- Sunday: Gentle shampoo if needed, or skip if symptoms are calmer.
By the end of week 2, you should notice fewer flakes between washes. If itch is still high, you can extend treatment shampoo to 3 washes per week for weeks 3–4—then reduce as symptoms settle.
Adjust your routine based on what you observe
Use your tracking notes to guide changes. A simple decision rule:
- If itch and flakes are improving: keep the same schedule and reduce treatment frequency after week 4.
- If itch is unchanged but flakes are reducing: focus on gentle technique and drying habits.
- If itch is worsening quickly: you may be over-stripping or reacting to a product. Pause new additives and consider switching to a gentler approach for a few washes.
When to consider extra help
If you have severe redness, painful scalp, thick crusting, or shedding that’s rapidly accelerating despite 4–6 weeks of consistent care, it’s smart to involve a dermatologist or healthcare professional. Persistent scalp inflammation can have multiple causes, and targeted treatment may be needed.
Soft product integration ideas (without overcomplicating)
You don’t need a huge lineup. One treatment shampoo plus one soothing option is often enough.
- If you want to try an anti-itch approach, consider a scalp serum with calming ingredients (apply between washes).
- If you’re currently using a basic shampoo, upgrading to a treatment shampoo with an active antifungal or anti-inflammatory focus can be a meaningful next step.
- For styling, choose lighter styling products that don’t leave heavy residue on the scalp.
If you’re shopping, look for formulas that match your symptom pattern (greasy/itchy vs dry/tight). Keep it simple for the first month so you can measure results.
Step-by-step maintenance plan after your first 4–6 weeks
Once itch, flakes, and shedding are calmer, your routine should shift from “treat” to “maintain.” This helps prevent the cycle from restarting.
Step 1: Lock in a maintenance wash schedule
- Most people do best with 1–2 treatment shampoo washes per week after improvement.
- Use gentle shampoo on other washes.
Step 2: Keep contact time consistent
Even during maintenance, don’t rush the treatment shampoo. Keep the 3–5 minute contact time so it continues to control inflammation.
Step 3: Use soothing support only when needed
If your scalp stays calm, use the soothing serum 1–2 nights per week. If you notice early itch returning, temporarily increase to 3 nights per week for 1–2 weeks.
Step 4: Re-check your baseline every month
Once per month, repeat the baseline check: itch rating, flake presence, and scalp tenderness. If you see a return of symptoms, go back to the earlier schedule for a short “reset” period.
Step 5: Protect your scalp during styling and seasonal changes
Stress, weather shifts, and new styling products can all trigger inflammation. When that happens, reduce friction and keep your cleansing schedule steady rather than abruptly changing everything at once.
Quick troubleshooting if your routine isn’t working
Use this to guide your next move without derailing your progress.
If flakes increase in week 1
This can happen when scale loosens. Keep treatment contact time and avoid aggressive scratching. Reassess at the end of week 2.
If itch improves but shedding stays high
Shedding can lag behind inflammation improvement. Continue maintenance for another 2–4 weeks and check if shedding gradually decreases as your scalp stabilizes.
If you feel burning after treatment shampoo
Reduce frequency to 1–2 times per week and ensure water isn’t too hot. Also check for product sensitivities—stop any new additives and return to gentle cleansing.
If you suspect product buildup
Confirm that you’re rinsing thoroughly and that conditioner isn’t touching the scalp. On one weekly reset, focus on lifting scale gently rather than increasing harsh scrubbing.
Final checklist for your scalp inflammation routine
- Choose a treatment shampoo category and stick with it for 4 weeks.
- Use treatment contact time of 3–5 minutes.
- Massage gently with fingertips; avoid scratching.
- Condition only hair lengths, not the scalp.
- Dry carefully and reduce friction.
- Track itch, flake presence, and shedding trends weekly.
When you follow this routine consistently, you’re giving your scalp the best chance to calm down. And once it does, you’ll usually see less flaking and a gradual reduction in noticeable shedding.
21.03.2026. 02:35