

Beginner Biohacker Wearables Setup Protocol (Step-by-Step)

What a “wearables setup protocol” means for beginners
If you’re new to biohacking, wearables can feel like a lot at once. You buy a device, sync an app, and suddenly you’re staring at charts, scores, and numbers you don’t fully understand. That’s where a setup protocol helps.
A beginner biohacker wearables setup protocol is simply a repeatable way to get your device working correctly, collect clean data, and interpret your results without getting overwhelmed. Think of it like setting up a home lab—but for your daily signals like sleep, heart rate, and activity.
You don’t need to track everything. You need reliable tracking, consistent routines, and a clear plan for what to look at first.
Key terms you’ll see in wearable data (plain-English version)
Before you start, it helps to know a few common terms. You’ll see these words in most wearable apps, even if the device brand is different.
- Baseline: Your normal range after you’ve worn the device consistently for a couple of weeks. Early numbers can be noisy, so you’re looking for your “usual.”
- Sampling: How often the device measures. Some signals are continuous (like heart rate), while others are intermittent (like temperature trends).
- Resting heart rate (RHR): A heart rate estimate when you’re at rest. Many apps show a trend over time.
- HRV (heart rate variability): A measure of how your heart rate changes from beat to beat. Higher HRV often shows better recovery, but it varies by person.
- Sleep stages: Labels like light, deep, and REM. These are estimates based on sensors, not lab-grade measurements.
- Readiness or recovery score: A summary number the app creates. It’s useful for trends, but it’s not a diagnosis.
- Sync: The process of sending data from your device to your phone or computer.
If you remember nothing else, remember this: wearables estimate. Your goal is not perfection—it’s consistency and trend awareness.
How wearables actually work (so you trust your data more)

Most consumer wearables rely on a few sensor types. Understanding them makes it easier to set up correctly.
Optical heart rate sensors
Many wristbands and smartwatches use light-based sensors. They shine light into your skin and measure how your blood absorbs and reflects it. That allows the device to estimate heart rate, and often HRV during sleep.
Sensor fit matters. If the band is too loose, you can get gaps in heart rate readings. If it’s too tight, you may feel discomfort and still get noisy readings.
Motion sensors (accelerometer and gyroscope)
To estimate steps, activity, and sometimes sleep stages, wearables track motion patterns. The app uses movement plus heart rate signals to guess when you’re awake versus asleep.
That means your sleep tracking can be affected by things like tossing and turning, unusual schedules, or even how you wear the band during the night.
Skin temperature and other metrics
Some devices include skin temperature or “skin temperature trend” features. These can be helpful for noticing overall changes, but they are sensitive to things like room temperature, exercise timing, and even how tightly the device sits on your wrist.
For beginners, temperature trends are best treated as “directional clues,” not exact medical readings.
Why the phone app is part of the protocol
Your wearable is only half the system. The phone app handles settings, data storage, firmware updates, and how the device interprets your signals. A lot of setup problems happen when syncing is inconsistent or when settings were never reviewed after installation.
So your setup protocol should include both the device and the app.
Common beginner mistakes that ruin data (and what to do instead)
These are the errors that most often lead to confusing results. If you avoid them, your first month will feel dramatically calmer.
- Skipping firmware updates: New firmware can improve sensor algorithms and battery behavior. If you see a “update available” prompt, don’t ignore it.
- Wearing the device too loosely: If your heart rate readings randomly drop during the day, tighten the band slightly and keep it snug during workouts and sleep.
- Changing where you wear it: If you move the band from wrist to wrist, or shift it up and down your arm, your sensor readings can shift too. Pick one spot and stay consistent.
- Starting too many experiments at once: If you change caffeine, sleep schedule, workouts, and supplements all in the same week, you won’t know what caused a change in sleep or HRV.
- Reading the score as a verdict: A readiness or recovery score is a summary. It can fluctuate based on stress, travel, illness, and even a late meal. Use it to spot trends, not to judge your day.
- Expecting sleep stages to match your intuition: Your wearable’s sleep staging is an estimate. Instead of arguing with it, use it to compare your sleep patterns week to week.
- Not charging enough: Many people miss data simply because the battery died. For consistency, set a reminder to charge before it gets low.
If you want one simple rule: keep your setup stable for at least 14 days before you start making big changes based on the data.
Your first setup checklist: day 1 to day 3
This is the practical part. You’ll set up your wearable for clean data without turning it into a complicated project.
Day 1: physical fit and basic settings
Start by wearing the device where you’ll keep it long-term. For wrist wearables, aim for snug-but-comfortable. You should be able to fit a finger under the band with gentle movement, but the device shouldn’t slide around.
Then do these steps in the app:
- Enter accurate profile details: age, sex, height, weight (if your app uses it). This affects calorie estimates and some HRV baselines.
- Set your time zone and schedule: If your device has a sleep schedule option, set it to your real typical bedtime and wake time.
- Check units: miles vs kilometers, Fahrenheit vs Celsius.
- Enable notifications you actually want: If you disable everything, you might miss reminders to sync or charge.
Finally, look for any “permissions” prompts on your phone. If the app can’t access Bluetooth or background activity, syncing can fail.
Day 2: sync and sensor validation
Wear the device for most of the day and confirm it’s collecting heart rate and activity data. In the app, check that you have a timeline for the day you just lived.
Do a simple validation moment: take a short walk of about 5 to 10 minutes at a normal pace. Then check if the step count and active minutes reflect the walk. This isn’t about accuracy perfection—it’s about confirming the device is reading movement.
If you notice missing chunks of heart rate data, adjust the band fit and try again the next day.
Day 3: firmware updates and charging routine
Check for firmware updates in the app. Updates can take 10 to 30 minutes depending on the device and connection.
Now build a charging routine that fits your life:
- Pick a consistent time: Many people charge during a morning routine or while showering.
- Aim for charging before the device hits very low battery: If your device typically lasts 5 to 7 days, charge around day 4 or 5.
- Don’t assume it’s fully charged if it’s “almost” there: For consistent sleep data, you want it to have enough battery to last the night.
By the end of day 3, you should feel confident that your wearable is syncing and collecting at least basic signals reliably.
How to run your first 14 days without getting lost

Your first two weeks are for building a baseline and learning what your device does well. You’re not trying to optimize your life yet.
Pick one “primary metric” to watch
Choose one main area. For most beginners, sleep or resting heart rate is a good starting point.
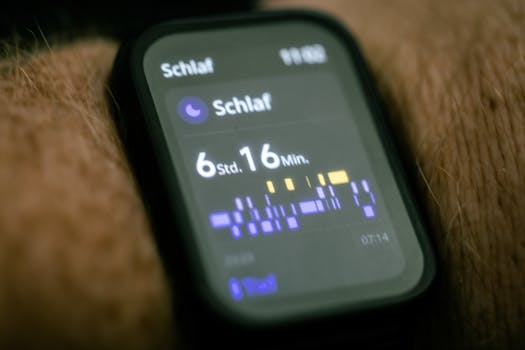
- Sleep-focused: Track total sleep time, sleep consistency (bedtime and wake time), and sleep efficiency (if your app provides it).
- Recovery-focused: Track resting heart rate and HRV trends, especially on days after poor sleep or stress.
- Activity-focused: Track steps or active minutes and how they relate to your sleep quality.
When you only track one primary metric, you avoid the trap of chasing every number.
Keep everything else stable
Try to avoid changing multiple habits at once. If you want to make one change, do it gently and keep it for at least 7 days before judging the effect.
Example: if you decide to stop caffeine after 2:00 PM, keep that rule for a week. Then compare your sleep trends to the previous week.
Use a simple “data hygiene” routine
Wear the device as consistently as possible. If you remove it, note why (like a charging window, a long shower, or a day you forgot). Most apps can handle occasional gaps, but frequent missing time makes trends harder to interpret.
Also, keep your device placement consistent. If you sleep with it on the same wrist and in the same position, your sensor readings are more comparable.
A real-world scenario you can copy
Let’s say you work a standard weekday schedule and you want better sleep. You set up your wearable on Monday. You wear it every night starting Monday. You don’t change your diet or workout routine for the first 7 days.
On day 8, you decide to move your evening workout earlier. Your plan is to finish exercise by 7:00 PM instead of 9:00 PM. You keep the rest of your routine the same. You check your app each morning for sleep consistency and total sleep time.
By day 15, you’re not looking for miracles. You’re looking for a pattern: did your bedtime drift less? Did your sleep duration become more consistent? Did your HRV trend improve on nights with earlier workouts?
If you see improvement, you now have something to build on. If you don’t, you learned something too—without guessing wildly.
What to look at in your app (and what to ignore at first)
Wearable apps often show a lot of information. Your job is to focus on the pieces that help you make better decisions.
Sleep: start with consistency, not perfection
Don’t obsess over whether you got “enough” REM. Instead, look at:
- Bedtime and wake time consistency
- Total sleep duration trend over the week
- How often you had long wake periods (if your app highlights it)
If you see your sleep improving over 2 weeks, that’s meaningful even if the sleep stage breakdown looks imperfect.
Heart rate: focus on trends
Resting heart rate and HRV are most useful when you look at multi-day patterns. A single high or low day can happen due to stress, travel, hydration changes, or a late meal.
Try this beginner approach: pick 3 to 5 “typical days” in your week and compare them. For example, compare weekdays with similar workout timing and similar bedtime routines.
Steps and activity: connect them to your energy
Activity metrics are useful if you connect them to how you feel. If you notice that heavy training days lead to worse sleep for you, that’s a real insight—even if the wearable isn’t “right” every minute.
For beginners, the goal is to learn your personal patterns.
How to adjust your protocol when life changes
Wearables can still help you even when your schedule shifts. The key is adjusting your expectations and your baseline timeline.
- Travel: Expect disrupted sleep for a few nights. Don’t compare travel week numbers directly to your baseline.
- Illness: You may see resting heart rate changes and HRV shifts. Treat it as a “recovery phase,” not a normal data day.
- New workout routine: If you start lifting or running, your resting heart rate may change. Give it 10 to 14 days before you judge the impact on sleep.
- Seasonal changes: Temperature and daylight can affect sleep. If your wearable includes temperature trends, remember they’re influenced by the environment too.
When life changes, your protocol doesn’t have to stop. You just extend your baseline window and focus on longer trends.
Simple getting-started guidance for your first week
If you want a clear plan you can follow right away, here’s a straightforward first-week approach.
Day 1 (setup):
- Wear the device on your chosen wrist in a snug position.
- Set your profile details and time zone in the app.
- Confirm you can sync data at least once that day.
Day 2 (confirm readings):
- Do a 5 to 10 minute walk and check if steps and active minutes reflect it.
- If heart rate looks spotty, adjust the band fit.
Day 3 (stabilize):
- Check for firmware updates.
- Create a charging routine so you don’t miss sleep data.
Days 4 to 7 (learn your patterns):
- Pick one primary metric (sleep or resting heart rate).
- Keep bedtime and wake time as consistent as possible.
- Make no more than one small habit change during the week.
- Each morning, glance at trends rather than reacting to single-day spikes.
By the end of day 7, you’ll have enough information to understand how your wearable behaves and whether it’s collecting consistently. Then you can move into the second week to build baseline confidence.
When you should be concerned and consider extra help
Most wearable data is normal to vary. Still, there are times you should treat the situation seriously and consider talking with a qualified healthcare professional.
- If you see persistent, unusual resting heart rate changes along with symptoms like dizziness, chest pain, fainting, or shortness of breath.
- If you have sleep disruption that’s severe and ongoing (for example, frequent insomnia for weeks) and it affects your daily functioning.
- If your wearable data suggests an abnormal pattern and you also feel unwell.
Wearables can be helpful for awareness, but they’re not a substitute for medical evaluation.
How to keep your protocol simple after you’re “set up”
Once you’ve completed the initial setup and your first two weeks, your protocol shouldn’t become more complicated. It should become easier.
Stick to three habits:
- Consistency: Wear it most days, especially during sleep.
- Focus: Track one primary metric at a time.
- Patience: Give changes at least 7 to 14 days before you interpret them as meaningful.
That’s the beginner biohacker wearables setup protocol in practice. It’s not about chasing perfect numbers. It’s about building a reliable picture of your routines so you can make calmer, more informed choices.
28.11.2025. 09:32