Wearable Validation Protocol for Optical HR, SpO2, and HRV
Why your optical HR, SpO2, and HRV look untrustworthy
Optical wearables can be genuinely useful, but they can also produce readings that feel unstable, delayed, or implausible—especially when you’re trying to use the data for recovery, training decisions, or health monitoring. The most common “trust issues” show up as sudden jumps in heart rate (HR), SpO2 values that don’t track your breathing or activity, and HRV graphs that swing wildly from one session to the next.
This article focuses on a wearable validation protocol you can apply at home to determine whether the problem is measurement quality, device fit, sensor contamination, or something physiological (like motion or poor perfusion). The goal is diagnostic: you’ll learn how to troubleshoot optical HR, SpO2, and HRV readings in a structured way and restore reliable signal quality.
What symptoms usually indicate a sensor or signal-quality issue
Before troubleshooting, identify which symptom you’re seeing. Not every failure mode looks the same.
- Optical HR spikes or drops that don’t match how you feel (for example, HR jumps during stillness or drops while you’re clearly active).
- SpO2 that stays flat at an unlikely value, drifts slowly upward while you’re not improving, or swings sharply with minimal movement.
- HRV that changes dramatically without corresponding changes in sleep quality, stress, illness, or training load.
- “No signal” or delayed updates that resolve only after you adjust the band or re-seat the sensor.
- Different numbers across devices when both are worn at the same time, especially if one device seems “chattier” than the other.
These patterns often point to optical signal problems (motion artifact, poor contact, ambient light interference, or degraded sensor optics) rather than a true physiological change.
Most likely causes behind unreliable optical HR, SpO2, and HRV
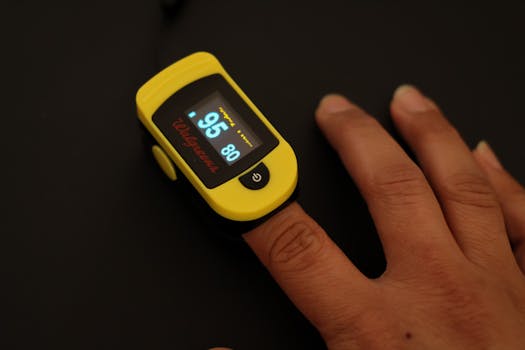
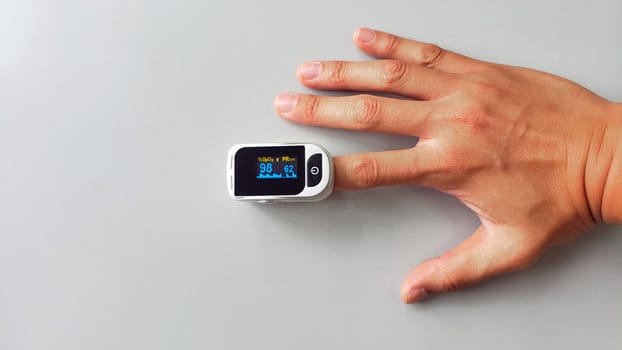
Optical HR, SpO2, and HRV rely on photoplethysmography (PPG): the wearable emits light into the skin and measures how much light returns from blood volume changes. Any factor that reduces signal quality or increases noise can degrade all three metrics.
1) Fit issues and micro-motion
Even small shifts—especially during walking, stretching, or sleep—can cause the sensor to lose consistent contact. HR is often the first metric to show this; SpO2 and HRV may follow because their algorithms are more sensitive to stable waveform quality.
2) Poor perfusion (cold skin, dehydration, vasoconstriction)
Cold hands, low blood flow, alcohol the night before, dehydration, or stress-induced vasoconstriction can reduce the PPG amplitude. The sensor then “fills in” with weaker signals, which can look like unstable SpO2 or HRV.
3) Sensor contamination and optical surface degradation
Sweat salts, sunscreen, lotions, or a film of grime can scatter light and distort the waveform. Over time, worn bands can also trap residues in the sensor area.
4) Ambient light interference
Direct sunlight, bright indoor lighting, or reflective surfaces can introduce noise. Some devices compensate, but strong interference can still cause artifact.
5) Incorrect measurement conditions for HRV
HRV is not just “another number.” Many wearables compute it from stable intervals that assume rest. If you’re measuring HRV while moving, talking, or in a noisy physiological state (heated room, caffeine, late meal), the variability can be real—but it can also be algorithmically unstable.
6) Algorithmic differences and calibration limits
Even with good signal quality, different wearables may use different filtering, window lengths, and HRV definitions. This is not a “fault” so much as a limitation of consumer sensors. Your validation protocol should focus first on whether the signal is stable and plausible, not on absolute agreement across brands.
7) Device hardware issues
Less common, but possible: a failing LED, damaged sensor window, loose internal connections, or a battery/processor issue can reduce output quality. These show up as persistent problems even after correct fit, cleaning, and controlled conditions.
Step-by-step troubleshooting and repair process (from quickest checks to deeper fixes)
Use this wearable validation protocol optical HR SpO2 HRV trustworthy approach as a sequence. Don’t skip ahead: early steps often resolve the majority of “untrustworthy” readings.
Step 1: Confirm the basics—band position, tightness, and skin contact
- Wear the device on the recommended location (commonly wrist, but some models specify distance from the wrist bone).
- Adjust tightness so the sensor stays in consistent contact without restricting circulation. If you can slide it easily around the wrist, you likely have micro-motion.
- For optical sensors, avoid placing the device over bony areas where the pressure changes during movement.
Quick test: sit still for 2–3 minutes. If HR and SpO2 stabilize quickly and HRV starts producing reasonable values only during rest windows, fit is likely the primary issue.
Step 2: Clean the sensor area and the skin contact surface
- Remove the band and gently wipe the sensor window with a microfiber cloth.
- Use mild soap and water on the strap if it’s safe for the material; remove sweat residue from the contact points.
- Let the device dry fully before re-wearing.
- On the skin side, wipe off sunscreen, lotion, and oils. Residues can be enough to distort PPG.
If your device uses a removable sensor module, ensure it’s seated correctly. Poor seating can mimic “contamination.”
Step 3: Control for ambient light and reflective surfaces
- Test in a dimmer or indirect-light environment.
- Avoid strong direct sunlight during the check.
- During the test, keep your wrist stable and avoid covering the sensor with clothing.
If readings improve noticeably under controlled lighting, you’ve likely identified an interference problem rather than a device failure.
Step 4: Eliminate motion artifact with a waveform-quality test
Motion is the most common cause of unstable optical signals. Do a structured test that separates “rest signal” from “moving signal.”
- Rest: sit quietly with your arm supported for 3–5 minutes. Keep your wrist relaxed at heart level if possible.
- Move: walk slowly for 2 minutes and then stop again.
- Observe: HR should change physiologically during walking, but it should not “flutter” wildly when you stop. SpO2 should not oscillate rapidly during rest.
If HR stabilizes during rest but becomes erratic during movement, the issue is likely micro-motion and fit. Tighten slightly (without discomfort) and re-test.
Step 5: Address perfusion—warm the skin and re-test
Cold skin reduces the optical signal and can lead to poor SpO2 and HRV reliability.
- Warm your hands (for example, a short indoor warm-up) and wait 5–10 minutes.
- Re-seat the device and repeat the rest test.
If SpO2 becomes steadier and HRV becomes less erratic after warming, your wearable is likely working but perfusion was too low for consistent PPG capture.
Step 6: Validate HR vs. your pulse to confirm plausibility
Optical HR can be checked with a simple manual method.
- After the device shows stable HR for 1–2 minutes, measure your pulse manually for 30–60 seconds.
- Compare the manual HR to the wearable’s displayed HR. Small differences are normal, but large discrepancies while still can indicate a sensor/contact issue.
If manual HR and wearable HR agree during rest but diverge during movement, you’re dealing with motion artifact rather than a broken sensor.
Step 7: Validate SpO2 using a controlled breathing check (not medical diagnosis)
SpO2 should generally remain within a plausible range during rest. You can do a non-diagnostic breathing check:
- Rest quietly with the device stable.
- Take normal breaths for 1 minute, then take a slightly deeper breath pattern for 30–60 seconds.
- Watch for rapid, unrealistic swings. SpO2 may show minor drift, but it should not jump dramatically without corresponding physiological explanation.
If SpO2 is highly unstable during rest, prioritize fit, cleaning, and perfusion steps. If instability persists across controlled conditions, move toward hardware and replacement considerations.
Step 8: Validate HRV measurement conditions—use the right window
HRV is sensitive to time window and state. A wearable validation protocol should include consistent conditions.
- Measure HRV at the same time of day when you’re typically rested.
- Avoid immediate post-exercise readings; allow a recovery period.
- Avoid measuring right after caffeine, alcohol, or a stressful event.
- Keep your wrist stable and your breathing calm.
If HRV looks erratic only when you’re moving, talking, or stimulated, the device may be functioning correctly but your measurement context is unsuitable for HRV reliability.
Solutions from simplest fixes to advanced fixes
Simple fixes that resolve most optical trust issues
- Re-seat the band: adjust tightness and placement according to the device guidance.
- Clean sensor and skin: remove oils, sweat residue, and sunscreen film.
- Stabilize the wrist: support your arm during rest checks.
- Warm the skin: improve perfusion before evaluating SpO2 and HRV.
- Control lighting: reduce direct sunlight exposure during testing.
Intermediate fixes if readings remain unstable
- Update firmware and app settings: some reliability issues are addressed through algorithm updates. Ensure the device is fully updated and the correct measurement mode is selected.
- Check strap wear and sensor alignment: stretched bands can cause shifting. If the strap no longer holds position, micro-motion increases.
- Try a different wrist position (within the manufacturer’s recommended area): a small shift can improve contact geometry.
- Repeat the validation protocol across multiple days: if you see consistent improvement after cleaning and warming, you’re likely dealing with contact/perfusion rather than hardware.
Advanced fixes when you suspect hardware or persistent optical failure
- Inspect the sensor window: look for scratches, cloudiness, or damage to the optical surface. Even small damage can scatter light and destabilize PPG.
- Test with a different strap/module (if your device supports it): this isolates strap fit from sensor hardware.
- Check charging behavior and power stability: if the device frequently reboots or shows battery instability, optical sensors can behave inconsistently.
- Compare across consistent conditions: wear both devices simultaneously during a controlled rest test. If one device is stable and the other isn’t under identical conditions, the unstable device is more likely at fault.
If you still see persistent “no signal,” extreme HR flutter during rest, or SpO2/HRV instability even after cleaning, correct fit, controlled lighting, and warming, hardware failure becomes more likely.
When replacement or professional help is necessary
Most optical reliability problems are solvable with cleaning, fit adjustments, and measurement-context changes. However, there are situations where replacement or professional evaluation is appropriate.
Consider replacement or service when
- Optical readings remain unstable after completing the validation steps in a controlled environment.
- The sensor window is visibly damaged (clouding, cracks, deep scratches) or the device frequently loses signal despite correct placement.
- HR and SpO2 fail in a consistent pattern across multiple days, even when your skin is warm and the device is cleaned and properly fitted.
- The device shows repeated software crashes, charging faults, or unexplained restarts that coincide with measurement dropouts.
Seek professional medical advice when
- You observe persistently low SpO2 readings that don’t match how you feel, especially if accompanied by shortness of breath, chest pain, confusion, or cyanosis.
- You have symptoms of illness (fever, persistent cough, suspected infection) and your wearable suggests abnormal oxygenation or sustained tachycardia.
- HRV instability coincides with concerning symptoms (dizziness, fainting, palpitations) rather than training variability.
Wearables can be helpful for trends, but they are not diagnostic tools. If the data suggests a potentially serious issue, professional evaluation should take priority over continued self-troubleshooting.
How to keep optical HR, SpO2, and HRV trustworthy after you fix the issue
Once you’ve stabilized readings, treat “trustworthy” as a process, not a one-time achievement. Consistency is the difference between useful data and confusing noise.
- Standardize your validation conditions: warm skin, stable wrist position, and similar lighting for at least a few check sessions.
- Use rest windows for HRV: avoid interpreting HRV during periods of movement, talking, or high stimulation.
- Clean on a schedule: especially if you use lotions, sunscreen, or sweat heavily. A quick wipe can prevent signal drift.
- Track reliability signals: if your wearable provides confidence indicators, pay attention to them. Low-confidence segments are often where “bad data” originates.
With this wearable validation protocol optical HR SpO2 HRV trustworthy workflow, you can separate measurement artifacts from true physiological changes—and make your biohacking foundation more dependable.
28.11.2025. 03:19