Indoor CO2 Monitor for Sleep: Set Up for Better Air at Night
Goal: Use an indoor CO2 monitor to improve sleep air quality
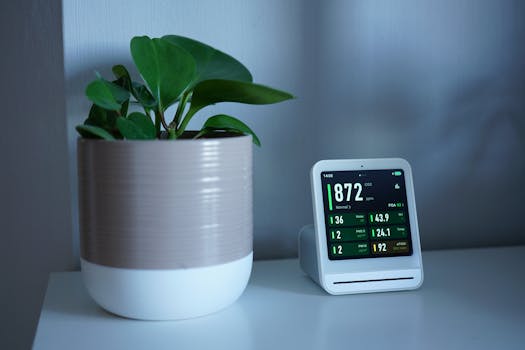
If you want better sleep, you need more than a cool bedroom and a quiet room. People exhale carbon dioxide (CO2), and elevated indoor CO2 often indicates poor ventilation. While CO2 isn’t the only factor that affects comfort, it’s a practical indicator of how much fresh air is getting into your sleeping space.
An indoor CO2 monitor for sleep helps you track ventilation patterns at night so you can adjust windows, HVAC settings, or air cleaning strategies. The goal is simple: capture reliable CO2 readings during the hours you actually sleep, then use the data to make targeted changes.
To do that well, you’ll need correct placement, correct calibration, and sensible alert thresholds. The steps below guide you through set-up from unpacking to night-time monitoring.
Preparation: What you need before you start
Before you power anything on, gather the essentials so you don’t waste time troubleshooting later.
- Your CO2 monitor (with included power supply or batteries).
- Placement options near the breathing zone (bedside shelf, wall mount position, or a safe tabletop spot).
- A phone or computer if your monitor uses an app or exports data.
- Time for calibration and baseline readings (often 20–60 minutes, sometimes longer depending on the device).
- Basic bedroom data: approximate room size, window types, and whether you run HVAC or a fan at night.
- Optional but helpful: a simple thermometer/hygrometer or a second sensor if you want to cross-check temperature and humidity trends.
Check the device manual for its specific warm-up time and calibration method. Some monitors self-calibrate (often called “auto-calibration”), while others require manual calibration using outdoor air or a calibration procedure.
Step-by-step: Set up your monitor for accurate nighttime readings
Choose the monitoring location at your breathing level. Place the monitor where it measures the air you breathe during sleep. A typical starting point is 3–6 feet (1–2 meters) from where you lie down, at about the height of your head or upper torso. Avoid placing it directly on the pillow or inside a blanket area.
Keep it away from sources that can distort readings. Do not put the monitor right next to a window that’s frequently opened, a fireplace, a cooking area, an air vent that blasts directly onto it, or a bathroom door where humidity spikes. Airflow from a vent can make the monitor read lower or fluctuate faster than what you experience.
Ensure steady airflow around the device. Your goal is representative room air, not a pocket of air trapped behind furniture. Leave a small clearance around the sensor so it can sample air naturally. If the monitor sits in a corner niche, readings may lag behind real conditions.
Power on and allow the sensor to stabilize. Many CO2 sensors require a warm-up period after powering on. Keep the bedroom conditions as normal as possible during warm-up. If the monitor has an “initial settling” phase, let it complete before interpreting results.
Calibrate correctly for your environment. If your device supports manual calibration, follow the recommended procedure. If it uses auto-calibration, ensure the device spends enough time in fresh-air conditions over multiple days so it can correct drift. For manual calibration, common practice is to calibrate in outdoor air when outdoor CO2 is relatively stable; follow your manufacturer’s instructions rather than assuming a universal outdoor value.
Record a baseline during a typical night routine. Before changing anything, run one night with your normal ventilation habits. Note the approximate time you go to bed, any window opening, and whether HVAC runs. If you use an app, enable data logging so you can review the CO2 curve.
Set alert thresholds that match sleep conditions. Use the monitor’s alarm feature if available. A practical approach is to set one lower “watch” threshold to prompt ventilation adjustments and one higher “action” threshold. Choose thresholds based on your comfort and your bedroom’s typical pattern, but start conservatively so you don’t ignore alerts.
Verify the monitor responds to ventilation changes. On a separate evening, make one controlled change (for example, crack the window for 10–20 minutes or adjust HVAC fan mode) and observe whether CO2 decreases afterward. This confirms the monitor is measuring the effect of ventilation decisions.
Use the data to decide what to change, not just to watch numbers. Look at the evening rise and the overnight peak. If CO2 steadily climbs and peaks near wake time, you likely need more fresh air during the first half of the night. If CO2 falls after a ventilation event but rebounds quickly, you may need longer ventilation or a more continuous air exchange method.
Lock in consistent settings for at least several nights. After you select a ventilation strategy (window cracked at a set width, HVAC schedule, or fan runtime), repeat it for multiple nights so you can confirm that the pattern is stable. CO2 is influenced by occupancy, room volume, and even how tightly the room is sealed.
Common mistakes that ruin CO2 monitor accuracy at night
Even reliable devices can produce misleading results if set up incorrectly. Avoid these issues:
- Placing the monitor directly in the air stream of a vent. This can create readings that don’t reflect the air you actually breathe.
- Mounting it too high or too low. CO2 distribution is influenced by air movement. If the sensor is at ceiling height while your breathing zone is lower, readings may lag or differ.
- Ignoring calibration requirements. If you skip calibration or use the wrong method, the monitor can drift and give you incorrect “good” or “bad” readings.
- Changing multiple variables at once. If you adjust the window, HVAC mode, and a fan all in one night, you won’t know which change affected CO2.
- Interpreting short spikes as the overall picture. CO2 can jump briefly when a door opens or someone walks in. Focus on the sustained trend during sleep hours.
- Using the monitor as a one-night decision tool. A single night may reflect an unusual occupancy pattern, weather shift, or window positioning. Confirm with several nights of data.
- Placing the monitor behind furniture or in a sealed enclosure. Restricted airflow can cause the sensor to sample stale air and distort the curve.
Additional practical tips to optimize sleep monitoring and ventilation
Once your setup is accurate, the next step is using the monitor in a way that improves comfort and reduces unnecessary disturbance.
Choose a ventilation approach that fits your sleep schedule
CO2 peaks often occur after the room has been closed for some time. If you typically go to bed at a consistent hour, you can time ventilation so it happens before CO2 reaches its highest levels. For example, if your CO2 rises for the first 2–4 hours after bedtime, start ventilation earlier rather than waiting until late night.
Consider how you will maintain airflow without waking yourself. A small, consistent air exchange method tends to be easier on sleep than large, intermittent adjustments.
Use CO2 trends with temperature and humidity awareness
CO2 alone doesn’t tell you whether the air feels comfortable. When you increase ventilation, temperature and humidity can change as well. If ventilation makes the room too cold or too dry, you may end up opening windows less often, which can bring CO2 back up. Monitor your general comfort and adjust ventilation duration or HVAC settings accordingly.
Account for occupancy and room dynamics
CO2 accumulation depends on the number of people, their activity level, and how much air the room exchanges. If you share the bedroom, your CO2 pattern will likely differ from nights when you sleep alone. Also note whether the bedroom door is open or closed. Door position can significantly affect how quickly CO2 rises.
Consider pairing with an air cleaning strategy when appropriate
Air purifiers can improve particle levels, but they don’t remove CO2 in the same way ventilation does. If you use an air cleaner for dust or allergens, keep it running consistently, but treat CO2 as a ventilation indicator. Your best CO2 reductions during sleep typically come from fresh air exchange (windows, HVAC outside-air intake, or controlled ventilation systems).
Review your data in a structured way
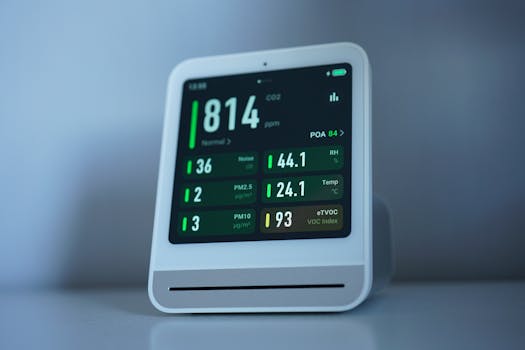
Instead of checking the monitor constantly, review the log once in the morning or after waking. Look for:
- Time-to-rise: how quickly CO2 climbs after bedtime.
- Peak concentration: the highest sustained level during sleep.
- Time-to-recovery: how long it takes to drop after ventilation.
- Consistency: whether the pattern repeats on similar nights.
If your monitor supports it, export data and keep a simple note of what you changed each night. This helps you converge on a stable routine.
Use device features correctly (and safely)
Many indoor monitors include additional sensors and settings. Use them intentionally:
- Alarms: set alerts so you can respond without fully waking. If the monitor is loud, consider lowering alarm volume or using a phone notification instead.
- Display brightness: reduce brightness at night if it disrupts sleep.
- Auto mode vs manual: if your device has modes, ensure they don’t change sampling behavior in unexpected ways during sleep hours.
If you’re using a monitor that supports integration with other systems, confirm that the app doesn’t change settings automatically overnight in a way that affects readings.
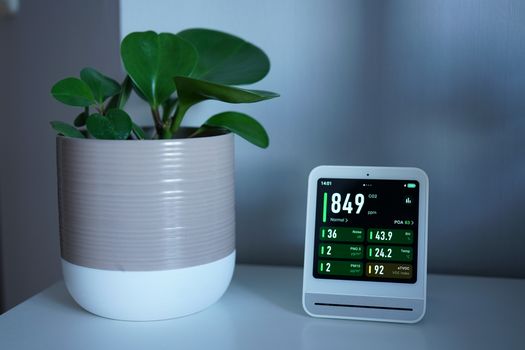
Where to place common monitor types in real bedrooms
Placement is the difference between “useful trend data” and “numbers that don’t match your experience.” Practical starting points:
- Bedside shelf: good for stable readings if the shelf isn’t in a vent stream and isn’t tucked behind objects.
- Wall mount near the headboard: often stable, but ensure it’s not above a heating register or direct airflow.
- Nightstand: acceptable if you keep it away from direct vents and don’t cover it with bedding.
If you find that CO2 changes sharply when you move, adjust the monitor’s location so it samples the general room rather than micro-air movements near your body.
Examples of practical setups you can replicate
Use these as templates for your first optimization cycle:
Example 1: Window micro-ventilation. Keep the window closed for the first hour after bedtime, then open it slightly for 20–30 minutes. Monitor whether CO2 peaks later or at a lower level. If CO2 rebounds quickly, extend the ventilation window or start earlier.
Example 2: HVAC schedule adjustment. Run the HVAC fan on a continuous or scheduled setting for the first half of the night. Compare the CO2 rise rate to the baseline night.
Example 3: Door management consistency. Keep the bedroom door in the same position each night for a week. If CO2 is consistently lower with the door closed, keep it closed; if it’s lower with the door open, you may benefit from a consistent airflow path.
Relevant device features to look for when selecting a monitor
If you’re choosing a monitor for sleep (or replacing one), prioritize features that support accurate overnight use:
- Stable sensor performance and clear calibration instructions (manual or well-documented auto-calibration).
- Data logging so you can review trends the next morning.
- Adjustable alarms that don’t require you to wake up to act.
- Low display brightness options to avoid light disruption.
- Fast response without excessive noise so you can see meaningful changes after ventilation adjustments.
Some monitors from established indoor air brands—often sold as CO2 and air-quality devices for home use—support app-based graphs and night-friendly settings. Regardless of brand, follow the calibration and placement guidance in the manual.
After setup: Turn monitoring into a repeatable nighttime routine
Once placement, calibration, and baseline logging are done, your indoor CO2 monitor becomes a routine tool rather than an experiment. Aim for a consistent sleep environment: the same bed location, the same ventilation approach, and the same door and HVAC behavior. Over several nights, you’ll see a clear pattern in CO2 rise and recovery.
When you make adjustments, change one variable at a time and observe how the CO2 curve responds. That’s how you convert CO2 data into actionable ventilation decisions that support sleep—without guessing.
With accurate placement and a few nights of logged trends, you’ll know what your bedroom needs to stay ventilated during sleep hours, and you’ll be able to adjust calmly and consistently rather than reacting to air quality only when it feels “off.”
31.01.2026. 08:45