

validate wearable HRV sensor accuracy protocol

Understand what you’re validating (and what “accurate” means)
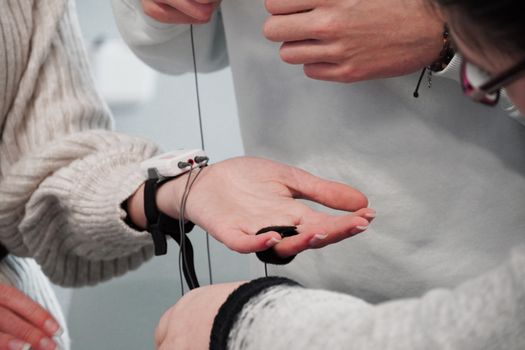
Your goal with a validate wearable HRV sensor accuracy protocol is simple: determine whether your wearable’s HRV metrics are reliable enough for the way you’ll use them—training decisions, recovery tracking, or clinical-adjacent monitoring.
HRV is sensitive to many non-physiological factors: sensor contact, skin temperature, motion artifacts, breathing patterns, time of day, and even how you sit. “Accurate” doesn’t always mean identical to a lab-grade ECG. Instead, you want consistent, repeatable readings under controlled conditions and predictable agreement with a reference method.
In practice, you’ll validate in two layers:
- Signal quality: Can the wearable consistently produce usable HRV data (low artifact, stable signal)?
- Metric agreement: Do the wearable’s HRV values track closely with a reference across short test windows?
For most users, the most actionable protocol focuses on short, repeatable sessions (10–20 minutes each) and a consistent reference setup.
Prepare your setup: reference, environment, and tracking baseline
Before you start, decide what reference you’ll use and how you’ll control conditions. The more stable your setup, the more meaningful your results.
Choose a reference method
Pick one:
- ECG (gold standard for many settings): Use an ECG chest strap or medical-grade ECG device if available. Many consumer ECG straps (e.g., Polar H10) can provide R-R intervals suitable for HRV calculation.
- High-quality HR monitor with R-R intervals: If ECG isn’t available, choose a monitor that provides raw R-R timing (not just heart rate). The key is the ability to compute HRV from accurate beat-to-beat intervals.
If you’re validating a wearable that reports HRV as RMSSD or similar time-domain metrics, try to compute the same metric from your reference R-R intervals over the same time windows.
Use consistent test conditions
Set yourself up for repeatability:
- Room temperature: Aim for 20–24°C (68–75°F) if possible. Cold hands can reduce sensor contact quality.
- Time of day: Test at the same time daily, or within a 2–3 hour window. HRV has daily rhythms.
- Caffeine/alcohol: Avoid caffeine for 4–6 hours before testing. Avoid alcohol for 24 hours if you want “baseline” stability.
- Exercise: Avoid hard workouts for 12–24 hours before your validation sessions.
- Hydration: Drink normally. Don’t “overhydrate” right before testing.
Prepare the wearable for best contact
Wearables vary a lot in how they capture HRV. Before you start, do a quick contact check:
- Placement: Keep the sensor centered over the pulse area (not drifting toward the wrist crease).
- Tightness: Snug enough to prevent sliding, but not so tight that it leaves deep marks. If your device has a fit guide, follow it.
- Skin prep: Clean the sensor area and dry your skin. Sweat residue can degrade signal.
- Warm-up: Give the wearable 5–10 minutes to stabilize before you start recording.
Set up data capture
You need a way to capture both streams:
- Wearable HRV data: Use the device app or export feature if available.
- Reference data: Record R-R intervals or export HRV/beat data from the reference monitor software.
Use a consistent session length and record timestamps. If you can’t align exact timestamps, you can still validate using overlapping windows, but plan for that in your analysis.
Run a controlled validation session (10–20 minutes)
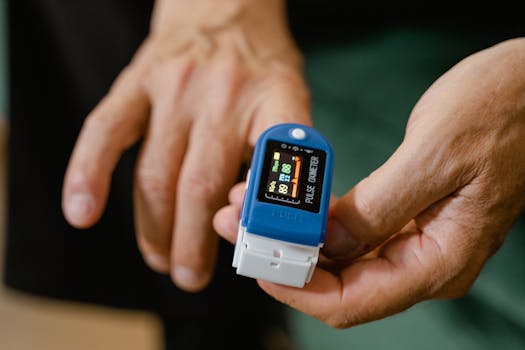
Now you’ll test both signal quality and agreement. The core protocol uses stable periods and small, reproducible changes. You’re looking for HRV that behaves logically and consistently.
Step 1: Choose your test window and posture
Pick a posture you can repeat exactly. Most people do best with:
- Sitting upright, back supported
- Feet flat on the floor
- Hands relaxed on thighs or armrests
- Neck neutral (no looking down at the phone)
Use a timer. Plan for 15 minutes total for each session to keep it realistic.
Step 2: Start both devices and confirm stable signals
Start the reference monitor and wearable at the same time if possible. If not, start them within 30 seconds of each other.
Wait 5 minutes for stabilization. During this time, watch for wearable indicators of poor signal (e.g., “move detected,” low signal quality, or missing HRV values).
Only proceed when both devices show stable beat detection.
Step 3: Record a baseline segment (5 minutes)
For the baseline, keep everything still:
- No talking
- No phone scrolling
- Breathing natural (don’t intentionally control it yet)
Capture HRV from both devices for a 5-minute segment. If your wearable updates HRV in shorter windows (like 1-minute or 30-second), note the update cadence so you can align windows later.
Step 4: Add a controlled breathing segment (3–5 minutes)
To test whether HRV responds in a predictable way, run a standardized breathing pattern. Use a metronome or breathing app.
Try one of these patterns:
- 4.5–5 breaths/min: Often used for HRV-related breathing effects (about 12–13.3 seconds per breath cycle)
- 6 breaths/min: About 10 seconds per breath cycle
Keep your breathing consistent and do not move your arms.
Record HRV again for this segment. The goal is not to “improve HRV,” but to confirm that your wearable tracks changes similarly to your reference.
Step 5: Add a brief movement challenge (1–2 minutes)
HRV is extremely sensitive to motion artifacts. This step validates whether the wearable can reject noise or whether it produces spurious HRV.
Do one controlled challenge:
- Raise and lower your hand slowly (or gently flex the wrist) for 60–90 seconds, without bouncing.
- Then stop and return to stillness for 1 minute.
From this segment, you’ll learn whether the wearable produces stable HRV only when motion is absent, and whether it recovers quickly.
Step 6: Repeat the entire session on a different day
Do not validate on a single day. Repeat at least twice across 2–7 days.
For example:
- Session A: Tuesday morning
- Session B: Thursday evening
Try to keep conditions similar. If you can’t, at least keep the posture and breathing protocol identical.
Analyze agreement: decide what you’ll measure and how you’ll judge it
After you collect data, your analysis should focus on two things: consistency and trend-tracking.
Step 7: Align HRV windows between devices
Wearables often compute HRV on rolling windows (for example, 30–60 seconds). Your reference may produce HRV over longer windows (like 1–5 minutes) depending on software.
To keep it practical:
- Use the same metric (e.g., RMSSD) if available from both sources.
- Compare overlapping windows (e.g., wearable 1-minute windows matched to reference 1-minute windows computed from the same time span).
- If you can’t compute the exact same window, use the closest consistent window length and document it.
Keep notes. Your future self will thank you.
Step 8: Evaluate signal quality first, then metric agreement
Start with signal quality. A wearable that outputs HRV during poor contact is not trustworthy even if the numbers sometimes “look right.”
Use these checks:
- Missing values: How often does HRV drop out?
- Artifact behavior: During movement, does HRV spike unrealistically, or does it remain stable?
- Stability at rest: In baseline stillness, does HRV remain within a reasonable band across the 5-minute segment?
Then evaluate agreement using trend behavior. You can look for:
- Baseline RMSSD values that are consistently “higher/lower” relative to reference across sessions.
- Breathing segment showing a consistent shift direction (even if absolute values differ).
- Movement segment showing either artifact sensitivity (expected) or rapid recovery to baseline after stillness.
Step 9: Set practical acceptance thresholds
Instead of chasing laboratory-level matching, set thresholds that reflect your use case. For many users, a reasonable approach is:
- Within-session consistency: HRV values should not jump wildly between adjacent windows during stillness.
- Cross-session repeatability: Baseline HRV should show the same general magnitude across days when conditions are similar.
- Trend alignment: When breathing changes, HRV should respond in the same direction as the reference.
If your wearable is consistently unstable (frequent dropouts, erratic spikes during stillness), improve fit and signal conditions before you judge accuracy.
Common mistakes that break HRV validation
Most validation failures come from avoidable setup issues. Avoid these.
Step 10: Don’t validate while the wearable is still “settling”
If you start recording immediately after putting the watch on, you’ll capture unstable contact. Always allow 5–10 minutes of warm-up and confirm signal stability.
Step 11: Don’t compare mismatched metrics or different HRV definitions
Some wearables report RMSSD, others report SDNN, and some report proprietary indices. If you compare the wrong metric, your agreement will look poor even when the sensor is functioning well.
Step 12: Don’t ignore breathing and posture differences
HRV changes with breathing. If you breathe naturally in one session and follow a breathing pattern in another, you’re testing two variables at once. Keep breathing instructions identical across validation days.
Step 13: Don’t let motion artifacts contaminate “rest” segments
Rest segments should be truly still. Even small arm movements can distort beat detection for optical sensors. If your wearable has a movement warning, treat it seriously.
Step 14: Don’t validate after a heavy meal or poor sleep (unless you intend to)
HRV is affected by physiology and stress. If you’re validating accuracy for recovery tracking, you need baseline sessions where your body is not in an extreme state.
Practical tips to optimize accuracy for real-world use
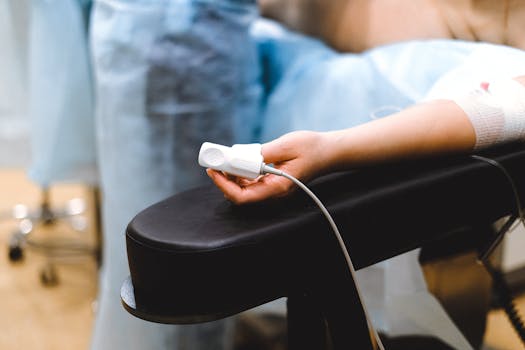
Once you validate, the next step is making your wearable behave reliably in daily life. You can’t control everything, but you can reduce variability.
Step 15: Standardize your “daily HRV capture” routine
Pick one routine and stick to it. For example:
- Morning, seated quietly for 5 minutes
- Natural breathing
- Same room and time window (within 2 hours)
If you track HRV to guide training, this routine becomes your personal measurement protocol.
Step 16: Use fit adjustments based on your validation results
If your wearable struggles with contact, try:
- Repositioning slightly higher on the wrist (still over the pulse area)
- Tightening by a small amount (enough to prevent sliding)
- Ensuring skin is dry before you start
After each fit change, run one short re-check session (10 minutes) to confirm improvement.
Step 17: If you want stronger breathing consistency, use a metronome
Breathing-based HRV protocols are easier when your breathing is externally cued. Use a phone timer or metronome app and keep the same breath rate across sessions.
Try 4.5–5 breaths/min for 3–5 minutes. Then return to natural breathing for baseline comparisons.
Step 18: Consider pairing with a chest strap reference during your own validation phase
If you’re serious about accuracy validation, a chest strap ECG-style reference can help you understand whether your wearable is tracking your physiology or mostly reflecting sensor noise.
Many people start with a reference chest strap (for example, a device like Polar H10 paired to the appropriate app/software) during validation weeks. Soft approach: use it only when you need calibration confidence, not necessarily forever.
Real-world scenario: validating for training recovery decisions
Here’s a practical example you can mirror.
You train 5 days/week and want HRV to help decide whether to do heavy lifting or a lighter session. You wear a wrist-based optical HRV device and you’re unsure whether it’s reliable.
Week 1:
- Tuesday: baseline (5 min), paced breathing (4 min at ~6 breaths/min), movement (1 min), then stillness (1 min). Record everything.
- Thursday: repeat the same protocol at the same time window.
Reference:
- You use an ECG chest strap with beat-to-beat data to compute RMSSD over matching windows.
What you learn:
- Baseline stillness: your wearable’s HRV values shift in the same direction as the reference and are consistent across sessions.
- Paced breathing: HRV changes direction and magnitude is reasonably aligned (even if absolute values differ).
- Movement: HRV spikes are obvious during the movement segment, but the wearable returns to baseline quickly after stillness.
Decision:
- You accept the wearable for rest-based HRV capture.
- You stop using it during the day when you’re moving or stressed and focus on a daily 5-minute seated protocol.
This is the point of validation: not to force perfect agreement, but to make your measurement useful and predictable for your training workflow.
Turn your validation into an ongoing quality check
Validation isn’t a one-time event. You can keep your results meaningful by doing quick checks when conditions change.
Step 19: Do a monthly “fit and signal” check
Once a month, repeat a short 10-minute session at rest (baseline only). Confirm:
- HRV values appear consistently without frequent dropouts
- Baseline values are stable across the segment
- You don’t see frequent artifact spikes
If performance changes—new strap, different skin condition, seasonal temperature changes—adjust fit and re-run your full protocol.
Step 20: Document changes that affect readings
Keep a simple log:
- Wear location (wrist left/right)
- Strap tightness (snug/loose)
- Skin dryness (dry/sweaty)
- Any changes in caffeine, sleep, or medications
Over time, you’ll see patterns that explain why your HRV looks different—even when the sensor is working correctly.
Step 21: Use your validation results to guide interpretation
After you validate, you’ll likely find one of two outcomes:
- Your wearable is reliable for rest-based HRV tracking, but less reliable during movement.
- Your wearable struggles with signal quality, and you need better fit, more consistent timing, or occasional reference checks.
Either way, the protocol gives you a grounded interpretation framework. That’s what makes your HRV data actionable.
Final checklist you can use before trusting your HRV
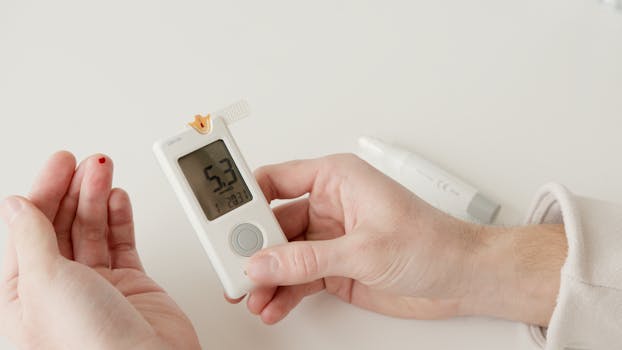
- You recorded at least two sessions on separate days with the same posture and breathing instructions.
- You warmed up the wearable 5–10 minutes and verified stable beat detection.
- You aligned HRV windows and compared the same HRV metric type (e.g., RMSSD vs RMSSD).
- You confirmed signal quality at rest and understood how movement affects readings.
- You standardized your daily HRV capture routine (time, posture, and breath behavior).
If you can check all of these, you’ve effectively validated your wearable HRV sensor accuracy protocol for your real-life use.
29.11.2025. 22:15