

Best Heart Rate Zones Method: Polar, Garmin, HRR, or Lactate?

Four popular ways to set heart rate zones—and why the details matter

Heart rate zones look simple on paper: pick a number, train within a range, and progress. In practice, the “best heart rate zones method” depends on how your zones are calculated and how well your device estimates effort. Two athletes can both “do zone 2,” yet train at meaningfully different intensities if their zone model is different.
This comparison focuses on four widely used approaches:
- Percentage of Max Heart Rate (HRmax) (commonly used by Polar-style zone tables)
- Percentage of Heart Rate Reserve (HRR) (Karvonen method, often found in Garmin-style training)
- Threshold-based zones (using Functional Threshold Power/Heart Rate concepts; some plans approximate this with measured thresholds)
- Lactate/biochemical-informed zones (more lab-accurate, less common, sometimes approximated in field tests)
You’ll see where each method tends to be accurate, where it breaks down, and what that means for your training—especially if you’re using a real watch like a Garmin Forerunner, a Polar, or a Coros that maps HR to zones.
Quick summary: If you want the strongest overall blend of simplicity and performance, the best heart rate zones method for most endurance athletes is HRR (Heart Rate Reserve) using a realistic HRmax and HRrest, then refining with your threshold (or a practical field test). It adapts better to individual physiology than raw HRmax percentages, and it’s easier to implement than lactate testing.
Quick summary: the strongest overall option
If you’re training for distance, aerobic base, or general endurance improvements, start with HRR-based zones (Karvonen) and then align them to what your body actually does around your threshold. In most cases, this yields zones that “feel right” and produce consistent pacing across weeks.
For athletes who can access lab testing or have reliable threshold data, threshold-based or lactate-informed zones can be more precise. But precision is only valuable if you can measure it reliably and update it as fitness changes.
Side-by-side comparison: how each heart rate zone method defines effort
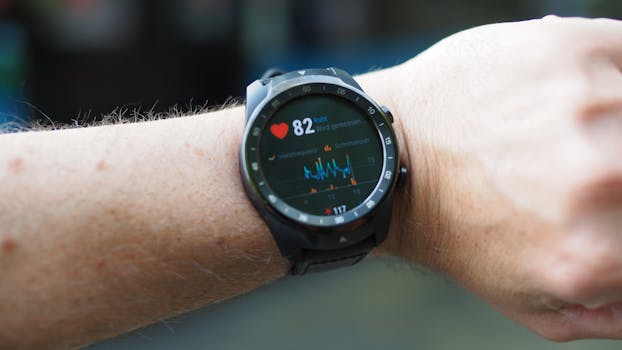
Below is a practical comparison of how the methods usually set zones, what inputs they require, and what differences you should expect when you use them for real training.
| Method | Typical input(s) | How zones are calculated | Common strengths | Common weaknesses | Best fit |
|---|---|---|---|---|---|
| HRmax % (Polar-style tables) | HRmax estimate (often age-based) or lab HRmax | Zone = % of HRmax | Simple to set up quickly; works decently when HRmax is accurate | If HRmax is off by 5–10 bpm, every zone shifts; many “age-based HRmax” estimates underperform | Beginners, quick setup, low-stakes training |
| HRR % (Karvonen; Garmin-style is often HRR) | HRrest + HRmax (measured or well-estimated) | Zone = HRrest + % of (HRmax − HRrest) | Better individualization; often improves “zone 2” targeting for aerobic work | Needs stable HRrest; HRmax estimation still matters | Most endurance athletes; especially if you want consistent aerobic/pacing targets |
| Threshold-based (field/lab threshold) | Measured threshold HR (or power) and sometimes second thresholds | Zones anchored to LT1/LT2 or functional thresholds | Often best alignment to how intensity changes during workouts | Thresholds drift; measurement method matters; can be time-consuming | Structured training, athletes who test periodically |
| Lactate-informed (lab LT1/LT2/OBLA) | Lactate samples + HR at each intensity | Zones tied to lactate thresholds and rates | High physiological accuracy; clear boundaries | Not practical for frequent updates; lactate response varies by protocol and modality | Competitive athletes, research-minded training |
Real-world performance differences: what you’ll notice in your workouts
The biggest differences show up in the “gray zone” areas—especially the lower aerobic band you’ll use for long rides, runs, and swims.
1) Zone 2 drift: same label, different intensity
Consider a practical example. You run with a watch that reports zones. If your zones are set using HRmax percentages with an HRmax estimate that’s 8 bpm too high, your “zone 2” will be too easy. Over months, you might spend extra time in a training state that doesn’t build the aerobic engine you expected.
Now flip it: if HRmax is underestimated, your zone 2 becomes too hard. That often shows up as unexpected fatigue by week 3–4, even if your total mileage looks reasonable.
HRR-based calculations reduce this problem because they anchor the range to both your resting HR and your HRmax, which tends to track individual physiology more closely.
2) Workout pacing consistency: threshold-based methods “hold shape” better
In tempo and threshold sessions, athletes care less about “meeting a perfect percentage” and more about sustaining a target effort. Threshold-based zones usually track that better. If you do a 3 x 10-minute session at your threshold, you want your heart rate to land around the same band each time.
When you use HRmax % zones, heart rate can be more variable due to factors like heat, hydration, caffeine, and course elevation. Threshold-based anchoring typically makes those sessions more repeatable.
3) Lab-lactate precision doesn’t automatically translate to better training
Lactate-informed zones can be extremely accurate in a controlled test. But your weekly training still runs in the real world—wind, hills, different footwear, and even sleep changes. If you can’t update lactate zones every 4–8 weeks, the “precision advantage” can shrink quickly.
In other words: lactate testing can tell you what’s true today. Your training benefits most when your zones remain aligned to your current physiology.
Pros and cons breakdown for each heart rate zones method
HRmax percentage method (Polar-style tables)
Pros
- Fast setup: You can get started in minutes.
- Works if HRmax is accurate: If you’ve measured HRmax (or have a reliable test), zones can be stable.
- Easy to understand: You know you’re training at “80% of max,” etc.
Cons
- Sensitivity to HRmax error: Even a 5–10 bpm mistake can shift every zone.
- Age-based HRmax is often a guess: For athletes, it frequently underestimates or overestimates real max.
- Less individualized at low intensity: Your resting physiology isn’t directly used, so “zone 2” can miss the mark.
HRR (Heart Rate Reserve) method (Karvonen; common in Garmin training)
Pros
- More personalized: Uses HRrest + HRmax, which tends to better reflect your cardiovascular baseline.
- Usually improves aerobic targeting: Many athletes find their zone 2 becomes more usable and less “mushy.”
- Simple to adjust: If your HRrest changes, you can update it without recalculating everything from scratch.
Cons
- HRrest variability: Stress, poor sleep, and early training can elevate resting HR, which can distort zones if you update too aggressively.
- Still depends on HRmax: If HRmax is wrong, HRR still shifts all zones.
- Device settings matter: Some watches calculate zones slightly differently (rounding, thresholds, or how they interpret HRmax).
Threshold-based zones (measured threshold HR)
Pros
- Better workout specificity: Your “tempo” and “threshold” sessions tend to match how intensity feels.
- Often improves repeatability: Heart rate bands align more consistently across similar efforts.
- Great for structured plans: Interval prescriptions map more directly to training outcomes.
Cons
- Requires testing: You need a reliable threshold estimate (field test, ramp test, or power-based proxy).
- Threshold drift: Fitness changes; if you never update, zones can become outdated.
- Not always transparent: Some devices label zones without showing the underlying threshold model.
Lactate-informed zones (lab LT1/LT2/OBLA)
Pros
- Highest physiological specificity: Lactate is a direct marker of metabolic stress.
- Clear boundaries: LT1 and LT2 provide distinct anchors for training intensity.
- Useful for race-specific planning: Especially for athletes targeting a specific pace range.
Cons
- Less practical to update: Lactate testing every 4–8 weeks is costly and time-consuming.
- Protocol dependence: Results can vary with treadmill vs. bike, ramp speed, and sampling technique.
- May not outperform good field-based thresholds: Precision doesn’t always beat consistency.
Best use-case recommendations: which method fits your training style
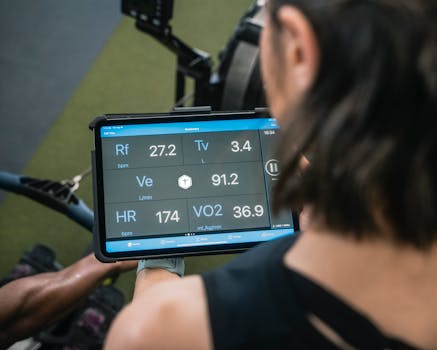
Here’s how to choose based on your goals and how you actually train.
If you’re building an aerobic base (most runners/cyclists/swimmers)
Recommended method: HRR-based zones, then sanity-check with a threshold session or a simple field test.
Why: Zone 2 is where most endurance volume lives. HRR typically gives you a more accurate low-intensity band than HRmax % tables—especially when your resting HR is stable and your HRmax is measured.
Device-friendly approach: If you’re using a Garmin, you can set HR zones using HRR. Pair that with a chest strap (e.g., Garmin HRM-Pro style) for better accuracy on climbs and intervals.
If you do a lot of structured intervals and want tighter intensity control
Recommended method: Threshold-based zones with periodic updates.
Why: Your “hard days” are where precision matters most. Threshold anchoring reduces the “zone label mismatch” that can happen with HRmax % methods.
Practical example: You’re training for a 10K and run 2 tempo sessions/week. After a ramp test gives you a threshold HR, your watch zones become a tool for consistency. Instead of “somewhere in the 170s,” you’re targeting a narrower band that matches your actual lactate rise point.
If you want the quickest setup and don’t want to test
Recommended method: HRmax percentage zones, but only if you’re willing to refine.
How to make it work: Use age-based HRmax as a starting point, then adjust after you do a hard session where you can confirm a realistic max (for many athletes, a best-effort near-max effort during intervals or a ramp test is better than guessing).
Where it shines: Beginners and casual endurance athletes who prioritize consistency over physiological precision.
If you’re competitive and can justify testing costs
Recommended method: Lactate-informed zones or lab-threshold mapping, then transition to field-based updates.
Why: Lab testing can define your anchors precisely. But you’ll still want a practical method to keep zones current—usually by re-testing threshold HR every 6–12 weeks or after major training blocks.
Best pairing: Use lab-derived zones to calibrate your watch, then rely on threshold-based checks in the field.
Final verdict: which heart rate zones method should you use?
Best overall for most endurance athletes: HRR-based zones (Karvonen) with a realistic HRmax and stable HRrest, optionally refined with threshold information. This is the best heart rate zones method balance of accuracy, simplicity, and day-to-day usability.
Choose threshold-based zones if: you’re doing frequent tempo/interval work and you want your “tempo” and “threshold” sessions to match the same physiological intensity week after week. It tends to produce the most useful differences in hard workout execution.
Choose HRmax % zones if: you want an easy starting point and you can accept that zone accuracy depends heavily on your HRmax being correct. It’s the least forgiving method when HRmax is off.
Choose lactate-informed zones if: you have access to lab testing and you can translate it into a maintenance plan. It’s the most precise, but precision only pays off when you can keep your zones aligned to your current fitness.
If you want one clear recommendation: set HRR zones first, then validate them with one solid threshold-oriented workout and adjust based on what your heart rate does at effort. That approach usually gets you closer to the training intensity you intended—without needing a lab every time your fitness changes.
02.05.2026. 08:54