Fat Loss Training Using HRV, Resting Heart Rate, and Sleep
Goal: Use HRV, resting heart rate, and sleep to guide fat loss training
Fat loss training works best when you apply the right effort on the right days and recover fully enough to keep training quality high. HRV, resting heart rate (RHR), and sleep duration/quality give you a practical feedback loop. Instead of guessing whether your body is ready for hard sessions, you can use these signals to decide when to push, when to reduce intensity, and how to structure your week for consistent progress.
This guide shows you a step-by-step method to implement “readiness-based training” for fat loss. The focus is on using HRV, RHR, and sleep to adjust training stress while maintaining enough weekly exercise to support energy expenditure and metabolic health.
Preparation: What to track, how to set up, and what “normal” looks like
Before you change your training, set up your measurement system and establish personal baselines. Your body’s signals are highly individual, so the “rules” below depend on your own trends over time.
Tools and setup
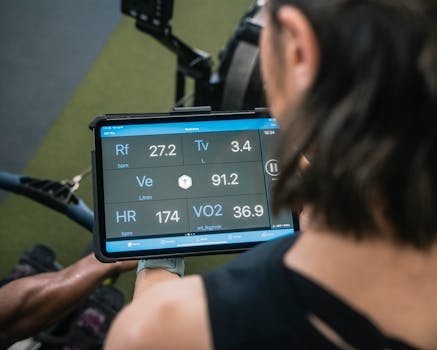
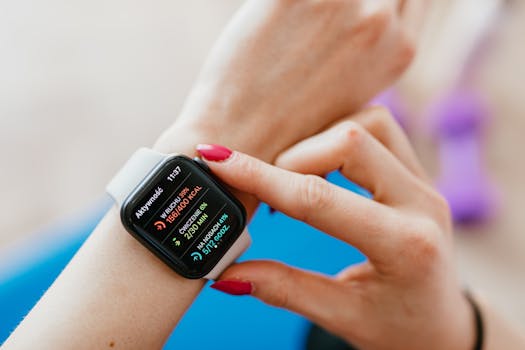
- Wearable that reports HRV and resting heart rate (common examples include Garmin, Oura, Whoop, Apple Watch with compatible apps). Choose one system and stick with it for accurate trend tracking.
- Sleep tracking from the same wearable if possible, including sleep duration and sleep staging/efficiency if available.
- Training log (notes app, spreadsheet, or training diary) to record workouts, perceived exertion (RPE), and any adjustments you make based on HRV/RHR/sleep.
- Consistent measurement conditions: wear the device snugly, keep it on the same side of the body, and measure at roughly the same time each night.
Establish baselines (do this before making decisions)
For at least 2–3 weeks, track HRV, RHR, and sleep without major training changes. During this period:
- Look at your typical nightly HRV (not a single day).
- Identify your typical morning resting heart rate range.
- Note your usual sleep duration and how often you fall below your target.
When you start deciding, use a simple approach: compare today’s values to your personal 2–3 week average or typical range. If you want a starting point, aim for:
- HRV “lower than normal”: often 10–20% below your usual nightly HRV average (or a clear downward trend for multiple days).
- RHR “higher than normal”: often 5–10% above your typical morning RHR average, especially if it persists.
- Sleep shortfall: missing your usual sleep duration by ~60–90 minutes or more, or consistently poor sleep quality/staging.
These are starting thresholds. Your body will tell you what “meaningful” looks like over time.
Step-by-step: Build a readiness system for fat loss training using HRV, resting heart rate, and sleep
Use this process to decide what type of training to do each day. The goal is not to avoid training; it’s to match training stress to recovery so you can sustain weekly effort without accumulating excessive fatigue.
Step 1: Define your training week structure
Choose a simple weekly plan you can repeat. A common fat loss structure is:
- 2–3 strength sessions (full-body or upper/lower split) to maintain muscle and support metabolic demand.
- 1–2 interval or higher-intensity cardio sessions (short bouts) to improve conditioning.
- 1–3 low-intensity cardio or active recovery sessions (easy pace, incline walking, cycling) to increase daily energy expenditure.
- At least 1 full rest day if sleep or readiness signals show you need it.
Then use HRV/RHR/sleep to adjust each session’s intensity or volume.
Step 2: Create three readiness zones
Use your baseline to sort each morning into one of three zones. You’ll decide training intensity based on the combination of signals, not just one metric.
- Green zone (ready): HRV near your usual range, RHR near your typical range, and sleep was consistent with your target.
- Yellow zone (caution): HRV lower than normal or RHR higher than normal, and/or sleep was shorter or less restorative than usual.
- Red zone (recover): HRV significantly suppressed for you and/or RHR clearly elevated, especially if sleep was poor and the pattern repeats across multiple days.
Practical rule: if two or more signals point to poor recovery, treat it as Yellow or Red even if one metric looks “okay.”
Step 3: Decide today’s session type using the zones
On training days, choose one of the following actions based on the zone:
- Green (ready): Perform your planned session. Use normal targets (loads, intervals, total work).
- Yellow (caution): Keep the session but reduce stress. For strength, use fewer sets or reduce load by ~5–10%. For intervals, shorten total work or extend rest. For cardio, switch to steady easy intensity.
- Red (recover): Replace intensity with low-stress movement (easy walk, mobility, light cycling) or take a rest day. Aim for movement without pushing heart rate high.
This is the core method that links biometrics to training decisions for fat loss.
Step 4: Use HRV trends, not single-night noise
HRV can fluctuate due to stress, hydration, alcohol, illness, travel, and even measurement differences. To avoid overreacting:
- Track whether HRV is consistently trending down for 2–3 nights.
- Check whether RHR is simultaneously rising.
- Consider whether you had an obvious stressor (late night, poor sleep, missed meals, intense training yesterday).
If HRV drops once but sleep was otherwise good and RHR is normal, you may stay in Green. If HRV stays low and RHR stays high, move to Yellow or Red.
Step 5: Use resting heart rate to confirm fatigue and guide recovery
RHR is often slower to change than HRV and can reflect accumulated fatigue. Use it as a confirmation signal:
- If HRV is low and RHR is high, treat the day as Yellow/Red even if you feel “mentally ready.”
- If HRV is low but RHR is normal, consider a Yellow adjustment (slightly reduced volume) rather than a full recovery day.
Also pay attention to “step changes.” If RHR jumps noticeably for multiple mornings, it can indicate illness onset or recovery impairment. In those cases, reduce training intensity and prioritize sleep.
Step 6: Use sleep duration and quality to set your daily intensity ceiling
Sleep is a major driver of recovery and training adaptation. Use it to set an intensity ceiling:
- If sleep was near your baseline, you can keep planned intensity in Green.
- If sleep was short or fragmented, cap intensity in Yellow: fewer hard sets, shorter intervals, and more steady cardio.
- If sleep was very poor or you had unusually low sleep quality, treat the day as Red: low-stress movement only.
Example: Suppose your planned day includes 6–8 rounds of intervals. In Yellow from short sleep, do 3–4 rounds at the same effort per interval but stop early once you hit your reduced total work target.
Step 7: Apply adjustments that preserve fat loss training quality
When you reduce training stress, preserve the elements that support fat loss:
- Keep movement volume: even on Red days, aim for a walk or easy bike session to maintain low-level energy expenditure.
- Maintain strength stimulus when possible: in Yellow, do fewer sets rather than skipping all work. In Red, focus on technique, mobility, or very light circuits.
- Prioritize consistency over intensity spikes: multiple weeks of smart adjustments outperform one week of maximal effort followed by multiple days of compromised recovery.
For strength in Yellow, you might keep the same exercises but reduce total sets by 30–40% and stop each set with more reserve (for example, 3–5 reps in reserve instead of 1–2).
Step 8: Review weekly patterns and refine your thresholds
At the end of each week, look at:
- How often you were in Yellow/Red
- Whether those days correlated with performance drops (heavier weights felt harder, intervals were slower, form degraded)
- Whether you improved sleep and HRV after you made adjustments
Then refine. If you’re constantly in Yellow, your plan may be too aggressive. If you rarely hit Yellow but performance is stable, your thresholds may be too strict or your baseline is broad. The goal is a system you can follow without constant second-guessing.
Common mistakes that undermine HRV-based fat loss training
Even good measurement can lead to poor decisions. Avoid these pitfalls:
- Overreacting to one bad night: HRV can drop from stress, caffeine, alcohol, or travel. Use trends and confirm with RHR and sleep.
- Ignoring strength and movement quality: if you only reduce cardio but keep pushing heavy lifting when recovery is poor, you may still accumulate fatigue.
- Changing too many variables at once: if you alter training, sleep schedule, and diet simultaneously, you won’t know what caused changes in HRV/RHR.
- Training at the same intensity regardless of signals: the whole point is to match effort to readiness. If you do not adjust, the metrics won’t help.
- Using a different wearable or loose fit: device changes and inconsistent placement can shift HRV and RHR readings.
- Confusing “low HRV” with “bad all the time”: sometimes low HRV is temporary and not linked to actual overreaching. Confirm with RHR and performance.
Additional practical tips and optimisation advice
To make this approach work long-term, focus on measurement consistency, recovery habits, and training that supports fat loss without chronic fatigue.
Use a simple daily decision checklist
Before training, quickly check:
- HRV relative to your baseline (trend for 2–3 nights)
- Morning RHR relative to baseline
- Sleep duration and whether it was consistent
- Any obvious stressor (illness symptoms, travel, late caffeine, missed meals)
If two or more items suggest poor recovery, choose Yellow/Red adjustments even if you feel fine.
Prioritise sleep regularity to stabilise HRV and RHR
One of the fastest ways to improve readiness tracking is to reduce sleep variability:
- Keep a consistent wake time on most days.
- Reduce late caffeine and heavy alcohol use.
- Use a wind-down routine (dim lights, reduce screens) to protect sleep onset.
As sleep stabilizes, your HRV and RHR signals become more reliable for decision-making.
Structure “recovery movement” on Yellow/Red days
Movement supports recovery when it’s not stressful. On Yellow/Red days:
- Choose easy walking, zone-2 style cycling, or gentle mobility.
- Avoid training to exhaustion.
- Keep effort low enough that you could speak in full sentences for most of the session.
This maintains daily activity (helpful for energy expenditure) while giving your nervous system a break.
Adjust the hardest workouts first
If you need to reduce stress, start by modifying the sessions that create the most fatigue:
- Intervals and high-intensity cardio usually raise fatigue faster than easy cardio.
- Heavy strength days can also drive significant recovery demand.
In Yellow, swap interval volume down before you eliminate it entirely. In Red, replace it with easy movement and focus on sleep.
Track performance alongside biometrics
HRV/RHR/sleep are signals, but performance tells you whether the signal matches reality. Record simple markers:
- Work output in intervals (time to complete, total rounds)
- Strength session quality (reps achieved at planned load, bar speed if available, or RPE)
- Any form breakdown or persistent soreness
If biometrics suggest recovery is poor but performance is fine, you may have a measurement anomaly. If biometrics suggest recovery is poor and performance declines, your system is working.
Example weekly application (practical walkthrough)
Consider a week where your plan includes two strength days and two cardio days. After your baseline period:
- Monday (Green): Strength session as planned. Keep sets and loads at your normal targets.
- Tuesday (Green): Easy cardio or steady zone-2 work. Keep it comfortable.
- Wednesday (Yellow): HRV lower than usual and RHR slightly elevated; sleep was short. Do strength with fewer sets and stop earlier. If you planned intervals, shorten them or switch to steady cardio.
- Thursday (Green): Interval cardio as planned.
- Friday (Red): HRV suppressed for multiple nights and RHR elevated; sleep quality poor. Skip intensity. Do a long easy walk plus mobility.
- Weekend (mixed): Return to training only when you’re back in Green or stable Yellow with good sleep.
This pattern supports fat loss training by keeping weekly movement consistent while preventing the “stacking” of hard sessions when your body is signaling fatigue.
Use recovery habits that complement the data
When you see Yellow/Red signals, support recovery with actions that are broadly effective:
- Maintain hydration and regular meals.
- Get sunlight exposure early in the day when possible.
- Keep stress-management routines consistent (breathing exercises, short walks, reducing late-night work).
These habits help stabilize readiness markers and reduce the chance that your training plan repeatedly outruns your recovery capacity.
Natural product mentions (optional, for measurement consistency)
If you’re choosing a tracking setup for HRV and RHR, look for wearables that provide reliable nightly HRV and morning resting heart rate, plus consistent sleep metrics. Many people use devices like Oura, Whoop, Garmin, or Apple Watch—what matters most is consistency in wearing the device, measurement quality, and your ability to review trends over time.
When you apply the method above, fat loss training using HRV resting heart rate sleep becomes a practical system: you train hard when you’re ready, reduce stress when you’re not, and use sleep as the foundation that makes the data meaningful.
24.12.2025. 07:14