Compression Therapy for Injury Recovery: Wear-Time Under Pressure
Goal: Use compression therapy for injury recovery even when your schedule is tight
If you’re recovering from an injury, you probably want results without adding another complex routine. The goal here is simple: you’ll use compression therapy for injury recovery wear time pressure—meaning you’ll follow a realistic wear-time plan that fits your day, while still getting the benefits of improved circulation and swelling control.
You won’t need to “live in” compression gear. You’ll learn how to choose a sensible start point, how long to wear it, and how to adjust when your time is limited—like during work shifts, travel days, or back-to-back appointments.
Preparation: Choose the right compression gear and set yourself up for success
Before you compress anything, make sure the basics are in place. Compression works best when it fits properly and when you can wear it consistently enough to matter.
1) Confirm it’s safe for you
If you have known circulation problems (such as severe peripheral arterial disease), uncontrolled heart failure, active infection in the area, or you’re unsure about clot risk, check with a clinician first. Compression can be helpful, but it’s not “one size fits all” medically.
2) Pick the right type for your injury
Use compression where it’s most relevant to your injury:
- Swelling in the lower leg/ankle: knee-high compression socks or calf sleeves.
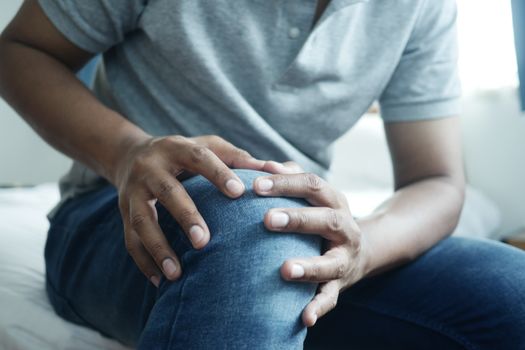
- Knee or lower thigh support: compression knee sleeves or thigh-high garments.
- Wrist/forearm or elbow: compression sleeves or wraps.
- Shoulder or upper arm: compression sleeves designed for that region.
If you’re buying, look for reputable brands with clear sizing charts. Many people underuse compression because the garment is uncomfortable or the size is off.
3) Measure and size correctly
Do this once, carefully. Measure the circumference at the manufacturer’s recommended points (commonly calf/ankle for socks, mid-knee for sleeves). If you’re between sizes, follow the sizing guidance rather than guessing. A garment that’s too small can cause numbness or pain; too large may not provide enough therapeutic pressure.
4) Set up your “wear-time system”
Time pressure is real. Create a simple plan so you don’t rely on memory:
- Pick two anchor times in your day (for example, 9:00–11:00 AM and 3:00–5:00 PM).
- Keep the garment accessible (drawer or hook near your bathroom routine).
- Decide what you’ll do on “busy” days (for example, a shorter minimum wear window).
Even if you can’t hit a perfect schedule, you can still be consistent.
Step-by-step: Wear compression therapy under time pressure without doing it wrong
Follow these steps in order. Adjust the minutes to match your day, but keep the safety checks in place.
Step 1: Start with a realistic baseline window
On day one (or when you restart after a break), aim for a manageable session:
- Start with 2–3 hours total the first day.
- If you tolerate it well (no numbness, no increasing pain), progress to 3–6 hours on day two.
- Then target your typical daily range (often 6–10 hours) depending on comfort and your clinician’s guidance.
Practical scenario: You have a 9-to-5 job and you’re dealing with ankle swelling after a sprain. You can wear a knee-high compression sock from 8:30–11:00 AM, remove it for lunch if needed, then put it back on from 1:30–5:00 PM. That’s a practical 4–6 hour total without trying to wear it all day.
Step 2: Use staged wear if you can’t commit to long sessions
If you’re pressed for time, you don’t have to do one continuous stretch. Staged wear can still help:
- Try 2–3 hour blocks separated by 30–60 minutes off.
- On the busiest days, you can aim for a minimum effective routine of 4–5 hours total spread across the day.
That “minimum” isn’t a guarantee for every condition, but it’s a common, practical target when life doesn’t cooperate.
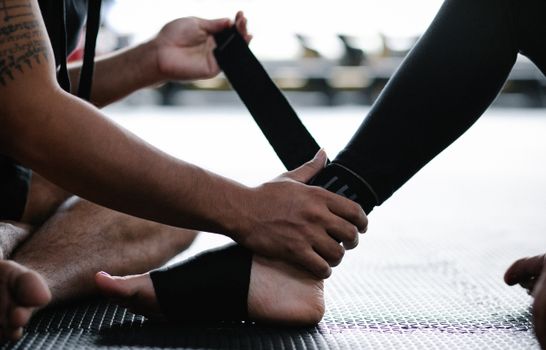
Step 3: Put it on correctly (timing and technique matter)
Before you wear it, choose the right moment:
- If swelling is worse later in the day, put compression on after you’ve been resting for a bit.
- If you’re able, elevate the affected limb for 5–10 minutes first.
Then:
- Smooth the fabric gradually. Avoid rolling or bunching.
- Make sure the garment sits at the intended position (for socks: around the ankle/calf with no “gap” that leaves pressure uneven).
- Check that toes or fingers are free if the garment is designed that way.
Step 4: Confirm comfort and circulation within the first 10 minutes
Don’t wait until later to find out it’s too tight. Do a quick check:
- Within 10 minutes, you should feel support and mild pressure—not sharp pain.
- Skin should not turn pale, blue, or very dusky.
- You should not have new numbness or tingling.
If you notice symptoms, remove it and reassess sizing and positioning. Compression should feel “firm,” not “unsafe.”
Step 5: Match wear time to the stage of recovery
Your wear-time plan should reflect what your body is doing right now. Use these practical guidelines:
- Early swelling phase (first days to ~2 weeks): aim for 6–10 hours/day if tolerated, often in staged blocks.
- Stabilization phase (~2–6 weeks): aim for 4–8 hours/day, especially during standing/walking-heavy parts of your routine.
- Later strengthening phase (after swelling settles): use compression more selectively, such as 2–6 hours on active days or during long periods on your feet.
Use pain and swelling as your guide. If swelling increases after removal, you may need earlier or longer sessions. If pain increases while wearing it, scale back and check fit.
Step 6: Use “pressure management” rules when you’re rushing
Time pressure often leads to rushed donning and ignoring early warning signs. Use these rules so you stay safe:
- Never force it on if it’s clearly too tight. Choose correct sizing.
- Don’t exceed your comfort ceiling. If you can only tolerate 4 hours today, do 4 hours consistently rather than 8 hours once.
- Re-check at mid-day if you’re wearing it longer than 6 hours. Look for bunching, skin indentation, or discomfort.
Compression pressure should support recovery. It shouldn’t create a new problem.
Step 7: Remove it safely and monitor what changes
When you take compression off, do it gently:
- Remove slowly. Avoid yanking, especially on fresh healing tissue.
- Look at skin for redness that doesn’t fade within about 30–60 minutes.
- Note swelling changes: does the area increase quickly after removal?
Use this feedback to adjust your next day’s wear window.
Step 8: Pair compression with simple recovery habits
Compression works best alongside basic recovery steps. You don’t need a huge routine:
- Hydrate and sleep. Swelling and tissue healing respond to your overall recovery load.
- Move gently as directed by your rehab plan. Compression isn’t a substitute for mobility work.
- If you’re cleared for it, do short elevation breaks (even 5 minutes).
When you’re busy, these small habits can be the difference between “it helps” and “it doesn’t feel like anything.”
Common mistakes and issues during compression wear time pressure
These are the problems that most often derail results. Avoid them and you’ll get more from the same garment and the same minutes.
1) Wearing it too long too soon
It’s tempting to “catch up” after missing a day. Start from your baseline tolerance again if you’ve had a gap. Too much time early can increase irritation or pain.
2) Wrong size or uneven fit
Bunching at the ankle or rolling at the top can create pressure points. That can cause discomfort and may reduce effectiveness.
Fix it by smoothing fabric and ensuring correct placement. If it keeps happening, you likely need a different size or garment style.
3) Ignoring numbness, tingling, or color changes
If you develop numbness, tingling, or discoloration, remove the garment. Those are not “normal adjustment feelings.” They can signal that the garment is too tight or positioned incorrectly.
4) Wearing it only during workouts while ignoring the rest of the day
For many injuries, swelling is driven by daily load—standing, walking, commuting, and time on your feet. If your schedule is busy, prioritize wear during those high-load windows.
5) Forgetting to recheck comfort after a few hours
Fabric stretches slightly over time, and swelling can change. If you’re wearing compression for >6 hours, do a quick mid-day check for tightness, bunching, and skin irritation.
6) Not washing the garment
Sweat and residue can irritate skin and make the garment feel tighter. Wash according to label instructions. Many people benefit from having two garments so you can rotate while one is drying.
Additional practical tips and optimisation advice for real schedules
Here’s how to optimize wear time when you’re juggling work, commuting, and appointments—without turning compression into a second job.
Build a “minimum effective day” plan
When you’re slammed, aim for a simple target you can reliably hit. For many people, that’s:
- 4–5 hours total spread across the day
- Plus 5–10 minutes elevation before your first session
This helps you maintain momentum even on chaotic days.
Use your calendar like a rehab tool
Set two reminders: one to put compression on and one to remove it. People miss wear sessions when they’re busy, not when compression “stops working.”
If you commute, for example, you might wear compression before leaving home. Then add a second wearable block after you arrive, rather than trying to manage it during travel.
Choose garments that match your lifestyle
If you have time pressure, comfort and ease matter. Consider garments that are:
- Easy to don (some people struggle with pulling socks on quickly)
- Breathable enough for long days
- Designed for your specific body area
If you’re shopping, look for products with clear sizing and strong return policies. A well-fitting garment is what makes longer wear realistic.
Plan for high-load days (travel, long meetings, standing work)
Here’s a practical example you can copy:
- Travel day: wear compression starting 30–60 minutes before you leave, keep it on through your main travel period, then remove it after you’re settled.
- Long meeting day: wear it during the morning and early afternoon, then do a short break if you’re getting discomfort.
- Standing job: prioritize the hours you’re on your feet. If you can only do one long block, choose the first high-load chunk.
Compression doesn’t have to be constant to be useful. It needs to be present when load triggers swelling.
Adjust wear time based on your response, not the calendar
Use a simple “signal check” each day:
- Is swelling higher than yesterday?
- Does the area feel heavier after work?
- Does it feel better during wear and worse after removal?
If swelling is increasing, you may need a longer wear window (within your comfort limits). If swelling is stable and comfort is improving, you can reduce wear time gradually.
Consider a two-garment rotation
If you wear compression most days, rotating garments can help keep them effective and comfortable. A garment that’s stretched out or worn thin can lose compression consistency.
Even a basic rotation—one garment for morning wear and one for later—can reduce irritation and improve adherence.
Coordinate compression with your rehab exercises
If your rehab plan includes exercises, you don’t necessarily need compression during every movement session. But if your clinician recommends it, you can:
- Wear compression during low-to-moderate activity periods.
- Remove it during specific exercise testing if it interferes with your movement quality.
- Reapply after the session to help manage swelling from the activity.
The key is to keep compression supportive, not restrictive.
Use elevation strategically when you can’t wear compression
On days when you have to remove compression early—work dress code, skin irritation, or a long appointment—use a backup:
- Elevate the affected limb for 10–15 minutes.
- Take short movement breaks (even 1–2 minutes of gentle walking if cleared).
This won’t replace compression entirely, but it can reduce swelling spikes when you’re forced to remove it.
Know when to stop self-adjusting and get guidance
Stop and seek professional input if you notice:
- Increasing pain while wearing compression
- Swelling that rapidly worsens despite rest and compression
- Skin breakdown, blistering, or persistent redness
- Any concerning circulation symptoms (significant numbness, color change)
Compression therapy can be a helpful tool, but your recovery plan should be individualized.
Putting it all together: A practical 7-day wear-time plan for pressure-filled recovery

Use this as a template. Adjust based on comfort and clinician direction.
Days 1–2: Build tolerance
- Day 1: 2–3 hours total in staged blocks (example: 2 hours AM, 30–60 minutes later).
- Day 2: 3–6 hours total, still staged if needed.
Days 3–4: Move toward your realistic workday
- Day 3: 5–8 hours total, prioritize the hours you’re most active.
- Day 4: 5–8 hours total. If you’re slammed, aim for at least 4–5 hours.
Days 5–7: Optimize and stabilize
- Day 5: 6–10 hours if tolerated, otherwise stay with your comfort ceiling.
- Day 6: Use compression during high-load periods (for example, commuting + afternoon standing).
- Day 7: Evaluate: if swelling is down and comfort is good, you can slightly reduce wear time. If swelling spikes, keep wear consistent and check fit.
Throughout the week, do the 10-minute comfort check and reassess fit if you notice bunching or new discomfort.
How to choose a compression routine when you can’t “find the time”
Sometimes the real problem isn’t compression—it’s scheduling. When you’re under pressure, you need a routine that survives real life.
Start with two wear windows you can actually protect. If you can’t do long sessions, split into blocks. If you can’t wear it continuously, use elevation and short movement breaks as a backup. Consistency beats perfection.
And if it hurts, tingles, or leaves skin irritated, don’t push through. Adjust sizing, technique, or wear time. Compression therapy works because it’s controlled and tolerable—not because you force it.
Soft product guidance you can use while staying educational
If you’re selecting compression therapy gear, prioritize fit and comfort first. Look for:
- Clear sizing based on measurements
- Garments designed for your specific body area
- Comfort-focused materials that feel tolerable for multiple hours
- Options like knee-high socks or sleeves that match your injury location
Many people do better with a reputable knee-high compression sock or calf sleeve for lower-leg swelling. For knee-related symptoms, a knee sleeve can be easier to integrate into daily wear. If you’re dealing with upper extremity swelling, a targeted compression sleeve can be more practical than generic wraps.
Choose what you’ll actually wear. The best compression therapy is the one you can keep using with good tolerance.
23.02.2026. 20:53