Best Time-Restricted Eating Tracker Setup: CGM, Wearables & Journaling
Why you need a better time-restricted eating tracker setup
Time-restricted eating can work well, but tracking it is where most plans fall apart. You start a 16:8 schedule, feel motivated for a week, then reality hits: sleep varies, stress spikes, workouts change your hunger, and your “fasting window” isn’t always as clean as you think.
That’s where a time-restricted eating tracker setup helps. The best approach for many people is combining CGM (continuous glucose monitoring) with a wearable (for sleep/HR/HRV) and a simple journaling system. Together, they help you answer practical questions like:
- Did my blood sugar rise during my fasting window?
- How quickly did I return to baseline after my first meal?
- Do late workouts or poor sleep make my fasting harder?
- What’s my real “break-fast” response after coffee or electrolytes?
If you’re buying into tracking for the first time—or you’ve tried an app-only approach and it didn’t stick—this guide will help you choose what matters and set it up in a way you can actually maintain.
Key components of the best time restricted eating tracker setup
Let’s break the system into three parts. You don’t need everything, but you do want the pieces to work together without friction.
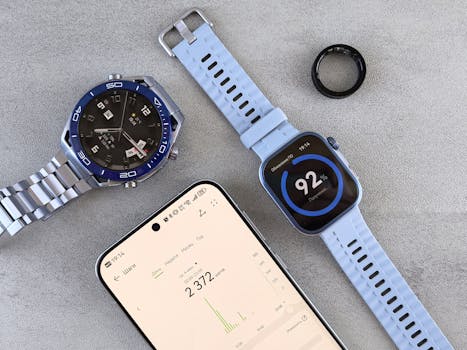
1) CGM: the glucose signal that turns “vibes” into data
A CGM measures interstitial glucose every few minutes. Most sensors record readings roughly every 5 minutes, which gives you enough resolution to see meal timing, post-meal spikes, and whether glucose drifts upward in your fasting window.
When you’re using time-restricted eating, CGM helps you evaluate:
- Fasting stability: how flat glucose is between meals
- Break-fast response: the first 1–2 hours after your first calories
- Meal timing alignment: whether your eating window actually matches your intended schedule
- Individual sensitivity: how different foods and portion sizes affect you
Look for CGM apps that make it easy to view time-of-day patterns and export or review data by date.
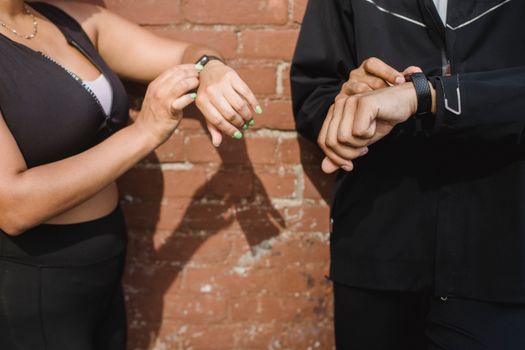
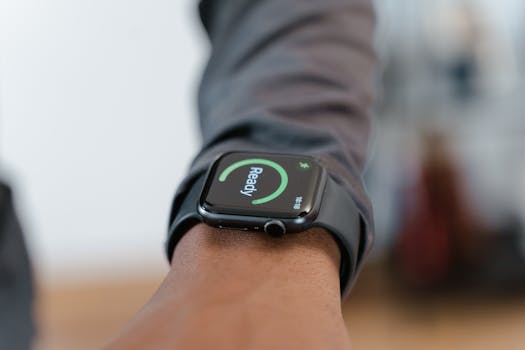
2) Wearables: sleep, heart rate, and recovery context
A wearable won’t replace CGM. But it explains the “why” behind glucose swings. Sleep quality, resting heart rate, and HRV can correlate with hunger, insulin sensitivity, and how hard it feels to fast.
For example, if your glucose rises earlier in the day during a fasting window, your wearable may show you slept 4.5 hours the night before or your HRV dropped. That context is valuable for adjusting your plan.
Prioritize wearables that track:
- Sleep stages (or at least sleep duration and consistency)
- Resting heart rate and trends over 7–30 days
- HRV if available
- Activity and workouts with timestamps
3) Journaling: the missing layer that makes patterns actionable
CGM gives you glucose curves. Your journal gives you meaning. Without it, you’ll see numbers but not know what to do next.
Good journaling for time-restricted eating is not long-form diary writing. It’s structured notes you can review weekly. The best journaling systems capture:
- Eating window: start time and end time (exact times)
- First intake at break-fast: what you had, portion size, and whether it included protein/fat/carbs
- Fasting “exceptions”: coffee, electrolytes, gum, sweeteners, creamer, or supplements
- Training: type of workout and time (especially late-day sessions)
- Sleep timing: bedtime, wake time, and any interruptions
- Stress/constraints: short notes like “travel day,” “high stress meeting,” or “poor sleep”
You can use a notes app, a spreadsheet, or a dedicated fasting journal. The key is consistency and timestamps.
Important features and specifications to look for
When you’re building the best time restricted eating tracker setup CGM wearable journaling, the features that matter most are the ones that reduce friction and improve data quality.
CGM features to prioritize
- Reliable sensor accuracy: choose a CGM brand with a strong track record and clear guidance on calibration/placement.
- Clear glucose trend views: you want to see both current readings and time-of-day patterns.
- Alerts you can control: alerts are useful, but too many notifications kill adherence. Look for adjustable thresholds and calm display options.
- Easy data review: daily summaries and trend lines help you spot patterns without digging.
- Export or sharing options: if you plan to track long-term, export can be a game changer.
Wearable features to prioritize
- Sleep tracking quality: choose a wearable that you can wear comfortably every night.
- Workout timestamp reliability: your journal needs to match what the wearable logs.
- Battery life: aim for at least 3–5 days of practical battery for most models, otherwise you’ll miss data.
- Comfort and fit: if it’s annoying, you’ll stop wearing it.
- Sync stability: check whether it frequently fails to sync—missed days break pattern analysis.
Journaling structure that actually works
Instead of trying to record everything, use a simple template. Here’s a practical structure you can copy into your notes app:
- Day: Date
- Fasting window: Start–End (e.g., 8:00pm–12:00pm)
- Break-fast: time + what you ate/drank (e.g., 12:00pm Greek yogurt + berries)
- Supplements/coffee: what + time (e.g., black coffee 9:00am, creatine 10:30am)
- Workout: type + time (e.g., 6:10pm strength)
- Sleep: bedtime/wake + quality note (e.g., 11:45pm–7:10am, 6/10)
- Notes: anything unusual (stress, travel, late meal)
This takes 60–120 seconds per day. Over 2–4 weeks, it becomes a powerful feedback loop.
What you should prioritize before you buy
Your goal isn’t to collect gadgets. Your goal is to keep the system running long enough to see patterns.
Start with your fasting style and choose tracking depth accordingly
Ask yourself how you fast:
- If you do strict daily windows (like 16:8 most days), you’ll benefit from CGM to check break-fast responses and fasting stability.
- If your schedule changes (shift work or irregular meals), you’ll benefit from wearables that capture sleep timing and activity, plus journaling that records exact eating times.
- If you’re experimenting with meal composition (higher protein, lower carbs, different fiber), CGM becomes even more valuable because it shows how glucose responds to the same window length with different foods.
Make sure your devices sync with minimal effort
Tracking fails when you have to “work” to use it. Prioritize:
- Apps that sync automatically
- Clear time stamps across CGM, wearable, and your journal
- Good mobile usability (you’ll check it on your phone)
Practical example: if you eat at 12:05pm but your wearable logs the workout at 12:02pm and your journal uses rounded times, your data alignment will get messy. Use exact times in your journal for break-fast and meal starts.
Choose a plan you can sustain for 30–90 days
Glucose patterns stabilize over weeks. If you only track for 3–7 days, you’ll confuse normal variation with “your new baseline.”
For most people, a realistic timeline is:
- Week 1: set up and learn your patterns
- Weeks 2–3: refine fasting window and break-fast routine
- Weeks 4–6: test adjustments (sleep, workout timing, meal composition)
Common purchasing mistakes and misunderstandings
These are the errors that waste money and create frustration.
Buying CGM without a journaling plan
CGM data is only useful if you can connect it to behaviors. If you don’t log break-fast timing, coffee/creamer, or workout timing, you’ll end up guessing. Plan your journal first, then choose the CGM setup.
Thinking “fasting” means only not eating
In real life, fasting includes what you consume and when. Even “zero calorie” items can affect some people’s glucose response, especially sweeteners or flavored additives.
Misunderstanding example: you start a fasting window at 8:00pm, but you have sugar-free dessert sauce or a flavored electrolyte at 9:30pm. Your CGM may show glucose drift, and you’ll assume your fasting plan failed—when the issue was the intake.
Ignoring sleep and workout timing
If you do late-night workouts or consistently sleep 5–6 hours, your fasting experience may change. Many people blame their eating window length. But the wearable context often reveals that sleep quality and recovery are the real drivers.
Overcomplicating the system
If you try to track 30 variables daily, you’ll stop after a week. Choose a short list: eating window, break-fast intake, coffee/supplements, workout time, sleep timing, and one-line notes.
Not checking battery life and comfort
You can’t collect wearable data if you forget to charge it or if it irritates your skin. Look for practical battery life and comfortable fit so you wear it nightly.
Practical buying checklist and decision framework
Use this checklist to decide what to buy and how to set it up.
Step 1: Confirm your tracking goals
- Do you want to verify fasting stability (glucose staying steady)?
- Do you want to optimize break-fast timing and meal composition?
- Do you want to connect fasting results to sleep and workouts?
Pick your top one or two goals. Your answers determine how much you invest in CGM vs. wearable vs. journaling workflow.
Step 2: Choose a CGM workflow that matches your lifestyle
- Can you wear it comfortably for the sensor lifespan?
- Does the app show trend views you’ll actually check daily?
- Are alerts adjustable so they don’t overwhelm you?
- Do you want data export for longer-term pattern review?
If you’re new, start with the setup that’s easiest to interpret. You can always go deeper later.
Step 3: Pick a wearable that gives sleep + recovery context
- Sleep tracking you can trust and read quickly
- Resting HR and HRV trends (if available)
- Workout timestamps that match your journal
- Battery life that won’t interrupt data collection
Many people do well with mainstream wearables that track sleep and recovery well enough. You don’t need every feature—just the ones that answer your “why” questions.
Step 4: Set up your journal template before you start
- Create a daily template with exact times
- Decide what counts as “break-fast” (first calories, coffee with additives, supplements, etc.)
- Set a rule for what you’ll always log (at minimum: eating window start/end, break-fast intake, workout time, sleep times)
Step 5: Do a 14-day calibration phase
For two weeks, keep your fasting window consistent. Don’t change everything at once. Your goal is to learn your baseline response to:
- Your first meal at the same time each day
- Your typical coffee/supplements
- Your usual workout timing
- Your typical sleep schedule
After 14 days, review what you wrote alongside the CGM patterns. You should be able to identify at least one relationship (for example: late workouts correlate with higher break-fast glucose).
Step 6: Make one change at a time
When you adjust, choose a single variable. Examples:
- Move break-fast 60 minutes earlier for 7 days
- Keep the same window but change the first meal to higher protein
- Keep food the same but shift workouts earlier (e.g., end by 6:00pm)
- Keep workouts the same but prioritize bedtime by moving it 30 minutes earlier
This is how you turn tracking into results instead of endless observation.
Final buyer guidance: how to build the system you’ll keep using
If you want the best time restricted eating tracker setup CGM wearable journaling, buy for consistency first. The “best” system is the one you’ll use every day without resenting it.
Here’s a practical recommendation path:
- If you’re serious about fasting verification: prioritize a CGM with strong app usability and clear trend views, then commit to a simple daily journal template.
- If you struggle with energy, cravings, or inconsistent fasting: prioritize a wearable that tracks sleep and recovery well, and use journaling to connect sleep/stress/workouts to glucose responses.
- If you’re experimenting with meal composition: use CGM to compare break-fast responses while journaling records exact foods, portions, and timing.
One real-world scenario: you work 9–5, but you often eat late on weekdays. You decide to try 16:8 with a 12:00pm–8:00pm eating window. For 14 days, you log your break-fast meal at 12:00pm, plus your coffee at 10:00am (black only). Your wearable shows you slept 6 hours on two nights. Your CGM shows higher break-fast glucose on those mornings. You keep the window, but you shift bedtime earlier by 30 minutes and move your workout from 7:30pm to 5:30pm. Over the next two weeks, break-fast responses smooth out. That’s the value of combining CGM, wearables, and journaling—actionable feedback, not guesswork.
Finally, don’t ignore safety and medical context. If you have diabetes, take glucose-lowering medication, or have any medical concerns, talk to a clinician before making fasting changes. Tracking can support your plan, but it doesn’t replace medical guidance.
If you want a strong starting point, focus on: a CGM you can interpret easily, a wearable that consistently captures sleep and recovery, and a journal template that takes under 2 minutes per day. Build that foundation first, then refine your fasting strategy based on what your data shows.
10.04.2026. 01:00