

How to Use HRV for Recovery Routine (Step-by-Step Guide)

Use HRV to guide your recovery routine—without guessing

HRV (heart rate variability) can help you move from “I think I’m recovered” to “my system looks ready today.” When you use HRV correctly, it becomes a feedback loop for recovery: you measure it consistently, look at trends (not single numbers), and adjust sleep, training intensity, and recovery work accordingly.
This guide shows you how to use HRV for recovery routine in a practical, repeatable way. You’ll set up your baseline, interpret your readings responsibly, and turn HRV signals into specific actions you can take the same day.
Set up your HRV measurement so results are actually usable
Before you can use HRV for recovery decisions, you need measurement consistency. HRV is sensitive to timing, posture, breathing, stress, illness, caffeine, alcohol, and even how you feel when you wake up.
Choose a device and stick with it for at least a few weeks. Many people start with a wearable that estimates HRV during sleep or provides morning HRV. The most useful option for a recovery routine is usually morning measurement taken the same way each day.
Required tools and setup
- A wearable or HRV-capable device that reports HRV (often RMSSD) and provides a timestamped daily value.
- A consistent measurement window (morning is common). Aim to measure within a 30–60 minute window after waking.
- A tracking method (notes app, spreadsheet, or the device’s own logs) to record HRV, sleep duration, and training load.
- A recovery action plan you can follow quickly (e.g., mobility, easy cardio, rest day, or a reduced session).
Measurement rules that reduce “noise”
- Measure at the same time each day. If you wake up at 6:30 one day and 9:00 the next, your HRV can shift for reasons unrelated to recovery.
- Use the same posture. If you measure sitting or lying down, keep it consistent.
- Minimize breathing interference. For morning readings, stay still and breathe normally.
- Keep a “context log”. Record sleep hours, hard training yesterday, alcohol, and any illness symptoms.
Build your baseline before you make decisions
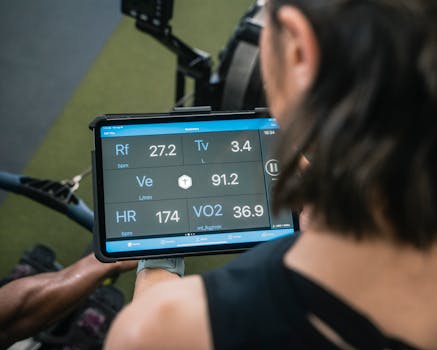
Your first goal isn’t to interpret today’s HRV. It’s to understand your normal range. Baselines vary widely by age, fitness level, genetics, and even how you train. The baseline is what makes HRV decisions meaningful.
Step 1: Collect at least 14 days of data
For the first two weeks, focus on consistency, not perfect interpretation. You’re training your “recovery model,” not yourself.
- Record morning HRV (or your device’s daily HRV) daily.
- Note training stress (easy / moderate / hard) and sleep duration.
- Keep a simple log of unusual factors: travel, poor sleep, stress, or sickness.
Step 2: Calculate your personal “normal” range
After 14 days, look at the trend rather than single-day spikes. If you’re using an app that already shows trends, use it. Otherwise, you can calculate:
- Your typical HRV level (average of your best 5–7 days when you felt good).
- Your typical recovery dip (how low HRV goes after hard training for you).
Instead of chasing a perfect number, you’re defining what “normal for you” looks like across real training.
Use HRV trends to decide what recovery you need today
Once you have a baseline, you can turn HRV into a daily decision process. This works best when you interpret HRV as a trend over the last 24–72 hours, not as a one-off verdict.
Step 3: Compare today’s HRV to your baseline
On a normal training week, you want to check whether HRV is:
- Near your baseline (often suggests you’re recovering adequately).
- Below your baseline (often suggests you may need extra recovery or reduced training stress).
- Rising or falling compared with the last 2–3 days (trend matters).
A practical way to do this: define a threshold for your own data. Many people start with a simple rule such as:
- HRV within ~5–10% of baseline: proceed with your planned session.
- HRV down ~10–20%: reduce intensity or choose a lighter workout.
- HRV down more than ~20% or dropping for 2+ days: prioritize recovery (rest, mobility, or very easy work) and consider illness/stress screening.
These percentages are starting points. Adjust after 3–4 weeks based on how you actually feel and how your performance responds.
Step 4: Confirm with your body and readiness signals
HRV is a signal, not a diagnosis. Use it alongside simple checks:
- Sleep quality (hours and how rested you feel).
- Resting heart rate (if your device reports it). Higher than usual can align with low HRV.
- Perceived soreness and joint discomfort.
- Motivation and effort during warm-up.
If HRV is low but you feel great, you may still train—just avoid maxing out. If HRV is low and you feel run down, treat it as a clear “back off” cue.
Step 5: Choose one of three recovery actions for the day
To keep your routine usable, don’t create 20 options. Pick three and use them consistently.
- Recovery Action A: Maintain (HRV near baseline). Do your planned session, but keep intensity controlled. If you’re doing intervals, consider capping at 90–95% of your usual effort.
- Recovery Action B: Reduce load (HRV moderately below baseline). Swap a hard session for one of these: longer warm-up + easy steady cardio, technique work, mobility circuit, or shorter intervals at reduced intensity.
- Recovery Action C: Prioritize restoration (HRV low and trending down, or low for 2+ days). Choose one: full rest day, low-intensity walk + breathing practice, or a short recovery session (20–35 minutes) focused on mobility and easy aerobic movement.
Turn HRV signals into a repeatable weekly routine
HRV works best when it changes your training schedule in small, timely ways. You’re not trying to “game” the number. You’re using it to protect your consistency.
Step 6: Build a “decision day” workflow (takes 5 minutes)
Every morning, run this quick check:
- Open your device/app and note today’s HRV value and whether it’s higher/lower than yesterday.
- Check the last 2–3 days for direction (rising, flat, falling).
- Scan context: sleep hours (roughly), alcohol/travel, and yesterday’s training intensity.
- Pick Action A, B, or C using your thresholds and how you feel.
- Plan the day before you get busy. Decide your workout or recovery block by midday if possible.
This prevents you from making impulsive decisions later when you’re already tired.
Step 7: Adjust training intensity, not just volume
Many people reduce only the duration, but HRV often responds more to intensity and stress than to total volume. If HRV is low, consider:
- Lowering interval intensity by one step (e.g., from hard to moderate).
- Skipping all-out efforts and “max” sets.
- Keeping sessions technically focused instead of performance focused.
If you’re a runner, for example, replace a tempo run with a relaxed aerobic run plus strides only if HRV is stable.
Step 8: Add recovery work that supports autonomic regulation
When you choose Action B or C, you want recovery work that helps your nervous system downshift. Practical examples:
- Breathing practice: 5–10 minutes of slow nasal breathing (comfortable pace, no strain).
- Mobility: 10–20 minutes focused on hips, thoracic spine, and calves.
- Easy aerobic: 20–40 minutes at a pace where you can speak in full sentences.
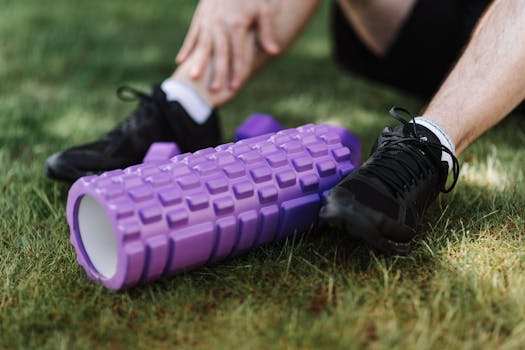
- Light massage or foam rolling: 10–15 minutes if it feels good and doesn’t leave you sore.
Soft recommendation: consider using a structured recovery tool such as an HRV-breathing or guided breathing feature (many apps and some wearables include prompts). The goal is consistency, not chasing a specific HRV increase.
Real-world scenario: using HRV during a hard training block

Imagine you’re training for a 10K and you do two interval sessions and one long run each week. Your HRV baseline (best days) is around 55 (units vary by device), and your usual post-hard-training dip is around 45–50.
On Tuesday, you do intervals. Wednesday morning your HRV is 42 (about 15–20% below baseline). You feel slightly flat during warm-up. You apply Action B: you swap your planned strength session for mobility + easy cycling for 30 minutes, and you keep your walking steps up.
Thursday morning your HRV is 48 and stable. You feel better. You return to Action A: you do a moderate strength session but avoid heavy near-failure sets. Friday morning your HRV is near baseline again, and you complete your long run as planned.
Now the key lesson: you didn’t panic over one low reading. You used the trend and adjusted the stress level early enough to protect your next sessions.
Common mistakes that derail HRV-based recovery
HRV can be helpful, but it’s easy to misuse. Here are the most common issues you’ll want to avoid.
Step 9: Don’t treat one low HRV day as a “red alert” by itself
Single-day fluctuations happen. Poor sleep, late meals, stress, caffeine, and even an early alarm can lower HRV without meaning you’re truly under-recovered. Use multi-day context (24–72 hours) before making drastic changes.
Step 10: Don’t compare HRV numbers across different devices
Different sensors and algorithms can produce different HRV values. If you switch from one wearable to another, your baseline will shift. Keep the same device for at least a few weeks whenever possible.
Step 11: Don’t ignore the timing of measurement
Morning HRV taken after waking can behave differently than HRV measured during sleep or at a specific time of day. If your routine changes (weekends vs weekdays), your HRV interpretation can become inconsistent.
Step 12: Don’t overcorrect by doing only rest
It’s possible to “rest your way into stagnation.” If HRV is slightly low but you’re otherwise okay, choose Action B rather than full rest. Light movement often helps you feel better and maintains training momentum.
Step 13: Don’t chase a higher HRV number at the expense of recovery fundamentals
HRV can improve when recovery fundamentals are strong, but it can also be temporarily influenced by breathing or measurement conditions. Prioritize:
- Consistent sleep schedule
- Enough calories and hydration
- Training stress management
- Stress reduction you can actually maintain
Additional practical tips to optimize your HRV recovery routine
Once your system is running, you can refine it to make better decisions with less effort.
Step 14: Use HRV alongside training load tracking
HRV becomes much more actionable when you know what stress you applied. If your device or training app tracks session duration, heart rate, or intensity, record it. A simple method:
- Mark sessions as easy/moderate/hard.
- Note any extra stress (travel, poor sleep, long workdays).
After 3–4 weeks, you’ll see patterns like “hard day usually lowers HRV by X” and “if HRV doesn’t rebound by day +1, I’m likely to feel heavy.”
Step 15: Create a 7-day “recovery ladder” you follow automatically
Instead of making a new plan every day, use a ladder that responds to HRV:
- Day 0 (hard session): proceed as planned.
- Day +1: if HRV is moderately low, do Action B.
- Day +2: if HRV is still low or falling, do Action C.
- Day +3: if HRV returns toward baseline, resume Action A.
This reduces decision fatigue and keeps you from “thrashing” between rest and training.
Step 16: Make your breathing practice consistent when HRV is low
If you want a practical recovery tool, use breathing in a structured way. A simple starting protocol:
- 5 minutes of slow nasal breathing right after your HRV check.
- Another 5–10 minutes later in the day if you feel tense.
Keep it comfortable. If you feel lightheaded, stop. The goal is to support down-regulation, not to force a physiological response.
Soft affiliate integration note: many people pair HRV recovery routines with guided breathing apps or wearable breathing prompts. If you already have a breathing feature on your device/app, use it rather than adding a dozen new tools.
Step 17: Use illness and stress screening when HRV drops sharply
If HRV drops more than your usual post-hard-training dip and stays low for multiple days, consider illness, overreaching, or high life stress. In that case, your recovery routine should shift from “training adjustment” to “health-first adjustment.”
- Prioritize sleep and nutrition.
- Choose easy movement only.
- Consider taking a full rest day if symptoms appear (sore throat, feverish feeling, unusual fatigue).
How to evaluate whether HRV guidance is actually working
After you’ve used HRV for recovery routine for 3–6 weeks, you should be able to answer: did it improve consistency and how you feel during training?
Look for these signs:
- You complete more quality sessions without feeling “wrecked” for days.
- You notice fewer cases of repeated low performance after hard blocks.
- Your recovery days feel intentional rather than random.
If you don’t see benefits, don’t abandon HRV—refine your thresholds and your measurement consistency. Often the issue is timing, device switching, or overreacting to single readings.
Keep HRV simple: measure, trend, act
The core of how to use HRV for recovery routine is straightforward:
- Measure consistently (same timing, posture, and device).
- Build a baseline over at least 14 days.
- Use trends over 24–72 hours, not single-day numbers.
- Choose a clear recovery action: maintain, reduce load, or prioritize restoration.
- Reassess after 3–6 weeks and adjust thresholds based on your real outcomes.
When you do this, HRV becomes a practical tool for autonomic regulation and restoration—helping you train with more control and recover with more intention.
28.04.2026. 04:57