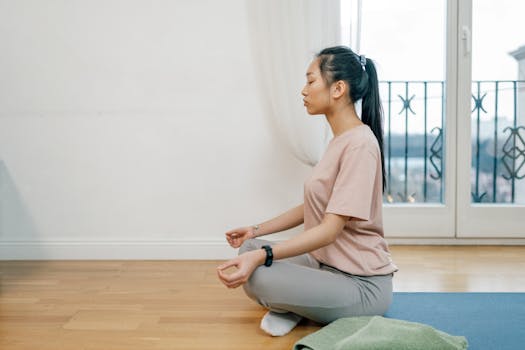
HRV for Meditation: A Practical How-To Guide
Goal: Use HRV for meditation to guide your regulation practice
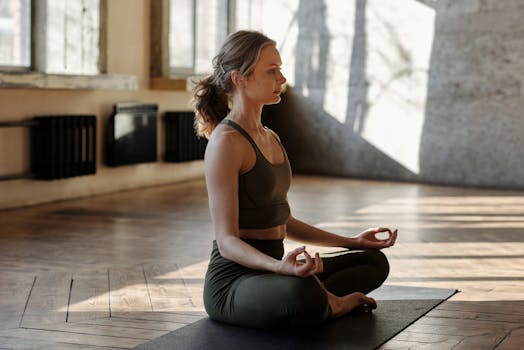
HRV for meditation is about using heart rate variability (HRV) as a feedback signal from your body. Instead of guessing whether you’re relaxing, you can track changes in HRV as you practice breathwork, mindfulness, or guided relaxation. Over time, HRV trends can help you identify what conditions and techniques support a more regulated physiological state.
HRV is not a measure of “success” in a spiritual sense, and it’s not something to chase. Used well, it becomes a practical tool: you meditate, you observe how your autonomic nervous system responds, and you adjust your approach to make it easier to settle.
Preparation: What you need before you start tracking
To use HRV for meditation effectively, you need consistent measurement and a simple routine for data review. You don’t need complex equipment, but you do need reliable HRV readings and a plan for how you’ll apply the information.
1) Choose an HRV tracking method
Common options include:
- Wearable heart rate monitors that provide HRV metrics (often via an app). Look for devices that report HRV with clear definitions and stable signal quality.
- Chest straps (when available) that typically capture heart signals more consistently than wrist devices.
- HRV-focused apps that use data from compatible devices.
If you already own a wearable, start there. If you’re buying specifically for HRV training, prioritize measurement consistency and data export or at least clear historical trends.
2) Understand which HRV metric you’ll use
Different apps may show different HRV values. Some popular ones include RMSSD (often used as a short-term marker of parasympathetic activity) and frequency-domain measures. For meditation guidance, it’s usually best to pick one metric and stick with it for a few weeks.
Also note whether your app labels the value as a snapshot (during a session) or a resting estimate (often measured after you’ve been still). Your technique will differ slightly depending on the measurement type.
3) Set up a consistent environment
HRV is sensitive to movement, stress, caffeine, sleep, hydration, and even room temperature. Choose a meditation space where you can sit quietly with minimal distractions.
- Time: pick a similar time of day for most sessions.
- Posture: sit in a stable position to reduce motion artifacts.
- Lighting and noise: keep them consistent when possible.
- Phone handling: avoid picking up the phone during the session, since sudden movements can affect sensor readings.
4) Prepare your session structure
A helpful HRV-for-meditation session includes a baseline period, a practice period, and a short reset. This makes it easier to interpret changes rather than mixing multiple states into one number.
Step-by-step: How to use HRV for meditation in real sessions
Follow these steps to set up a practical workflow. The goal is not perfection; it’s repeatable observation.
1) Calibrate your device before you track meditation
Before you begin your first tracking session, ensure your sensor is working properly.
- Wear the device correctly (wrist strap snugness or chest strap placement).
- Check signal quality in the app if it’s available.
- Do a short stillness check for 2–3 minutes and confirm the HRV output is stable or at least not wildly fluctuating due to signal dropouts.
Practical example: Sit quietly for a few minutes, breathe normally, and watch whether the HRV reading appears consistently. If the app reports poor signal or erratic readings, fix the fit before you start meditating.
2) Establish a baseline (1–5 minutes)
Start each session with stillness so you can compare practice effects to a reference point.
- Sit comfortably, keep your eyes relaxed, and minimize movement.
- Breathe naturally—do not force deep breaths yet.
- Let your device capture a baseline resting HRV estimate or a short snapshot, depending on your app’s capabilities.
Write down or note the baseline HRV value and the time of day. Even simple notes help you interpret patterns.
3) Choose one meditation technique for the first week
To learn how your body responds, keep the technique consistent long enough to see a pattern.
Pick one:
- Breath awareness: notice the sensations of breathing without trying to change them.
- Guided relaxation: follow a consistent script or audio track.
- Slow diaphragmatic breathing: use a gentle rhythm if your HRV app supports it.
For HRV-guided practice, consistency matters more than variety in the beginning.
4) Practice for 10–20 minutes while staying still
During the meditation:
- Keep posture stable to reduce motion artifacts.
- Avoid talking, reading, or checking your phone.
- If your app offers session HRV tracking, start it after baseline and let it run.
Practical example: Use breath awareness for 12 minutes. At minute 0–3 you establish baseline. From minute 3 onward, you practice. At the end, you record the HRV value associated with the practice period.
5) Record post-practice HRV and your subjective state
When you finish meditating, repeat a short stillness period (often 1–3 minutes) to capture a post-practice estimate if your app supports it.
Record:
- Baseline HRV value
- Practice HRV value (or the best available metric for the session)
- Post-practice HRV value (if available)
- How you felt (e.g., calmer, neutral, restless, sleepy, energized)
This combination prevents you from reducing meditation to a single number.
6) Compare within-session changes, not day-to-day perfection
After you’ve done several sessions, look for consistent patterns rather than focusing on one-off changes.
- If HRV tends to increase after certain practices, note that technique and conditions.
- If HRV decreases, consider whether you pushed too hard, breathed too aggressively, or measured during a restless state.
- If HRV is inconsistent, simplify: reduce movement, keep the technique steady, and improve measurement consistency.
Practical example: You notice that breath awareness increases your HRV after 8–12 minutes, while guided relaxation shows mixed results. You keep breath awareness as your default for the next week.
7) Use HRV trends to adjust your approach gently
HRV can guide micro-adjustments. Use it to refine, not to force a target.
Try one change at a time:
- Reduce intensity: if HRV drops, soften the practice. Stop trying to “make it happen.”
- Change breathing tempo: if you’re using slow breathing, try a slightly less intense rhythm. Some people over-breathe when aiming for a specific pace.
- Shorten the session: if you become restless, reduce to 8–10 minutes and build gradually.
- Improve stillness: HRV readings can be distorted by movement. Sit more steadily, loosen the phone handling, and avoid fidgeting.
8) Create a two-phase routine for best signal clarity
Once you have a few sessions logged, you can streamline:
- Phase A (baseline): 2–4 minutes of natural breathing and stillness.
- Phase B (practice): 10–15 minutes of your chosen meditation.
- Phase C (optional): 1–2 minutes of stillness after you stop.
This structure makes it easier to interpret whether the practice itself is associated with HRV changes.
Common mistakes when using HRV for meditation
HRV tracking can be informative, but it’s easy to misread the data. Avoid these common pitfalls.
1) Chasing a number during meditation
If you repeatedly check the HRV value mid-session or try to “hit” a target, you increase cognitive load and may disrupt the relaxed state you’re trying to cultivate. Instead, track consistently and review after the session.
2) Meditating while moving or adjusting the sensor
Sensor movement and posture changes can cause HRV artifacts. Even small fidgeting can affect signal quality, especially with wrist-based devices. Keep your body stable and ensure the sensor is fitted before you begin.
3) Changing multiple variables at once
If you change technique, time of day, breathing pattern, and session length in the same week, it becomes hard to know what caused HRV changes. Adjust one variable at a time for clearer learning.
4) Ignoring sleep, caffeine, and stress context
HRV varies naturally. A single day can look “worse” due to poor sleep or caffeine, even if your meditation is working. Track basic context: sleep quality, caffeine timing, and major stressors when possible.
5) Measuring at inconsistent times with different routines
If you meditate at random times and after different activities, baseline HRV will shift, making comparisons confusing. Choose a consistent time window and keep your pre-meditation routine similar.
6) Using overly forceful breathing
Some people interpret slow breathing as “more is better.” But pushing breath too hard can create tension and reduce comfort. If HRV decreases, try a gentler breathing range and prioritize ease.
Additional practical tips and optimisation advice
These strategies help you get cleaner data and translate HRV changes into a more supportive meditation routine.
Optimize measurement quality for more reliable HRV
- Minimize motion: place your hands comfortably, relax the jaw, and keep the head steady.
- Check sensor fit: ensure consistent placement each session.
- Avoid interruptions: don’t pause the app repeatedly; interruptions can fragment the data.
- Use the same device settings: if your wearable has modes (e.g., workout vs. rest), use the one intended for calm tracking.
Use short “learning sessions” before longer practice
When you’re experimenting with a new technique, run a few 8–10 minute sessions rather than a single long one. This reduces fatigue and helps you identify what conditions produce the most stable HRV response.
Practical example: Try breath awareness for 10 minutes, record baseline and session HRV, then try a guided relaxation for another 10 minutes on a different day. Keep everything else the same.
Pair HRV tracking with a simple regulation check
HRV data becomes more useful when paired with a body-based check. After each session, note one or two observations such as:
- Breath ease (did it feel smoother?)
- Muscle tension (did it soften?)
- Mind state (was it calmer, clearer, or more restless?)
When HRV improves but you feel worse, you may be achieving physiological change in a way that doesn’t feel sustainable. When HRV improves and you feel better, you’ve found a technique that supports both.
Let HRV guide technique selection, not self-judgment
HRV for meditation works best as information, not as a performance score. If a session doesn’t show improvement, treat it as feedback about conditions: maybe you were tired, hungry, distracted, or using a method that didn’t match your current nervous system state.
Plan for variability: use a small weekly review
Instead of obsessing over daily changes, review your last 3–7 sessions once per week. Look for trends such as:
- Which technique most often coincides with post-practice HRV increases
- Whether baseline HRV is higher on days with better sleep
- Whether certain breathing approaches correlate with comfort
This weekly review helps you maintain consistency and reduces the urge to “tune” every single session.
Choose a realistic practice schedule
HRV tracking benefits from repetition. Aim for a manageable routine such as 3–5 sessions per week at first. If you do it daily, keep the technique consistent so you can learn your body’s response to that specific practice.
Use natural transitions into meditation
Many people start meditating abruptly after a stressful activity, which can overwhelm the system. Try a 1–2 minute transition routine before baseline:
- Lower your shoulders
- Unclench your jaw
- Exhale slowly once, then return to natural breathing
This can improve baseline stability and make HRV changes more attributable to your meditation rather than to immediate stress carryover.
Consider reliable measurement tools where they fit your lifestyle
If you want HRV for meditation to be practical, choose tools that you can wear or use consistently. Many people find that a chest strap can provide steadier readings for quiet sessions, while wrist-based monitors are easier for day-to-day use. The best option is the one you’ll use reliably without constantly adjusting it.
Similarly, HRV apps that display trend graphs and allow session notes make it easier to identify what works. If your device supports session labeling, use it so you can review results by technique later.
Putting it all together: a simple weekly workflow

To operationalize HRV for meditation, use a repeatable routine that balances measurement and mindfulness.
- Monday to Friday: run the same two-phase session (baseline 2–4 minutes, practice 10–15 minutes). Keep technique consistent.
- Saturday or Sunday: do one “learning session” where you test a small adjustment (e.g., slightly gentler breathing or a different meditation style), keeping everything else the same.
- Weekly review: check which sessions had the clearest post-practice improvement and which felt most comfortable.
Over a few weeks, you’ll develop a practical understanding of how your body responds. The aim is to make meditation easier to enter and more sustainable, using HRV as a calm, objective companion rather than a target to chase.
If you’d like, tell me which HRV metric your device reports (for example RMSSD or “HRV score”), your typical meditation style, and whether you’re using a wrist monitor or chest strap. I can tailor the steps and logging approach to match your setup.
04.02.2026. 03:06