

Microbiome Test Troubleshooting: Fixing Common Errors and Confusion

What goes wrong with microbiome tests (and what you’ll notice)

Microbiome test troubleshooting usually starts with a very practical problem: something about your sample handling, the lab workflow, or the way results are presented doesn’t line up with what you expected. You might see missing data, unexpected “low reads” warnings, results that don’t match recent diet changes, or a turnaround time that stretches far beyond what you were told.
Common symptoms you can’t ignore include:
- Your results show unusually low sequencing depth (for example, a small number of reads compared with typical reports, or a note that certain taxa are “not detected” due to insufficient coverage).
- Multiple markers are flagged as poor quality, such as degraded DNA, inhibition, or extraction failures.
- You receive a report with lots of “unknown” or unclassified categories, making the profile look incomplete.
- Timing feels off: you mailed a sample on day 1, but processing seems to begin weeks later, or you see storage/temperature notes that raise concern.
- Your results appear inconsistent across repeats even though you used the same collection method and stayed consistent with diet, medications, and bowel habits.
- Interpretation confusion: you’re not sure whether a change is meaningful or whether the lab’s units and thresholds differ from what you’ve seen elsewhere.
Even when the lab is competent, microbiome testing is sensitive to handling. A small deviation—like a warm storage window, a delay in sealing, or a sample mix-up—can change the DNA yield and the relative abundance estimates. The goal of troubleshooting is to identify which part of the chain is most likely responsible and correct it without overreacting to normal biological variability.
Most likely causes behind confusing or unreliable microbiome results
Microbiome test troubleshooting works best when you assume the problem is usually one of a few categories. In practice, the most common causes fall into sample integrity, lab processing, data reporting conventions, and real biological shifts that aren’t captured the way you expect.
1) Sample collection and storage issues
This is the top cause of repeatable problems. DNA in stool is fragile. If your collection or transport steps allowed temperature to drift upward, microbial communities can shift before extraction. You may also see problems if the sample was not sealed correctly or if the wrong portion was collected.
Real-world example: A person collects a stool sample in the morning, seals it, and leaves it in a car trunk for “just an hour or two” before dropping it at the post office. The outside temperature is 30°C (86°F). Even if the lab intended to stabilize DNA, the warm period can reduce usable DNA and raise the chance of low sequencing depth.
2) Insufficient sample mass or inconsistent sampling
Some kits rely on you to collect a small but specific amount. Too little material can lead to extraction failure or weak DNA yield. Too much isn’t always better either—especially if the kit instructs you to avoid certain materials (like water or urine contamination) or to use a particular sampling tool.
3) Cross-contamination during handling
Cross-contamination can occur when gloves are reused, when the collection tube is touched on the inner rim, or when multiple samples are handled in the same workspace. Even small contamination can inflate the abundance of unexpected taxa.
4) Sequencing or extraction failures at the lab
Labs typically include quality control checks. If PCR inhibitors are present, if extraction yields are too low, or if sequencing runs fail, the lab may still generate a partial report. The result can look “thin,” with fewer taxa called and more unclassified bins.
5) Bioinformatics and reporting conventions
Not every report uses the same reference database, taxonomic resolution, or normalization method. Some reports show relative abundance percentages; others may emphasize detected taxa only. A “change” might be real, but it can also be an artifact of how the lab filters low-abundance organisms.
6) Biological variability and time windows
Your microbiome can shift within days based on diet, travel, sleep, stress, and medication. Antibiotics are the most obvious driver, but even non-antibiotic factors can matter. If you compare results taken 2–3 weeks apart without controlling for major changes, you may interpret normal variation as a test problem.
Step-by-step microbiome test troubleshooting: from evidence to correction

Use this sequence to narrow down the cause. Don’t jump straight to “the lab must be wrong.” Start with what you can verify: kit steps, shipping conditions, and report quality indicators.
Step 1: Confirm the collection kit instructions you followed
Locate the kit’s written guidance (not just the app summary). Compare your actions to the exact steps. Pay attention to:
- When you collected relative to bowel movement and how long the sample sat before sealing.
- Temperature handling: whether the kit specified refrigeration, freezing, or room-temp stabilization.
- Sealing: whether the cap was fully closed and whether the container was upright during transport.
- Sample portion: whether you used the provided scoop/tool and avoided mixed materials.
If you find any deviation—especially around time and temperature—treat that as a prime suspect.
Step 2: Check your tracking and the lab’s received timestamp
Most kits provide shipping tracking and a “received” date. Compare those to the collection date. A gap can indicate that the sample sat in a facility or transit hub longer than you expected.
Look for any lab notes about storage conditions on receipt. If your report includes quality flags, connect them to shipping time. For troubleshooting, assume the worst plausible handling window unless you can verify otherwise.
Step 3: Review the report’s quality indicators
Even when results are presented cleanly, quality flags often exist. Identify whether you saw:
- Low sequencing depth warnings
- DNA degradation notes
- Inhibition / extraction failure language
- High proportion of unclassified reads
If sequencing depth is low, you may see “missing” taxa that aren’t truly absent in your gut. They may simply not be confidently detected.
Step 4: Verify you’re interpreting the same type of output
Many people compare different report formats without realizing it. Check whether your report is:
- Relative abundance (percentages that sum to 100%) vs. absolute quantification (organism counts per mass of stool).
- Species-level vs. genus-level resolution.
- Filtered to exclude low-abundance taxa.
If you compare two tests from different platforms or even different versions of the same platform, the “direction” of change may not align even if your microbiome is stable.
Step 5: Identify major biological confounders in the 3–14 days before collection
For troubleshooting, list the variables you changed. At minimum, document:
- Antibiotics or antiseptic medications (including recent dental antibiotics)
- Probiotics or prebiotics you started or stopped
- Major diet changes (fiber jump, elimination diet, high alcohol intake)
- Travel and time-zone changes
- Significant GI illness (even if it felt mild)
- Regular medication changes (metformin, PPIs, laxatives)
If you changed multiple variables in the week before collection, it can explain unexpected results without implying a test failure.
Solutions from simplest fixes to more advanced fixes
Work through these in order. If the simplest fix doesn’t resolve the issue, move to the next level. This approach prevents you from repeatedly retesting without addressing the most likely failure points.
Simple fix 1: Use consistent collection timing and handling
For your next sample, keep your collection workflow tight:
- Collect on the day you plan to ship (or follow the kit’s maximum room-temp window precisely).
- Minimize time between collection and sealing.
- Keep the sample within the kit’s specified temperature range. If the kit says refrigerate, refrigerate immediately.
- Use the kit’s sampling tool as directed—no extra mixing, no adding “extra” material unless the instructions explicitly allow it.
If your previous sample showed low sequencing depth, this step alone often improves yield.
Simple fix 2: Reduce contamination risk during collection
Cross-contamination can produce profiles that look “wrong.” For the next collection:
- Use fresh gloves if the kit provides them, and don’t touch the inside of tubes.
- Work on a clean surface. If you’re collecting more than one sample, separate them physically and temporally.
- Label containers before you start. Mislabeling is a surprisingly common real-world issue.
Practical example: If you collected samples from two family members on the same day, and you stored them on the same counter, you should assume the possibility of mix-up or aerosol transfer. Separate workstations and label immediately.
Simple fix 3: Confirm you’re comparing the same measurement type
Before concluding that the test is failing, confirm you’re not mixing report types:
- Compare relative abundance to relative abundance, and absolute to absolute (if offered).
- Compare the same taxonomic level (genus-to-genus, species-to-species).
- Check whether low-abundance taxa are filtered out.
If you’re using results to track trends, use the same platform and similar pre-collection conditions. Even a consistent method can still show natural variability, but you’ll reduce the “noise” from reporting differences.
Moderate fix 4: Standardize your pre-collection routine for 7–14 days
Biological variability is real. If your goal is troubleshooting accuracy rather than exploring how diet changes your microbiome, standardize:
- Keep fiber intake stable (avoid sudden jumps in beans, legumes, or high-fiber supplements).
- Keep probiotic/prebiotic use stable. If you stop a probiotic, don’t retest immediately—allow a consistent washout window based on your routine and the kit’s guidance.
- Avoid starting antibiotics or new GI meds right before a test if you’re trying to isolate sample handling issues.
- Record bowel pattern changes. If you had diarrhea, the stool composition and DNA yield can differ.
This is not about “controlling everything perfectly.” It’s about reducing the number of moving parts so you can tell whether the problem is technical or biological.
Moderate fix 5: Request lab review when quality flags appear
If your report includes explicit quality warnings (low reads, inhibition, extraction issues), treat it as actionable information. Contact the lab or support channel and ask:
- Whether the sample met acceptance criteria
- What the quality score indicated
- Whether a re-run is possible from the remaining extract
- What collection or shipping factors they suspect
Some labs can reprocess leftover material. If they can’t, you’ll still have gained clarity. For microbiome test troubleshooting, understanding the lab’s bottleneck is more valuable than repeating blindly.
Advanced fix 6: Use a repeat sample design to separate random variation from technical failure
When results are inconsistent across time, you need a better design than “test again whenever.” Consider collecting two samples on separate days within a narrow window while keeping your routine stable. For example, collect on day 1 and day 3 or day 1 and day 7 (choose the window that matches your normal bowel patterns and the kit’s guidance).
If both samples show the same quality problems (low depth warnings, high unclassified reads), you likely have a technical handling issue or a kit compatibility issue. If one sample looks strong and the other doesn’t, the problem may be collection-specific or timing-specific.
Advanced fix 7: Address inhibitors and sample matrix problems
Some stool samples contain compounds that inhibit DNA amplification. If your report suggests inhibition, you can’t always “fix” this at home, but you can improve collection consistency:
- Avoid collecting material contaminated with urine or water.
- Follow the kit’s guidance on how to collect from the stool surface vs. mixing.
- Ensure the sample is sealed quickly and transported correctly.
If inhibition repeats, ask the lab what mitigation options exist. Some protocols include steps to reduce inhibitors during extraction or amplification.
When replacement, retesting, or professional help is necessary
Microbiome test troubleshooting should end at a point where further self-management won’t add useful information. Use these decision points to know when to escalate.
Replace or retest sooner when you see quality failure language
If the report indicates sample failure, extremely low sequencing depth, or an inability to generate a reliable profile, you should plan for a new sample rather than trying to interpret partial data. In many cases, a second attempt with stricter handling will produce a usable dataset.
Also retest if you suspect a labeling error. If you mixed up dates, containers, or individuals, the best troubleshooting step is to redo the process with clear labels and a controlled workflow.
Seek professional guidance when results affect medical decisions
Microbiome profiles can be informative, but they’re not a substitute for clinical evaluation. If you’re dealing with persistent GI symptoms—like ongoing diarrhea, blood in stool, unexplained weight loss, severe abdominal pain, or symptoms lasting more than 4 weeks—get medical evaluation. A clinician can decide whether you need stool cultures, ova/parasite testing, inflammatory markers, or other diagnostics.
In such cases, don’t treat microbiome test output as the only evidence. Use it as background information while the appropriate medical workup proceeds.
Get lab support when the issue seems systemic
If multiple samples you submit show the same technical failure pattern, contact the lab and share the details. Provide:
- Collection dates and shipping tracking
- Any temperature or storage notes
- Quality warnings shown in the report
- Kit lot number if available
Labs can sometimes identify a batch issue, a protocol mismatch, or a common handling step that leads to inhibition or low DNA yield.
Know when “normal variability” is the explanation
Not every surprising result is a test failure. If your report quality indicators look solid (adequate sequencing depth, low inhibition flags) and your collection process matched instructions, then differences across tests may reflect real biology. That’s especially likely if you changed diet, traveled, or had an illness in the week before sampling.
In that scenario, troubleshooting should focus less on repeating immediately and more on establishing a consistent baseline. If you retest, do it under stable conditions and with a repeat design (for example, two samples in the same week) so you can distinguish signal from noise.
Practical microbiome test troubleshooting scenario you can apply
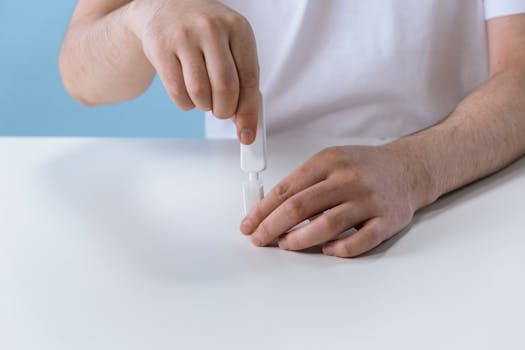
Here’s a realistic situation and how you’d troubleshoot it.
You run a test because you started a fiber supplement. Your report shows a big drop in several taxa you expected to increase, and the lab notes “low DNA yield” with fewer taxa detected. Your shipping tracking shows the package arrived 5 days after the label was created, and it sat in a transit facility over a weekend. You also remember the sample was collected on a Friday evening and left at room temperature for about 6 hours before you refrigerated it.
How you proceed:
- Step 1: You compare your collection steps to the kit’s instructions and confirm that the kit specified immediate stabilization/refrigeration within a shorter window than 6 hours.
- Step 2: You connect the received date and transit delay to the “low DNA yield” note. Warm exposure during that period becomes the leading suspect.
- Step 3: You standardize the next collection: you collect earlier in the day, seal immediately, refrigerate right away, and ship in a way that avoids weekend hold if possible.
- Step 4: You keep the fiber supplement stable for at least 7 days before the next test so you’re not changing variables midstream.
- Step 5: If the next sample again shows low yield and low sequencing depth, you contact lab support with the quality notes and shipping details, and ask whether reprocessing is possible from remaining material.
This approach doesn’t assume the lab is wrong. It uses evidence from your workflow and the report’s quality indicators to target the most likely failure point.
How to prevent recurring problems in future microbiome testing
Once you’ve fixed the immediate issue, you want to avoid repeating it. Microbiome test troubleshooting becomes simpler when you treat collection as a repeatable protocol.
Use a checklist mindset:
- Follow the kit’s time-to-stabilization instructions exactly.
- Use consistent storage temperature from collection to ship-off.
- Label immediately and keep samples separated if multiple tests are involved.
- Keep pre-collection routine stable for 7–14 days if the purpose is trend tracking.
- Document key confounders: antibiotics, probiotics, diet shifts, travel, and GI illness.
If you want to use results to guide decisions, create a baseline period before making changes. That reduces the chance you’ll interpret a normal response to diet or medication as a technical problem.
Guidance on interpreting troubleshooting outcomes without overcorrecting
After you troubleshoot, it’s tempting to “chase the perfect profile.” Resist that. Microbiome testing is inherently variable because it measures a living ecosystem that responds to your daily environment. Troubleshooting is about improving the reliability of the measurement, not eliminating biological change.
Once you get a usable report, focus on trends across comparable conditions rather than single-point surprises. If you still see meaningful shifts after you’ve standardized collection and handling, the change is more likely biological. If you see repeated technical warnings, your next step should be escalation—either a new sample with stricter handling or lab review.
When replacement or professional help is necessary (clear decision rules)
Use these rules to decide whether to stop troubleshooting at home.
- Stop interpreting and retest if your report states the sample failed quality thresholds or the profile is too incomplete to be reliable.
- Escalate to lab support if multiple attempts show the same quality warnings despite correct handling.
- Seek medical evaluation if microbiome results are being used to address persistent or severe symptoms. Lab profiles do not replace clinical diagnostics.
- Don’t retest immediately if your report quality indicators look strong and you had known biological triggers (antibiotics, illness, major diet change). Stabilize conditions and retest with a planned design.
By treating microbiome test troubleshooting as a structured process—evidence first, then targeted fixes—you can reduce uncertainty and get results that are easier to trust.
29.01.2026. 17:19