SpO2 vs ODI Accuracy Wearable Validation Protocol
When your wearable’s SpO2 and ODI don’t agree

You’re not alone if your wearable shows normal oxygen saturation (SpO2) but an overnight oxygen desaturation index (ODI) that looks unusually high—or the reverse. This mismatch can be confusing, especially when you’re trying to understand sleep quality, breathing patterns, or the impact of altitude, illness, or equipment changes.
Common “you might have a measurement problem” symptoms include:
- SpO2 readings look stable (for example, mostly 96–99%), while ODI spikes (for example, ODI > 15 or > 20) after a few hours.
- ODI drops after you move or adjust the device, but SpO2 doesn’t change much.
- ODI appears to “track motion”—it rises during restlessness, bathroom trips, or when your wrist/strap shifts.
- Sudden step-changes in SpO2 (for example, 98% to 92% for a short burst) that don’t match how you felt.
- Different nights, same conditions produce very different ODI while SpO2 averages stay similar.
These patterns often point to signal quality, device fit, algorithm settings, or a validation mismatch between SpO2 sampling and the ODI event detection logic. The good news: you can troubleshoot this systematically, and you don’t need specialized lab equipment to find the likely cause.
Most likely causes of SpO2 vs ODI accuracy errors
Before you start changing things, it helps to know what usually breaks first. ODI is derived from SpO2 trends and desaturation events, so small differences in signal quality can create big changes in event counts.
1) Poor sensor contact or strap tension
If the optical sensor isn’t pressed consistently to your skin, you can get artifacts. SpO2 may still show plausible averages, but the shape of the desaturation dips becomes unreliable, which can inflate ODI.
Wrist wearables are especially sensitive to fit. A strap that’s slightly loose can be fine while you’re awake and moving, then fail during sleep when your wrist angle changes.
2) Motion artifacts during sleep
ODI is event-based. If motion causes brief signal dropouts or corrupted pulses, the algorithm may interpret them as desaturation events. SpO2 averages might remain reasonable because the system can still compute a value, but event detection can be fooled by brief interruptions.
A practical example: you fall asleep on your side, your wrist rotates inward, and the strap shifts by 1–2 cm. After that, ODI climbs while you don’t feel any clear breathing disturbance.
3) Skin temperature, vasoconstriction, or cold hands
Cold reduces blood flow and can degrade the photoplethysmography (PPG) signal. SpO2 might appear intermittently stable, but the fine-grained desaturation curve used for ODI can become noisy.
If your bedroom is below ~18°C (or you often sleep with cool hands), try this before assuming a health issue.
4) Nail polish, lotions, sweat, or residue on the sensor area
Optical sensors don’t like barriers. Lotion, sunscreen, heavy moisturizer, or residue can change reflectance/absorbance. Even a thin film can increase noise and produce false event detection.
5) Algorithm and threshold mismatch (ODI definition)
Different devices implement ODI differently. Some use a fixed desaturation threshold (for example, a drop of 3% from baseline), some use smoothing windows, and some apply quality gating based on signal confidence.
If you validate “SpO2 vs ODI” by eyeballing two metrics without aligning the device’s internal ODI definition, you can misinterpret normal behavior as inaccurate accuracy.
6) Data alignment and sampling differences
Even if the wearable is accurate, your export or dashboard may summarize data in a way that hides the underlying event timeline. For example, SpO2 might be averaged over 5–15 second windows, while ODI events are detected at finer granularity. If you compare a chart with aggregated values to an event list, the mismatch can look larger than it really is.
Step-by-step troubleshooting and repair process
Use this protocol like a checklist. Your goal is to improve signal quality first, then validate that ODI events correspond to real SpO2 dips.
Step 1: Confirm the device is worn correctly for the entire sleep window
- Wear the device about 1–2 finger widths above the wrist bone (not directly on the joint).
- Keep the strap snug enough that it doesn’t slide when you gently move your wrist. If you can easily rotate the sensor by hand, it’s usually too loose.
- Align the sensor area flat against your skin. Avoid wearing over thick clothing cuffs.
Real-world example: if you typically wear your watch slightly lower, try raising it by ~2–3 cm for one night. Many ODI spikes caused by intermittent contact disappear after this simple change.
Step 2: Clean the sensor and skin contact points
- Clean the sensor window with a soft, dry cloth or device-safe wipe.
- Wipe and dry your skin. If you use lotion at night, stop for 24–48 hours and see if signal quality improves.
- Let the skin fully dry before wearing the device.
Do this even if you think it’s clean. Sensor windows can collect invisible residue that affects optical readings.
Step 3: Warm up the sensor environment
- If you sleep in a cold room, wear the device and check the first 10 minutes of data for stable readings.
- Consider warming your hands before sleep (warm socks or a brief warm-up). Then put the wearable on.
Cold-induced signal degradation often shows up as increased “noise” or more frequent quality issues. If your app shows a signal quality indicator, watch it for improvement after warming.
Step 4: Reduce motion artifacts during the test night
- For a validation night, avoid extra activities close to bedtime (extended phone scrolling with heavy hand movement).
- Sleep on your back or the side that keeps the sensor from bending sharply.
- If you tend to toss and turn, try a slightly tighter strap for that night only—then reassess comfort.
Motion artifacts often create ODI “clusters” rather than evenly spread events. If your ODI rises only when you’re moving, it’s a strong clue.
Step 5: Capture a “baseline” night and a “change one variable” night
Don’t change five things at once. Run two nights:
- Night A (baseline): wear it as you normally do.
- Night B (controlled): apply one change—fit adjustment or cleaning or warmth—while keeping everything else constant.
Then compare not just the ODI total, but whether ODI events correspond to visible SpO2 dips (even if you’re looking at the app’s chart).
Step 6: Validate ODI events against SpO2 dips using event timing
If your app provides an event list or you can export data, check whether ODI events occur when SpO2 actually drops.
- Look for a desaturation pattern: a downward trend, not just a single noisy point.
- Check whether multiple ODI events happen during the same segment where the SpO2 waveform looks unstable.
- If your app offers “signal quality” or “confidence,” treat low-confidence segments as unreliable for ODI interpretation.
What you’re trying to confirm is whether the wearable’s ODI logic is triggering on true oxygen dips versus triggering on artifacts.
Solutions from simplest fixes to more advanced fixes
Simple fix: re-fit and re-test for 2 nights
Start here because it resolves the majority of real-world mismatches. Adjust strap position and tension, clean sensor contact, then re-test for two nights.
If ODI drops meaningfully (for example, from > 20 to < 10) after fit correction while SpO2 stability remains similar, you’ve likely found the root cause.
Simple fix: remove external optical interference
- Avoid lotions, sunscreen, or oils on the sensor area.
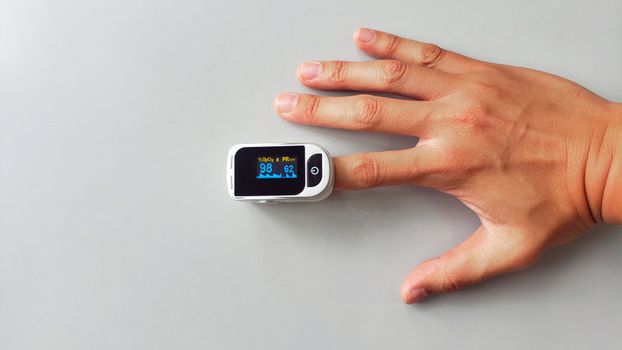
- Remove nail polish if the wearable is finger-based (some systems are).
- Dry your skin thoroughly before wearing.
Even if SpO2 “looks okay,” ODI can still be inflated by subtle noise.
Moderate fix: manage cold and circulation issues
If your bedroom is cool or your hands are often cold, try a warming strategy for 1–2 nights. The aim is to improve PPG signal quality, not to change your physiology.
For example, if your room is 16–17°C, try raising it to ~19–20°C or using warm socks. If ODI normalizes afterward, your wearable likely needs a better signal environment.
Moderate fix: use device settings that improve event detection quality
Many wearables include sleep tracking modes, “enhanced” monitoring, or quality gating features. If you can choose between standard and enhanced SpO2 monitoring, test one setting at a time.
Also check whether you can enable continuous night monitoring versus “only during detected sleep.” Event-based metrics like ODI often benefit from continuous capture.
Advanced fix: validate with a reference measure and align the ODI definition
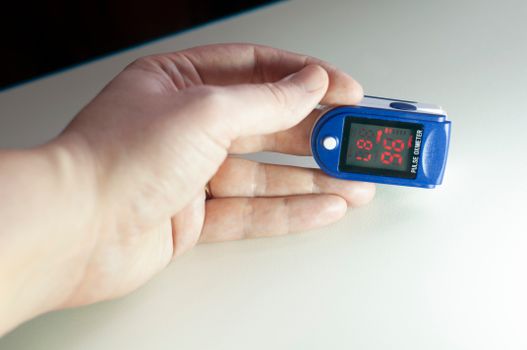
If you have access to a clinical-grade pulse oximeter or a research-grade device, use it to confirm whether true desaturation events exist.
Here’s a practical approach: use a reference pulse oximeter on a fingertip while wearing your wearable. Record for 10–20 minutes during sleep onset and again during a later sleep segment.
- If both devices show similar SpO2 dips during the same time windows, ODI discrepancies are more likely algorithm-related (thresholds/smoothing).
- If the reference shows no significant desaturation while your wearable shows dips, your wearable is likely detecting artifacts or has reduced signal confidence.
Important: ODI thresholds vary. If one device uses a 3% drop from baseline and another uses a different rule, you can see differences even when both are accurate.
Advanced fix: verify firmware/app integrity and data export behavior
- Update the wearable firmware and companion app.
- Confirm you’re exporting the correct metric definition (some exports include “SpO2” while others include “SpO2 derived” or “smoothed SpO2”).
- Check whether the app re-processes data on the server after syncing. If so, compare nights after data fully uploads.
Sometimes the wearable did the right measurement, but your dashboard presentation (averaging windows, smoothing, or delayed processing) makes ODI and SpO2 look out of sync.
Advanced fix: replace consumables or swap the hardware contact interface
If you’ve cleaned everything, fitted properly, and controlled motion and temperature, the remaining likely causes are sensor wear or hardware issues.
- Try a different strap if your model supports it, especially if the strap material is stretching or the sensor pressure varies.
- Inspect the sensor window for scratches or cloudiness.
- If your wearable uses a replaceable sensor module or docking cradle, try the manufacturer’s recommended replacement part.
If you’re using a popular line of wearables that support third-party straps, stick to straps that maintain consistent pressure. In practice, inconsistent pressure is a top driver of ODI inflation.
When replacement or professional help is necessary
Not every mismatch is a device problem. Use your troubleshooting results to decide when to escalate.
Consider replacement or warranty service if
- After 3–5 nights of controlled re-fitting and cleaning, ODI remains erratic and does not correlate with visible SpO2 dips.
- You see repeated “low signal” or “sensor error” flags during sleep even with correct fit.
- SpO2 readings are frequently jumping by more than ~3–4 percentage points in a way that doesn’t match your symptoms (for example, 98% to 92% repeatedly within minutes) despite stable conditions.
- The wearable’s sensor window appears physically damaged or the device fails to hold stable readings.
Soft recommendation: if your device is within warranty, it’s often worth contacting support with your last 3 nights of data and describing the SpO2 vs ODI mismatch pattern. This helps them check firmware/sensor diagnostics faster.
Seek professional help if you suspect a real breathing or oxygenation issue
Wearables are screening tools. If your results suggest frequent desaturation or you have concerning symptoms, don’t treat the wearable as the only evidence.
Get medical advice promptly if you have any of the following:
- Daytime sleepiness, loud snoring, witnessed pauses in breathing, or morning headaches.
- Consistently high ODI across multiple nights even after signal-quality improvements (for example, ODI staying high after correct fit, cleaning, and stable temperature).
- Persistently low SpO2 readings compared to your baseline while you’re at rest (your clinician can help define what’s “low” for you).
- Shortness of breath, chest pain, or symptoms that worsen quickly.
A clinician may recommend formal testing such as a sleep study. If you do pursue that, bring your wearable reports. They can help your provider understand the pattern you’re seeing.
A practical validation protocol you can run this week
If you want a clean, repeatable approach, use this 7-day plan:
- Day 1: Clean sensor, check fit (1–2 finger widths above wrist bone), and start sleep tracking. Note whether the app shows stable signal quality.
- Day 2: Baseline night (keep everything normal). Record ODI total and how ODI events align with any visible SpO2 dips.
- Day 3: Change only one variable—either warm hands/room or adjust strap tension.
- Day 4: Controlled night. Aim to see fewer ODI clusters that correspond to motion or signal instability.
- Day 5: If possible, add a reference check for 10–20 minutes during sleep onset using a fingertip pulse oximeter.
- Day 6: Compare whether reference SpO2 dips occur when your wearable triggers ODI.
- Day 7: Decide whether you need warranty/service (if mismatch persists despite good signal) or medical evaluation (if the pattern persists as a true physiological signal).
In many cases, you’ll learn something actionable quickly. For example, one common scenario is that ODI looks “too high” until you raise the device position by a couple centimeters and stop applying lotion at night. After that, ODI totals normalize and the event timing lines up with actual desaturation dips.
Another scenario: you might see ODI persistently elevated even when SpO2 looks stable in the app. If the app indicates low signal confidence during the same intervals, it’s more likely a data quality issue than a true oxygenation problem.
Either way, this protocol helps you avoid guessing.
How to interpret results without getting misled
When you’re troubleshooting SpO2 vs ODI accuracy, focus on consistency and event plausibility, not a single number.
- If ODI changes dramatically when you change strap fit or reduce motion, the issue is likely measurement quality.
- If ODI stays high across controlled nights and aligns with true SpO2 desaturation segments, treat it as a potential signal worth discussing with a clinician.
- If SpO2 is stable but ODI is high, check whether the wearable’s quality/confidence gating is failing, or whether ODI is being triggered by brief artifacts that your chart smoothing hides.
Soft affiliate note (optional): if you’re shopping for a wearable to improve monitoring reliability, look for models that provide clear signal quality indicators, allow firmware updates, and offer transparent sleep metrics definitions. A device that helps you verify signal quality is often more useful than one that only displays a final ODI number.
15.03.2026. 01:51