

Hard Water Filter for Drinking Hydration: How to Choose & Use

Goal: get better-tasting water for hydration with a hard water filter
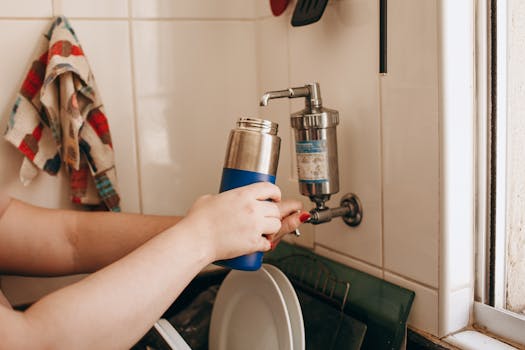
If you’re dealing with hard water, you already know the signs: chalky scale in the kettle, soap that doesn’t lather well, and sometimes a slightly “off” taste that makes it harder to stay consistent with drinking water. The goal of a hard water filter for drinking hydration is simple: reduce hardness minerals—mainly calcium and magnesium—so your drinking water tastes cleaner and your appliances and plumbing stay cleaner too.
This guide walks you through choosing the right type of filter, installing it correctly, and setting up a maintenance routine that keeps results stable. You’ll also learn how to test before and after, so you can verify that the filter is actually doing what you expect.
You don’t need special plumbing skills, but you do need to measure, prep, and follow a repeatable process. If you do that, your hydration setup becomes low-effort and reliable.
What you need before you start (prep, tools, and setup)
Before you install anything, gather the basics. This prevents the most common “it leaks” and “it doesn’t fit” problems.
Required items
- Water test info (recommended): If you can, check your water report or use a hardness test strip kit. Aim to know your hardness in grains per gallon (gpg) or ppm (mg/L of calcium carbonate).
- Filter type you’ve chosen: Common options include under-sink countertop systems, refrigerator inline filters, and point-of-use countertop filters. For drinking hydration, you’ll typically focus on the cold-water line feeding drinking water.
- Appropriate fittings/adapter: For example, 1/4" tubing adapters for RO-style systems, or standard G3/4" or 1/2" connections for some under-sink filters (varies by brand).
- Clean bucket and towels: For catching water during installation.
- Basic tools: Adjustable wrench, screwdriver, and a towel or small sponge for wiping surfaces.
- Food-safe silicone grease (optional): Only if your filter manufacturer recommends it for O-rings.
- Replacement filter cartridge: Confirm what model and size you’re installing so you don’t pause mid-job waiting for parts.
Setup you should decide ahead of time
- Where you’ll use filtered water: Drinking only, or also cooking? If you want filtered water for hydration and cooking, you’ll want a consistent source (usually cold water).
- Whether you’ll filter at the point of use or whole-house: For hydration, point-of-use is often the simplest. Whole-house can be useful, but it’s a bigger project.
Step-by-step: install a hard water filter for drinking hydration
Follow these steps in order. Skipping the testing and flushing steps is where most performance issues start.
Confirm the filter’s hardness target and flow rate. Look for specifications that match your water hardness. Many filters list a capacity (for example, “up to X gallons” under specific conditions). If your hardness is high, you may need earlier cartridge changes. If your filter includes a flow limiter, keep it installed as directed.
Turn off the water supply to the installation point. If you’re installing under a sink, close the cold-water shutoff valve. Open the faucet to relieve pressure. Put a towel around the area so you catch any residual drips.
Remove the old filter (if you’re replacing one) and inspect connections. Check O-rings and threads for damage. If you see cracks or flattened seals, replace the seal rather than trying to “make it work.”
Dry-fit the filter components before tightening. Assemble the parts without forcing them. This helps you confirm alignment and that adapters fit correctly. Tighten only after everything sits flush.
Install the filter according to the connection type. Use the manufacturer’s instructions for your exact model. For example:
- If it uses push-fit tubing, push tubing fully until it seats. Tug test the line gently to confirm it’s locked.
- If it uses threaded connections, tighten firmly but avoid over-torquing. Over-tightening can deform O-rings.
- If it uses inline cartridge housings, ensure the arrow/flow direction matches the water flow.
Check for leaks before you fully commit. Close the faucet, turn the water supply back on slowly, and observe for 2–5 minutes. Wipe joints with a dry towel and watch for moisture “appearing” rather than just initial drips.
Flush the system to remove carbon fines and initial media dust. Many filters require flushing. A common starting point is run cold water for 2–5 minutes (or until the filter’s stated volume is reached). If your filter instructions specify a different time or volume, follow that. Don’t drink the first flush water.
Flush again if the water smells “new” or looks cloudy. Cloudiness can happen right after installation. Run water in short bursts (30–60 seconds) and re-check clarity. Stop when it looks normal.
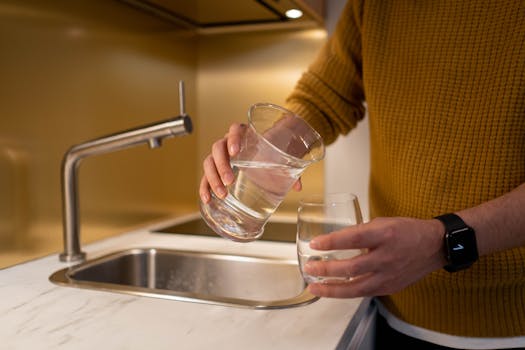
Run a practical hydration test for taste and feel. Fill a clear glass and let it sit for 1–2 minutes. Taste it. If you notice a strong “filter” taste, keep flushing according to your manufacturer guidance. If the taste still seems off after the recommended flush, you may have a cartridge seated incorrectly or an airflow/flow issue.
Measure hardness reduction after installation. Use a hardness test strip kit (or a liquid test) to check the filtered water. Test both unfiltered and filtered samples. If your test kit reads in ppm or mg/L, record both values so you can see how much you removed. If your filter type is designed for hardness reduction, you should see a meaningful drop.
Log your start date and expected cartridge lifespan. Write the installation date on the cartridge or in a note. Many filters specify capacity in gallons; if you don’t track usage, you can end up changing cartridges too late. A simple rule: if you drink about 2–3 liters per day per person and you also filter cooking water, estimate your monthly cartridge usage and plan changes earlier than the maximum rating.
Set up your routine for consistent hydration. Keep filtered water accessible. For example, you might fill a bottle in the morning and again in the afternoon. Consistency matters more than perfect timing—your hydration habit becomes easier when filtered water is always ready.
Common mistakes that reduce results or cause leaks
Even with good intentions, a few errors show up repeatedly. Here’s what to watch for so your hard water filter for drinking hydration performs as expected.
Skipping the flush step. If you drink straight after installation, you may taste carbon dust or see temporary cloudiness. Flush first, then taste.
Assuming “hard water filter” means any filter will reduce hardness. Some filters focus on chlorine taste, sediment, or general water clarity. Hardness reduction depends on filter media and design. Confirm your filter’s capability for calcium and magnesium reduction.
Using the wrong cartridge for the housing. A mismatched cartridge can restrict flow, bypass media, or reduce hardness treatment. Always match the exact model number.
Over-tightening threaded fittings. This can deform seals and lead to slow leaks. Tighten “snug plus a little,” not “as hard as possible.”
Not checking flow direction. If an inline filter is installed backward, performance can drop and the cartridge may not work as designed.
Ignoring high hardness and capacity limits. If your water is very hard, cartridge capacity may drop faster than expected. Your test results after installation can guide how quickly you’ll need to replace.
Failing to test after installation. Taste alone can be misleading. Some filters improve taste without reducing hardness enough for your specific goal. A simple test gives you clarity.
Letting the system sit unused for long periods. If you go away for weeks, water inside the system can stagnate. Many manufacturers recommend flushing before use after extended non-use. When in doubt, run water for a short period before drinking.
Additional practical tips to optimize drinking hydration results
Once your filter is installed, the goal shifts from setup to stability. These steps help you maintain performance and keep hydration convenient.
1) Choose a filter location that matches how you drink
Think about your routine. If you primarily drink from a bottle, a point-of-use filter near the sink can be easier than a whole-house system. If you use a kettle or coffee maker daily, filtering cold water at the sink often makes the most noticeable difference.
Practical example: Suppose you and your partner each drink about 1.5 liters of water daily, and you also make coffee in the morning using filtered water. That’s roughly 3 liters/day plus a few cups of extra water for coffee. If your filter is rated for a certain number of gallons, you’ll hit capacity faster than a household that only filters for one person. Tracking usage helps you replace on time rather than guessing.
2) Use a simple hardness log to plan cartridge changes
Instead of replacing cartridges strictly on the calendar, combine calendar time with a quick hardness check. For example, test again after 30 days and compare to your initial post-install reading. If hardness reduction drops faster than expected, you can adjust your replacement schedule.
3) Keep flow consistent and avoid restricted plumbing
If your filter includes a cartridge that can clog with sediment, you’ll want to prevent sediment from reaching it. If your water has visible particles or frequent plumbing disturbances, consider a pre-sediment stage if your system allows it.
Restricted flow can also cause taste issues. If you notice the water stream slowing down noticeably, check for cartridge installation errors, kinks in tubing, or a cartridge nearing capacity.
4) Flush after cartridge replacement and after long non-use
Every time you change the cartridge, flush according to the manufacturer’s guidance. For long absences, flush before drinking. A short flush prevents stale water from lingering in the housing.
5) Pair filtration with good hydration habits
Even the best filter won’t fix inconsistent hydration. Make it easy on yourself:
- Keep a pitcher or bottle filled with filtered water in the fridge.
- Use a visible “refill cue” (like keeping your bottle on the counter during the day).
- If you use ice, consider filtering the water you fill your ice trays with so the taste stays consistent.
6) Soft product guidance: what to look for in filter systems
You don’t have to overthink brands, but you should look for a system that’s clear about what it removes and how. When you’re shopping for a hard water filter for drinking hydration, prioritize:
- Clear claims about hardness reduction (calcium/magnesium reduction), not only “better taste.”
- Stated capacity in gallons and conditions used to calculate it.
- Cartridge availability so you can replace on schedule without long delays.
- Compatibility with your plumbing (connection type and dimensions).
If you want an easy starting point, many households use under-sink systems from well-known water filtration manufacturers, such as iSpring or APEC, or countertop solutions from brands like Brita. For hardness-heavy areas, pay special attention to whether the system is actually designed for hardness reduction rather than only taste and odor improvement. If you’re considering a reverse osmosis system (common for strong hardness and total dissolved solids reduction), ensure you have space under the sink and understand waste water requirements.
For shower or whole-home scale control, you might see other product types, but for hydration you’ll want a setup that produces drinking-ready water at a pace you can use daily.
7) Know when you may need a different approach
Sometimes a hardness-focused filter works well, and sometimes your water conditions require a different design. If your hardness test still shows high hardness after proper installation and flushing, re-check:
- That you installed the correct cartridge.
- That the flow direction is correct.
- That the cartridge is not past its rated capacity.
- That you’re testing the same water source (filtered vs unfiltered cold line).
If those checks don’t resolve it, consider whether your water hardness is beyond the filter’s capacity or whether you need a system with stronger hardness treatment media.
Maintenance schedule you can actually follow
A filter for drinking hydration is only as good as your routine. Use this simple schedule to keep performance stable.
Check the system weekly for leaks and flow changes. Spend 30 seconds looking at joints and observing whether the flow is steady.
Test hardness every 30–60 days at first. This is especially helpful in the first 2–3 months after installation. You’ll learn how quickly your cartridge is working in your specific water.
Replace the cartridge when you hit your planned schedule. If your filter is rated for a certain gallon capacity, estimate your household usage and replace earlier if your hardness reduction drops faster than expected.
Flush after each cartridge replacement. Follow the manufacturer’s time or volume. Then taste and visually confirm clarity.
Keep the area around the filter clean and dry. It sounds minor, but it helps you spot early seepage and prevents buildup around fittings.
Real-world scenario: setting up hydration filtration in a hard-water home
Imagine you moved into an older house with a water hardness around 15–20 gpg (commonly described as hard). You notice kettle scale every few weeks and you’re tired of the “chalky” feeling in drinks. You decide to focus on hydration first rather than doing a whole-home project.
You choose an under-sink or point-of-use system that is explicitly rated for calcium and magnesium reduction. After installation, you flush for the recommended 3–5 minutes, then test the filtered water with hardness strips. Your unfiltered reading comes in around 180–220 ppm (varies by kit), and your filtered reading drops noticeably—enough that your taste improves and the “chalky” afterfeel is reduced.
Then you set a routine: you log the start date, plan replacements based on usage, and retest after 45 days. If hardness reduction starts to fade early, you adjust the replacement schedule rather than waiting for a “bad taste” to appear. Within a few months, your hydration setup becomes predictable. You’re not guessing. You’re acting on measurements.
How to confirm your hard water filter is working for drinking hydration
Once installed, you want proof beyond “it seems better.” Use a combination of sensory checks and simple measurements.
- Taste check: Fill a glass with filtered water and compare it to unfiltered. If hardness reduction is effective, the taste is usually cleaner and less “flat.”
- Clarity check: Filtered water should look consistent. Cloudiness right after installation should clear after flushing.
- Hardness test: Use strips or liquid tests on both filtered and unfiltered cold water. Record results so you can see trends over time.
- Scale observation: If you’re filtering water for the kettle and coffee maker, you’ll often see slower scale buildup. That’s a practical indicator that hardness is reduced.
When you can confirm reduction and maintain it with timely replacements, your hydration becomes easier. You’re not just filtering water—you’re building a reliable system around the water you drink every day.
22.05.2026. 08:55