

EMF bedroom measurement workflow

What goes wrong in a bedroom EMF measurement

You start with good intentions: you measure your bedroom, you get a number, and you expect it to make sense. Then it doesn’t. Readings jump around. Your meter shows “high” even when you think you removed the obvious sources. Or you measure one spot and get a result, then you move 30 cm and the number changes dramatically.
These are common symptoms when running an EMF bedroom measurement workflow without a consistent process. You might notice:
- Inconsistent readings over 1–5 minutes, even at the same location.
- Strong hotspots near outlets, the bed headboard, or a specific wall.
- New spikes after you turn on devices (charging cables, Wi‑Fi router, smart plugs).
- Confusing meter behavior like different sensor modes, averaging delays, or “peak hold” that makes the display look worse than it is.
- Results that don’t match your expectations—for example, the highest reading occurs where there’s no obvious electrical device.
The good news: most measurement problems are workflow problems. If you tighten your steps—how you position the sensor, how you control the environment, and how you verify results—you can usually pinpoint the most likely cause and reduce it.
Most likely causes behind confusing bedroom EMF readings
Before you chase every number, you want to understand what typically drives the readings. In a bedroom, the main contributors usually fall into a few buckets.
1) Measurement inconsistency (position, height, and timing)
EMF sensors are sensitive to distance and orientation. Even small changes can alter readings. A 20–50 cm shift can move you closer to a cable run, a transformer, or a power supply. Height matters too: if your sensor is at 10 cm above the mattress one day and 30 cm the next, you’re not measuring the same “electrical environment.”
Timing matters as well. Many devices are intermittent. A router might send bursts. A smart plug might wake the system every few minutes. HVAC systems cycle. If you measure during a cycle, you may record a spike and assume it’s constant.
2) Hidden power sources inside the room
You may not see the source, but it can still dominate the measurement. Common hidden contributors include:
- Power strips and extension cords behind furniture.
- Wall adapters with switching power supplies (especially if they’re near the bed).
- HVAC wiring or a nearby electrical panel.
- Dimmer switches or LED driver power supplies.
- Ceiling fan controllers or smart ceiling modules.
Even if the device is “off,” some adapters draw standby power and still produce emissions.
3) External sources (neighboring units and mains wiring)
In apartments and townhomes, you can measure emissions that originate outside your room. Examples include neighbor Wi‑Fi, shared building wiring, or power distribution near the wall you’re using for measurement.
That’s why your workflow should include a “baseline then change one variable” approach. Without it, you can’t tell whether the source is yours or not.
4) Meter settings and sensor limitations
Different meters measure different bands or use different sensors (some are more sensitive to electric fields than magnetic fields, some have averaging delays, and some show peaks). If your meter has multiple modes, your readings can look contradictory.
For troubleshooting, treat your meter like a tool with rules. Follow the manual for sensor mode, distance guidance, and whether it’s showing instantaneous vs averaged values.
EMF bedroom measurement workflow: troubleshoot and verify step by step
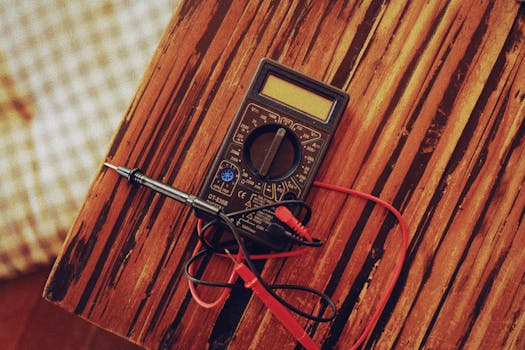
Use this workflow like a checklist. It’s designed to remove guesswork. If you do each step in order, you’ll usually identify the main driver within 30–90 minutes.
Step 1: Prepare a controlled measurement window
Pick a time when your room is stable. Ideally, choose a period where you can keep changes minimal for at least 10 minutes.
- Turn off or unplug devices you can easily control (except the essentials you need to test Wi‑Fi later).
- Close curtains or blinds if they affect sunlight-powered devices or smart automation.
- Write down the time and what’s on/off.
Practical example: If you measure at 7:10 pm while the router is restarting, you might capture a spike. Instead, wait 10 minutes after a restart so the system settles.
Step 2: Set a consistent sensor position and orientation
Consistency matters more than chasing a single “best” spot. Do this:
- Place the sensor at the same height each time—commonly around 5–10 cm above the mattress (or at the height your manual recommends for sleeping exposure).
- Keep the sensor facing the same direction if it has an orientation arrow.
- Keep your body away from the sensor if possible. Your own body can affect readings, especially with electric-field sensors.
Take readings at three points: near the headboard position, the center of the bed, and near your feet. If you sleep on your left side, also measure 30–50 cm to the left and right of your typical head position.
Step 3: Establish a baseline with everything “non-essential” off
Create a baseline reading before turning anything on. The baseline helps you understand what’s coming from the building wiring and external sources.
- Unplug or switch off devices that aren’t required for basic room function.
- Leave the room empty except for the sensor and the minimum you need.
- Record readings for 2 minutes at each location, noting whether the value drifts upward, stays steady, or spikes intermittently.
If readings are steady but elevated in the baseline, your likely causes are external wiring, nearby electrical panels, or persistent sources like always-on adapters.
Step 4: Use a one-variable-at-a-time test cycle
This is the core of troubleshooting. You’ll identify which device causes the change.
Follow this pattern:
- Turn on one device (for example, the bedside lamp, the charger, or the router).
- Wait 60–120 seconds for the system to stabilize.
- Measure again at the same three bed points for 1–2 minutes.
- Write down the change (even if it’s “noticeably higher” vs “same”).
Real-world scenario: You measure at the headboard and see a spike. You turn on a phone charger and the reading jumps within 30 seconds. That points strongly to the charger’s switching power supply. If the reading doesn’t change when you turn the charger off and on, the hotspot is likely elsewhere (like an outlet with faulty wiring or a nearby adapter not the one you tested).
Step 5: Map hotspots using short distance sweeps
When you find a location with the biggest reading, don’t immediately “fix” it. First, map how the field changes with distance.
- From the hotspot, move the sensor in 10–20 cm increments away from the suspected source.
- Note how quickly values drop.
Fast drop-offs often indicate a local source close to the sensor (like a charger or adapter). Slower, broad changes can suggest wiring effects or external interference.
Step 6: Identify electrical field vs magnetic field behavior (practical interpretation)
You can’t always fully separate fields without specialized equipment, but you can infer patterns:
- If turning on/off a device changes readings quickly, that device likely drives emissions.
- If readings change more with proximity than with device state, local wiring or adapters may be responsible.
- If readings remain similar regardless of device use, the building wiring or external environment may be the dominant factor.
Use these inferences to prioritize where to intervene first.
Step 7: Confirm repeatability (the “rewind test”)
Before you commit to a fix, repeat the measurement after reversing your change.
- Turn the tested device back off.
- Wait 60 seconds (or longer if the meter averages).
- Measure again at the same positions.
If the reading returns to baseline, you’ve likely found a true cause. If it doesn’t, your earlier result may have captured a transient event (like a router handshake, a smart home update, or an HVAC cycle).
Solutions from simplest fixes to more advanced fixes
Start with the easiest, reversible changes. Keep your bedroom workflow tidy: change one thing, measure again, and confirm results.
1) Remove obvious power sources near the bed
Begin with what’s easiest to test and often the most effective.
- Unplug phone chargers and USB adapters when not in use.
- Move charging cables away from the bed by at least 0.5–1 meter.
- If you must charge overnight, use a charging setup you can physically place farther away from the sleeping area.
Soft product integration: Look for chargers labeled with better shielding or with lower emissions characteristics, and consider using a remote charging station (a dedicated outlet farther from the mattress). Even without brand claims, distance is often the biggest win.
2) Re-route cables and reduce cable runs across the bed
Cable routing can create localized effects. If you have a power strip under the bed or a cable running along the headboard area, try:
- Changing the cable path so it doesn’t run parallel to where you sleep.
- Keeping cables from looping near the mattress.
- Securing cables so they don’t shift positions when you move furniture.
After rerouting, remeasure at the headboard and center points. If the reading drops quickly with distance, you’ve likely reduced a local source.
3) Adjust device placement (router, speakers, smart hubs)
Wireless devices are often the first suspect, but the highest readings aren’t always the Wi‑Fi itself. Still, placement helps.
- Place the router or smart hub at least 1–2 meters from the bed if possible.
- Avoid placing it directly on a nightstand beside your head.
- Turn off non-essential radios temporarily to test impact (for example, guest Wi‑Fi or unnecessary Bluetooth devices).
Practical example: If your readings spike at the headboard and the router is on the opposite side of the room, moving it to a shelf near the living room may reduce the “bed hotspot” without changing the router settings.
4) Use an outlet strategy: move adapters off the bed side
Many bedrooms have wall adapters for alarm clocks, air purifiers, or smart plugs. The adapter is often closer to your head than you realize.
- Move adapters to a more distant outlet.
- Use a short extension cord so you can relocate the adapter without stretching cables across the bed.
- If an adapter feels warm during operation, it’s likely a switching power supply—prioritize relocating it.
After each relocation, measure again for 1–2 minutes to confirm it’s not just meter drift.
5) Manage lighting and dimmers (LED driver and switch effects)
LED bulbs and dimmers can produce emissions that show up in bedroom measurements. If your measurement workflow points to the lighting circuit:
- Test with the lights off vs on using one-variable testing.
- If the reading rises when a specific lamp is on, try switching to a different bulb type or removing the dimmer control temporarily.
- If you use smart bulbs, test them separately from the rest of the system.
Don’t change everything at once. The goal is to isolate which component drives the change.
6) Treat the outlet itself as a suspect
If the highest readings consistently appear near an outlet, the outlet or its wiring may be contributing. Before you do anything advanced:
- Try a different plug (same device) in a different outlet on the same wall if available.
- If readings shift with outlet location, the outlet wiring is a likely contributor.
- If you notice burning smells, looseness, or visible damage, stop and get professional help immediately.
Electrical safety comes first. EMF troubleshooting never justifies unsafe handling.
7) Improve grounding and power quality (only if you can do it safely)
Some people attempt grounding and power conditioning solutions. The right approach depends on your country’s electrical system and your home wiring.
If you’re considering power conditioners or specialized filters, do it cautiously:
- First, identify the exact device causing the spike using your one-variable test cycle.
- Then, consider whether a filter is addressing the correct source.
- Measure before and after installation, using the same bed positions and timing windows.
In many cases, physical separation and adapter relocation beat expensive filtering. But if you confirm a specific device is the driver and separation isn’t practical, filtering may be worth investigating.
8) Reduce exposure by changing sleep geometry (bed placement)
When you can’t eliminate a source, you can reduce your exposure by moving the bed relative to it.
- If the hotspot is near the headboard wall, try placing the headboard on a different wall.
- Try rotating the bed so the head is farther from outlets, cable runs, and known adapter locations.
- Even a 0.5–1 meter shift can noticeably change readings.
Measure after each bed move. Don’t assume; confirm.
9) Advanced diagnosis: isolate circuits (only when you’re comfortable)
If you suspect the room’s electrical circuit contributes significantly, you can test circuit-level behavior. This is more advanced because it involves your electrical system.
- If you have a breaker you can safely switch, turn off the bedroom circuit and measure baseline again.
- Then turn it back on and retest.
If you’re not confident with breaker operations, skip this step and use professional help. Also, never open panels or modify wiring.
When replacement or professional help is necessary
Most EMF bedroom improvements come from repositioning and unplugging the right sources. But there are times when you should escalate.
Replace or stop using a device when readings are clearly device-driven
If your workflow shows a specific item reliably causes spikes—turning it on increases readings within 30–60 seconds, and turning it off returns them to baseline—consider replacement.
Common candidates include:
- Charging adapters that are unusually hot or physically damaged.
- Faulty power strips or extension cords.
- LED drivers, dimmer modules, or smart home hubs that create persistent hotspots.
Replacement isn’t about “fear.” It’s about removing a confirmed source.
Call an electrician when outlet or wiring behavior looks unsafe
Professional help is necessary if you see or smell anything concerning, or if a device causes repeated issues across outlets.
- Burning smell near a wall outlet or power strip.
- Visible scorch marks or loose-fitting plugs.
- Sparking when plugging/unplugging.
- Frequent breaker trips associated with bedroom outlets.
In these scenarios, do not continue troubleshooting with your meter. Safety first.
Consider a professional EMF assessment when you can’t isolate the cause
If you’ve followed the workflow—baseline, one-variable testing, hotspot mapping, repeatability—and you still can’t identify the driver, a professional assessment can help. This is especially relevant if:
- Your highest readings appear in multiple locations with no obvious device correlation.
- You live in an apartment with shared wiring where circuit-level testing is complex.
- You suspect an external source (neighboring equipment or building infrastructure) and need a broader survey.
When you hire help, ask them how they measure and whether they can document the source behavior (for example, changes when specific devices are turned on/off). You want confirmation, not just a single number.
Know when further changes are diminishing returns
You’ll often reach a point where additional tweaks give smaller improvements. Signs you’re nearing diminishing returns include:
- Changes only appear during unusual cycles (like HVAC), not when you sleep.
- Readings are stable and within your personal target range for the sleeping period.
- Every remaining change requires major lifestyle disruption for small reductions.
At that point, focus on the most impactful fixes you already validated—device relocation, cable rerouting, and bed geometry—then stop chasing noise.
Putting the workflow into practice with a complete example

Here’s a realistic scenario that matches what many people experience.
You measure your bed and see the highest reading near the headboard wall. You also notice your phone charger is plugged in overnight. Your first measurement is inconsistent because you’re measuring at different heights and sometimes the router restarts.
So you restart the process:
- You wait until things settle and keep devices stable for 10 minutes.
- You place the sensor 5–10 cm above the mattress at the headboard, center, and feet.
- Baseline: everything non-essential is off for 2 minutes at each point. The headboard reading is elevated but stable.
- One-variable test: you unplug the phone charger. After 60–120 seconds, the headboard reading drops noticeably while the center and feet stay similar.
- You confirm repeatability: you plug it back in and the spike returns; you unplug again and it returns to baseline.
- You do a short distance sweep: moving the sensor 20 cm away from the charger direction reduces the reading sharply.
Now you choose your fix. You don’t need to replace everything. You simply move the charger to an outlet farther from the bed and route the cable so it doesn’t run along the mattress edge. You remeasure after the change. The hotspot disappears or drops close to baseline.
That’s how the workflow turns “confusing numbers” into actionable decisions.
Common troubleshooting mistakes that waste time
If you keep getting unclear results, check whether you’re making one of these workflow errors.
- Measuring too quickly after turning devices on. Many sources take 30–90 seconds to stabilize.
- Changing multiple variables at once. If you move the router and unplug the lamp in the same step, you can’t tell which change mattered.
- Measuring only one spot. Bed exposure is rarely uniform. You need at least head, center, and feet.
- Ignoring meter mode and averaging. A “peak hold” can make your reading look worse than it is.
- Assuming Wi‑Fi is the only wireless driver. Bluetooth hubs, smart devices, and even the phone charger can be the bigger factor.
Once you correct these, troubleshooting becomes much faster.
How to document your results so decisions are easier
Write down what you did. Not because it’s “data science,” but because it prevents you from repeating the same work.
- Record baseline readings at headboard, center, and feet for 2 minutes.
- For each device test, note the device name, what changed, and the approximate reading change after 60–120 seconds.
- When you apply a fix, remeasure for at least 1–2 minutes and confirm repeatability.
Even a simple note app log works. If you later decide to replace a device or move the bed, your notes will tell you what mattered.
Where to start if you’re stuck right now

If you’re currently in the middle of troubleshooting and nothing seems to line up, start with this order:
- Baseline with non-essential devices off.
- One-variable testing of the most likely local sources: chargers, bedside adapters, and any power strip near the bed.
- Hotspot mapping with 10–20 cm distance sweeps.
- Repeatability check by reversing the device state.
- Only then consider outlet-level checks, circuit-level testing, or larger changes like bed placement.
This is the EMF bedroom measurement workflow that turns uncertainty into a clear path forward—without random trial-and-error.
09.02.2026. 00:46