

Night Light Sleep Worsens: Troubleshooting Low-Blue Issues

When a “low blue” night light makes sleep worse
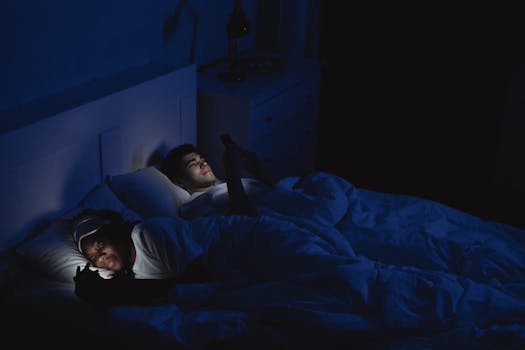
You buy a low-blue night light to help your body wind down. Then you notice the opposite: you fall asleep later, wake more often, or feel oddly alert after the light turns on. You might also see a pattern—sleep gets worse on nights when the night light runs, even if the room looks dim.
This troubleshooting guide is built for that exact situation. The target here is practical diagnosis: you’ll identify why the night light is affecting you (or your household), then adjust or repair the setup so it supports sleep instead of disrupting it.
Common symptoms you may experience include:
- More wake-ups between 1:00 a.m. and 4:00 a.m. on nights the night light is on
- Difficulty falling asleep by 15–45 minutes after the light activates
- A “wired but tired” feeling after you’ve been lying down for 20–30 minutes
- Sleep disruption when you get up briefly at night and the night light is bright or close to your field of view
- Headaches or eye strain if the light is harsh, flickery, or positioned near eye level
Before you assume the product “doesn’t work,” treat this like a system problem. Low-blue marketing is only one variable. Brightness, spectrum quality, flicker, distance, placement, and control settings all matter—often more than you’d expect.
Most likely causes behind “low blue” that still worsens sleep
Low-blue night lights can still disrupt sleep. The most likely causes fall into a few buckets.
1) The light is still too bright for your eyes
Even warm light can interfere if it’s bright enough to reach your eyes. A night light that outputs, for example, 5–20 lumens can be fine in some rooms. In others—especially small bedrooms, reflective walls, or if the fixture is within direct sight—those lumens can be enough to suppress melatonin.
If your night light is plugged into a nightstand outlet and you can see it from bed, brightness is a prime suspect.
2) “Low blue” doesn’t mean “no blue,” and spectrum quality varies
Many low-blue products use warm color temperatures like 2200K–2700K. That usually reduces short-wavelength light, but it doesn’t eliminate it. Two lights both labeled “low blue” can have different spectral peaks depending on the LED driver and phosphor design.
If your night light uses a typical LED plus a color-filter strategy, it may reduce blue but still produce enough short-wavelength energy to affect sensitive sleepers.
3) Flicker from the driver (even at low brightness)
Some LEDs flicker at frequencies that aren’t obvious. Flicker can be especially noticeable when the light is dimmed or when the device uses a cheap driver. Even if brightness looks steady to you, your eyes and brain may still register micro-variations.
In practice, flicker can worsen sleep quality for some people more than for others.
4) Sensor behavior creates unexpected brightness changes
Motion sensors, light sensors, and “smart” routines can turn the night light brighter than you think. For example:
- It may start dim and then ramp up when it detects movement
- It may interpret room light conditions incorrectly, especially with streetlights or curtains
- It may switch modes at a certain time (like after 10:00 p.m.)
If your sleep worsens only on certain nights, sensor logic is a strong candidate.
5) Placement allows light to enter your direct line of sight
Light doesn’t need to be intense to matter—it needs to be positioned correctly. If the night light is pointed toward your bed, leaks around blinds, or reflects off glossy surfaces, it can reach your eyes more than you realize.
6) You’re using the night light to solve the wrong problem
Sometimes the sleep issue isn’t caused by light at all. But the timing can trick you. A common real-world scenario: you start using the night light because you’re anxious about getting up in the dark. Later, you notice you’re also checking your phone more at night, or you’re waking due to noise. The light becomes the “visible cause,” even though it’s only one factor.
That’s why your troubleshooting should be structured and time-based.
Step-by-step troubleshooting and repair process
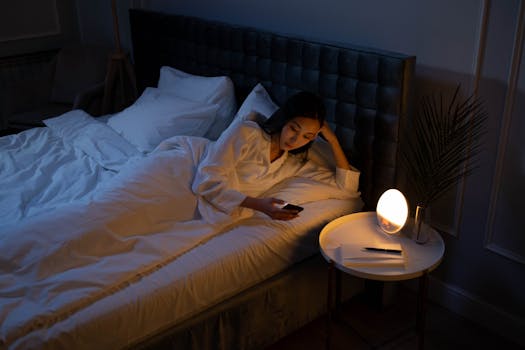
Work through these steps in order. Each step either confirms a likely cause or narrows the problem so you don’t waste time swapping products unnecessarily.
Step 1: Verify the exact behavior for 3 nights
Don’t judge after one night. For a simple baseline, track for 3 nights:
- When the night light turns on (time to the minute if possible)
- Brightness level (is it steady or does it ramp?)
- Where you can see it from bed (directly, in peripheral view, or only as a glow)
- Your sleep outcome (time to fall asleep, number of wake-ups, and how alert you feel after waking)
Practical example: If you fall asleep 20 minutes later on nights when the light ramps up after you move, you’ve found a sensor/brightness interaction. That narrows your fix to placement or sensor settings.
Step 2: Do a “lights-only” test
For one night, turn off the night light for the first half of the night (for example, from bedtime until 2:00 a.m.). Keep everything else the same: phone habits, room temperature, and bedtime time. Then switch it on at 2:00 a.m. (or whenever you typically wake).
Interpretation:
- If sleep improves when the light is off early in the night, the night light is likely suppressing melatonin or increasing alertness.
- If sleep is equally disrupted even when it’s off early, the issue may be elsewhere (noise, stress, routine changes, or another light source).
This test is especially useful if you have a motion sensor that activates only when you get up.
Step 3: Check for direct line-of-sight and reflections
From your bed, look toward where the night light is installed. If you can see the LED itself, the situation is often fixable without replacing anything.
Try these quick adjustments:
- Move the plug-in night light at least 30–60 cm (about 1–2 feet) away from your bed line if your layout allows.
- Angle it so the glow hits a wall rather than your eyes.
- Cover the fixture with a non-flammable diffuser (like a shade designed for lamps) to reduce glare—avoid anything that blocks ventilation if it’s a recessed or enclosed unit.
If you can’t move it, you can still reduce impact by changing what it illuminates.
Step 4: Measure brightness in a practical way (without special gear)
You don’t need a lab. Use your phone camera and your eyes:
- Take a photo of the night light from your bed at typical bedtime conditions. Compare it to a “comfortable dim” reference you know works for you.
- Look for glare hotspots. If the brightest part is visible, brightness is likely too high.
- If the night light has a dimmer dial, test the lowest setting. Many “low blue” units still run too bright on default mode.
If your phone shows a strong hotspot or the light appears “white,” consider that your device may have a higher color temperature than you assumed.
Step 5: Inspect for flicker and driver issues
Flicker checks are easier than you’d think:
- Turn the night light on and look at it while slowly moving your eyes side to side. If it appears to stutter, that’s a hint.
- Use your phone camera: many cameras reveal flicker as banding or shifting brightness in video.
- If you notice flicker only at certain brightness levels, the dimming circuit is likely the culprit.
If flicker is present, you may need to disable dimming, change modes, or replace the unit.
Step 6: Review power source and settings
Some night lights behave differently depending on the outlet and power environment.
- Try a different wall outlet if your unit plugs into a standard receptacle.
- If it’s on a smart plug, test it without the smart plug to rule out power cycling behavior.
- If it’s rechargeable, ensure it’s not running low; some devices change output when battery is low.
Then check settings:
- Disable motion boost mode temporarily.
- Set the light to a constant low setting rather than “auto brighten.”
- If there’s a “sunrise/sunset” schedule, confirm it isn’t misfiring due to ambient light sensor placement.
For smart night lights, a common troubleshooting move is to set a fixed timer (for example, 10:30 p.m. to 6:00 a.m.) and see if sleep improves compared with sensor-driven behavior.
Step 7: Confirm there aren’t other light sources competing
Sometimes the night light is only one element. Look for these common confounders:
- Streetlight entering through blinds or curtains
- TV standby glow, router LEDs, or charging indicators
- Phone brightness during the “wake up and check” habit
- Bathroom motion lights that turn on when you move
If your room is dark except for the night light, the troubleshooting becomes more reliable. If not, you’ll need to reduce other sources first.
Solutions from simplest fixes to advanced repairs
Start with the lowest-effort changes. Many sleep-disrupting setups can be corrected without opening the device.
Simple fixes you should try first (5–10 minutes)
- Lower the brightness setting to the minimum. If your night light has 2–5 brightness steps, use the lowest that still supports safe navigation.
- Change the direction of light. Point it at a wall, not toward your bed. Even 10–20 degrees can change eye exposure.
- Increase distance from the bed. If possible, place it farther from your line of sight—aim for at least 1 foot (30 cm) or more.
- Use a diffuser or shade designed for lighting. The goal is to reduce glare while keeping the room safe. Avoid improvised covers that trap heat.
- Disable motion boost or “auto brighten.” If it ramps when it detects movement, your sleep may worsen right when you’re most likely to wake.
Real-world scenario: You have a plug-in low-blue night light near the hallway. When your child walks at night, the motion sensor brightens the hallway light. The result is not just brighter light—it’s a sudden change in illumination. The fix is to either remove the motion trigger (use a timer) or reposition the unit so the bright beam doesn’t reflect toward the bedroom.
Intermediate adjustments (30–60 minutes)
- Reposition to eliminate direct LED visibility. If you can see the LED from bed, reposition until you only see a soft glow on a surface.
- Block indirect glare with curtains or placement changes. If the light reflects off a mirror, glossy dresser, or white wall, cover or reposition the reflective surface area during sleep.
- Use a schedule instead of ambient sensing. If your night light has a “light sensor,” it may respond to streetlight or headlights. Set a fixed timer window (for example, bedtime to morning) to prevent unexpected brightness.
- Test a “second light” strategy. If you only need navigation, consider placing the night light closer to the path you walk (like near the door) instead of near your bed.
Advanced troubleshooting (when behavior suggests a hardware issue)
If brightness and placement adjustments don’t help, the device may have spectrum or driver characteristics that are difficult to correct with settings alone.
- Disable dimming if flicker appears at low levels. Some LEDs flicker more when dimmed. If your night light supports a “fixed output” mode, try it.
- Replace the bulb/LED module if it’s serviceable. Some night lights use replaceable bulbs. If you can swap to a verified warm spectrum LED designed for dim environments, that can reduce disruption.
- Try a different model class. If you’re using a bright plug-in LED night light, a small, enclosed “glow” style diffuser may reduce glare and direct eye exposure. Look for steady output and low flicker claims, not just “low blue.”
- Check the power adapter quality. If your unit uses a separate adapter, test with the manufacturer’s recommended adapter. Third-party adapters can cause odd driver behavior.
Soft product guidance: In practice, many people find better sleep outcomes with night lights that offer low, steady output and no motion ramp. If you’re shopping, prioritize those features first. If you already own a specific low-blue night light, your best “repair” is usually configuration—then placement—then replacement if flicker persists.
When replacement or professional help is necessary
Most sleep-worsening cases can be fixed by placement, dimming settings, or sensor configuration. Replacement becomes more likely when you see evidence of hardware-driven behavior.
Replace the night light if you observe these patterns
- Flicker is visible on video or appears as banding/shimmering in your phone camera.
- Brightness ramps unpredictably even when sensors are disabled or settings are locked.
- The light is too bright at the lowest setting and you can’t reposition to avoid direct visibility.
- The unit changes behavior as it warms up (for example, output rises after 10–20 minutes).
- It’s physically faulty (loose housing, buzzing from the driver, discoloration, or a burning smell).
If your device is under warranty, replacement is often the simplest path. If it’s not, consider moving to a model with a reputation for stable output and warm spectrum.
Consider professional help if you have persistent sleep disruption
If you’ve adjusted light exposure and still experience significant sleep issues (for example, persistent insomnia, frequent awakenings, or daytime impairment lasting more than 2–4 weeks), it’s worth discussing with a healthcare professional. Light is a common factor, but it’s not the only one.
Also seek help promptly if the night light emits unusual electrical noise, gets hot to the touch, or shows signs of electrical failure. That’s not just a sleep issue—it’s a safety issue.
Use a structured “light log” to confirm improvement
Once you apply your fix, run another 3-night check. You’re looking for a measurable shift:
- Falling asleep earlier by 10–30 minutes
- Fewer awakenings during the early morning hours
- Feeling less alert after waking
If the changes don’t move the needle after you’ve removed direct glare, lowered brightness, and stabilized sensor behavior, replacement is the next logical step.
Quick checklist to stop night light sleep disruption
Use this as your final pass before you decide what to do next:
- Is the LED visible from bed? If yes, reposition or diffuse.
- Is the unit set to the lowest brightness? If not, set it and retest.
- Does it brighten with motion or ambient sensing? Disable or switch to a timer.
- Do you see flicker on your phone camera? If yes, replacement is likely.
- Are there other lights in the room competing (TV, router, streetlight)? Reduce them.
When you treat “low blue” as a starting point—not a guarantee—you can usually solve the problem. Your goal is simple: enough light to feel safe, but not enough to keep your brain in alert mode. With the right placement, stable output, and predictable timing, your night light can become a sleep ally again.
22.12.2025. 07:53