Wearables Accuracy Protocol: HRV, SpO2, Respiration & RHR
Goal: build a repeatable wearables accuracy protocol for HRV, SpO2, respiration, and RHR
Wearable sensors can be useful for trend tracking, but the quality of the signal depends heavily on how you wear the device, how you measure, and how you interpret results. This guide gives you a step-by-step wearables accuracy protocol designed to improve measurement consistency for HRV, SpO2, respiration, and RHR. Follow it for 7–14 days and you’ll typically see fewer “random” fluctuations, clearer patterns, and more confidence in day-to-day changes.
This is not medical advice. If you have symptoms (shortness of breath, chest pain, dizziness, fainting) or persistently abnormal readings, use clinical evaluation rather than wearable data.
Required preparation: setup, environment, and what to verify before you start
Before you change anything, set a baseline for how your wearable is measuring right now. The protocol relies on controlling variables that strongly affect optical and motion-based sensors.
1) Choose your wearable and measurement mode
Different devices estimate HRV, SpO2, respiration, and RHR differently. Use the same device features throughout the protocol. If your wearable supports “sleep tracking,” “SpO2 during sleep,” “respiration/respiratory rate,” or “resting heart rate,” keep those settings consistent.
If you have multiple wearables, pick one as your primary measurement device for this protocol to avoid mixing measurement methods.
2) Prepare your skin and device fit
- Clean the contact area: wash and dry the area where the sensor sits. Lotion and sweat can interfere with optical readings.
- Remove loose fit: the device should be snug enough that it doesn’t slide when you flex your wrist.
- Confirm sensor alignment: place the sensor over the same wrist location each time (many people get better results when the device sits slightly higher on the forearm rather than directly on the wrist crease).
- Avoid extreme tightness: overly tight straps can restrict blood flow and produce distorted heart rate and HRV signals.
3) Decide on a measurement schedule
To improve accuracy, you need repeatable timing. Choose a consistent window for “baseline” readings and stick to it. A common approach is:
- HRV: rely on sleep HRV (if available) or a consistent short rest period.
- SpO2: rely on sleep SpO2 or a consistent quiet time.
- Respiration: rely on sleep respiration data or a seated rest period.
- RHR: use the wearable’s daily “resting” estimate, but verify that your activity pattern is consistent.
4) Gather reference data (optional but helpful)
If you want a stronger accuracy check, use a clinical-grade pulse oximeter for occasional spot checks of SpO2 and a manual method for heart rate. For HRV and respiration, consumer wearables rarely match clinical devices perfectly, so your goal is consistency and trend alignment rather than absolute medical precision.
Step-by-step: the wearables accuracy protocol for HRV, SpO2, respiration, and RHR
Use these steps in order. Each step reduces a specific source of measurement error.
Step 1: Lock your fit and placement for the entire protocol
For 7–14 days, do not change where and how you wear the device unless you must. Take 10 seconds each day to re-seat the sensor:
- Place the device at the same wrist position.
- Use the same strap tightness.
- After putting it on, move your wrist through a few ranges of motion to confirm it doesn’t slide.
Practical example: If you notice your wearable sometimes sits “lower” after typing or driving, adjust the strap so it stays higher on the forearm consistently.
Step 2: Standardize the pre-measurement conditions
Optical heart rate, HRV, and SpO2 are sensitive to blood flow and movement. Standardize these conditions for your baseline window:
- Temperature: keep the area relatively warm. Cold hands commonly reduce signal quality.
- Hydration: dehydration can affect circulation and skin perfusion.
- Recent activity: avoid intense exercise immediately before your baseline window.
- Alcohol and heavy meals: keep timing consistent; both can affect sleep quality and autonomic signals that influence HRV and respiration.
Practical example: If you usually take readings right after a workout, switch to a consistent rest window (e.g., 60–90 minutes after training) for the protocol period.
Step 3: Use sleep as your primary HRV and SpO2 anchor (when available)
For many wearables, sleep provides the most stable signal for HRV and often the best opportunity for SpO2 and respiration estimation. To make sleep data more reliable:
- Wear the device throughout the night, not just part of it.
- Use the same bedtime and wake time when possible.
- Ensure the sensor remains snug; consider re-checking the fit before sleep.
Practical example: If you wake up and the device has shifted, re-seat it before returning to sleep. Even small changes can alter the optical signal quality.
Step 4: Improve HRV signal quality by reducing motion artifacts
HRV depends on accurately detecting heartbeats and the timing between them. Motion and poor optical contact can create HRV noise. Use these tactics:
- During rest: if you do daytime HRV checks, sit quietly and keep your arm supported.
- Avoid talking and gesturing: for short seated checks, keep movement low.
- Keep the device stable: a sliding strap during the check reduces beat detection quality.
Practical example: For a 5-minute seated HRV session, put the forearm on a table and relax your hand. Many people see more consistent HRV estimates when the wrist is supported.
Step 5: Calibrate your expectations for respiration rate (trend over absolutes)
Wearables estimate respiration using combinations of motion sensing, heart rate dynamics, and sometimes dedicated sensors. Absolute accuracy can vary, especially during movement. To improve reliability:
- Prefer sleep respiration: choose the wearable’s sleep respiration metric if it’s available.
- Use consistent position: if you track respiration during the day, use the same posture (e.g., seated upright).
- Control breathing behavior: avoid breath holds or unusual breathing patterns during baseline sessions.
Practical example: If your respiration rate spikes on days you do yoga or breathing drills, treat those days as “different conditions” and focus on baseline nights for comparison.
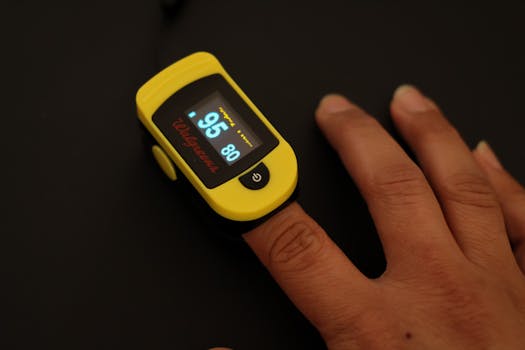
Step 6: Validate SpO2 readings with a spot-check routine
SpO2 is influenced by sensor contact, skin tone, movement, and perfusion. Your protocol should include both in-app review and occasional independent checks.
- Review signal quality: if your wearable provides a signal quality indicator, prioritize nights/sessions with good signal.
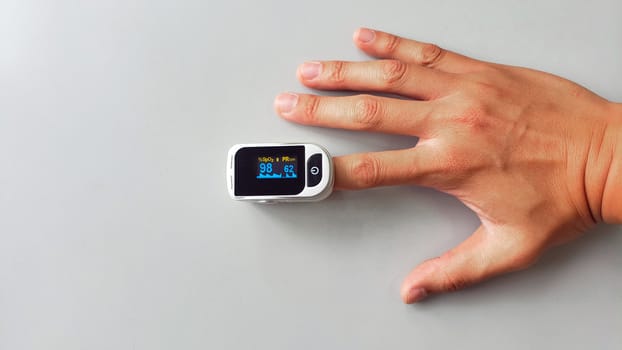
- Spot-check occasionally: use a fingertip pulse oximeter for a few quiet sessions (not constantly) to see how your wearable tracks relative changes.
- Match conditions: when you spot-check, sit quietly for 2–3 minutes before reading. Keep the same posture each time.
Practical example: On three separate days, take a wearable SpO2 measurement during a calm seated rest, then take a finger pulse oximeter reading immediately after. If wearable values consistently run higher or lower by a small amount, use that as your personal offset for trend interpretation.
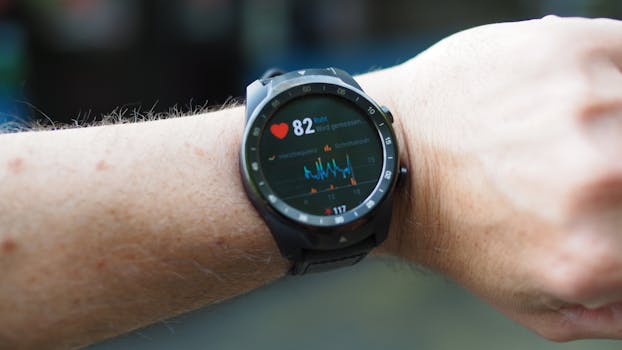
Step 7: Confirm RHR by controlling confounders
Resting heart rate can be “accurate” but still misleading if your baseline isn’t stable. Improve RHR interpretability by controlling common drivers:
- Sleep consistency: poor sleep often raises RHR the next day.
- Caffeine timing: keep caffeine timing consistent; late caffeine can raise morning RHR.
- Hydration and illness: dehydration and early illness can change RHR quickly.
- Measurement definition: rely on the wearable’s “resting” estimate rather than a random moment after activity.
Practical example: If your RHR jumps after a late evening meal, note that pattern. Your protocol goal is to understand why RHR changes, not just to chase a “perfect” number.
Step 8: Run the protocol for 7–14 days and track signal quality
Accuracy improves when you stop treating single readings as truth. Over 1–2 weeks, you’ll learn your device’s behavior under your typical conditions.
- Track daily trends for HRV, SpO2, respiration, and RHR.
- Mark days with unusual conditions (travel, illness symptoms, very late alcohol, intense training).
- Note any nights where the wearable indicates poor sensor contact or unusually high movement.
Practical example: If you see HRV drop on a night you were restless and the sensor likely shifted, don’t interpret that as a physiological change. Use the surrounding days as context.
Step 9: Apply a simple “confidence rule” before using data to make decisions
To avoid overreacting to noise, use a confidence rule for each metric:
- HRV: prefer values from sleep sessions with stable signal and consistent timing.
- SpO2: prefer nights with good signal quality; treat single low readings cautiously.
- Respiration: focus on sleep averages rather than momentary spikes.
- RHR: interpret changes in the context of sleep, caffeine, and illness.
Practical example: If SpO2 dips slightly on one night but respiration and HRV look normal and the sensor quality indicator is poor, treat it as a likely measurement artifact.
Common mistakes that reduce wearable accuracy (and how to fix them)
- Changing strap tightness mid-week: leads to inconsistent optical contact and HRV/SpO2 variability. Fix it by keeping placement and tightness constant.
- Wearing the device too loose for sleep: the sensor shifts during the night. Fix by tightening slightly for sleep and re-checking before lying down.
- Relying on daytime readings after movement: respiration and HRV can be noisy after activity. Fix by using a stable seated rest window.
- Interpreting a single SpO2 low value: movement, cold hands, or sensor contact issues can cause false lows. Fix by checking signal quality and comparing to nearby nights.
- Assuming RHR is “bad” when sleep was poor: RHR often reflects recovery, stress, and illness. Fix by correlating RHR with sleep duration and subjective recovery.
- Ignoring skin conditions: dryness, tattoos, scars, or hair can affect optical sensing. Fix by ensuring clean skin, avoiding lotion immediately before wearing, and maintaining consistent placement.
- Using multiple devices interchangeably: different algorithms estimate metrics differently. Fix by choosing one primary wearable for the protocol.
Additional practical tips and optimization advice for better HRV, SpO2, respiration, and RHR
Optimize placement with a quick “signal check”
When you first start the protocol (and after any strap change), spend a few minutes checking whether your wearable is detecting a stable signal. Many devices show beat detection status or signal quality in the app.
- If the signal looks unstable, adjust strap tightness and placement before relying on HRV and SpO2.
- If your wearable offers a “SpO2 during sleep” setting, enable it and confirm it’s recording.
Keep your baseline behavior consistent
Wearables respond to your physiology and behavior. Consistency makes your data interpretable.
- Keep sleep and wake times within a reasonable range.
- Use caffeine timing consistently (especially afternoon/evening).
- Avoid heavy alcohol close to bedtime during the protocol window.
Use “data hygiene” to manage missing or questionable readings
Don’t force conclusions from incomplete data. If a night has missing HRV or poor sensor contact, exclude it from your personal trend view.
- Focus on the majority of days where the wearable captured stable metrics.
- When you see outliers, check whether the device likely shifted or whether you had unusual movement.
Understand what improving accuracy really means
Even with great technique, wearables are still estimates. The protocol is designed to improve:
- Consistency: reduce random noise and signal drops.
- Repeatability: make results similar when conditions are similar.
- Trend validity: ensure changes reflect real shifts in physiology rather than measurement artifacts.
Where relevant, use natural device features without changing them constantly
If your wearable supports features like guided breathing, sleep stages, or “respiration tracking,” use them as designed and keep them on during the protocol. Frequent toggling can change how the device collects and processes sensor data.
For example, some devices allow respiration tracking on specific modes. If you want the cleanest comparison across days, keep the same mode enabled and avoid switching between “activity” and “sleep-only” tracking during the protocol window unless you’re intentionally testing a change.
Spot-check when something feels wrong
If you feel unwell or notice symptoms that could relate to oxygenation or breathing, use appropriate tools and seek medical guidance. A wearable can be a prompt to act, but it should not replace clinical measurement.
- If you experience persistent shortness of breath or concerning symptoms, use clinical evaluation.
- If you want to verify SpO2, use a fingertip pulse oximeter during quiet rest as a short-term check.
Use a consistent logging habit
Accuracy improves when you can connect measurements to conditions. Keep a small daily note for 7–14 days:
- Sleep quality (subjective)
- Exercise and timing
- Caffeine and alcohol timing
- Stress level (optional)
- Any symptoms (optional)
Practical example: If HRV drops consistently on days with late caffeine, you’ll recognize the pattern and stop treating each drop as an isolated issue.
How to apply the protocol to real-life routines without overthinking
Many beginners try to “optimize” every minute. Instead, build a routine that’s realistic and consistent.
- Morning: check RHR in the wearable’s resting estimate context; avoid making conclusions from a single moment right after waking if your device hasn’t finalized its resting calculation.
- Daytime: if you do HRV or respiration checks, do them at the same time with minimal movement and consistent posture.
- Night: keep the device snug, wear it throughout sleep, and rely on sleep-derived HRV/SpO2/respiration for your primary trend view.
When you follow this structure, your data becomes less “mysterious.” You’ll start to see which changes are likely real and which are likely artifacts of fit, movement, or conditions.
What “good results” look like after you complete the protocol
After 7–14 days, you should notice:
- Fewer nights where HRV or SpO2 seems implausible.
- More stable respiration patterns across similar sleep conditions.
- RHR changes that align with sleep, recovery, and stress rather than random jumps.
- A clearer personal understanding of how your wearable behaves under your typical routines.
That’s the practical outcome of an accuracy protocol: not perfect numbers, but dependable measurement behavior you can trust for trends.
03.03.2026. 07:16