

SpO2 vs ODI Troubleshooting: Fixing Drops and False Alarms

What goes wrong when SpO2 and ODI don’t match
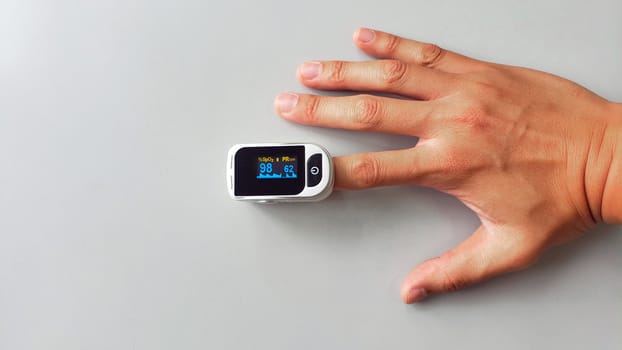
You’re looking at an overnight report and something doesn’t add up. Maybe your SpO2 curve looks relatively stable, but your ODI (oxygen desaturation index) is high. Or you see frequent SpO2 dips, yet ODI is low or inconsistent. Either way, the result is the same: you can’t trust the measurement enough to interpret sleep or respiratory status.
Common symptoms you might notice include:
- SpO2 drops that look brief or “spiky” (lasting 2–10 seconds) while ODI climbs steadily.
- ODI events clustered around movement, talking, coughing, or changing position.
- Large gaps in valid signal quality, followed by sudden ODI spikes.
- Persistent low SpO2 across long periods, but ODI doesn’t reflect expected frequency.
- Different readings across nights even when you believe you used the same setup.
This is exactly the kind of situation where “SpO2 vs ODI troubleshooting” pays off. SpO2 is the raw oxygen saturation estimate, while ODI is derived from desaturation events meeting a threshold (often a 3% or 4% drop, depending on your device and settings). When the signal quality, sensor fit, motion artifacts, or filtering differ, the two can diverge.
Most likely causes behind SpO2 vs ODI mismatches
Before you start changing hardware, it helps to narrow the problem to a few high-probability causes. Think of the mismatch as coming from one of four places: signal quality, event detection settings, physiology, or data handling.
1) Motion artifacts and poor sensor contact
If the pulse oximeter can’t maintain stable optical contact, it may intermittently lose the pulse waveform. The SpO2 value may still update, but it can become noisy. ODI, meanwhile, is sensitive to detected drops—even short, artifact-related ones.
Typical triggers:
- Hands under a blanket or pillow
- Cold fingers (reduced perfusion)
- Loose strap or shifting sensor position
- Frequent turning in bed
2) Low perfusion and vasoconstriction
Low blood flow reduces the strength of the pulse signal. That can create “false desaturations” or flatten the waveform so the device struggles to track oxygen saturation accurately. In some cases, SpO2 may look erratic; in others, the device may smooth values, which can lower ODI even when you suspect true events.
Common contributors:
- Cold environment or winter air-conditioning
- Smoking before the test
- Severe peripheral vascular disease
- Low hemoglobin states (depending on clinical context)
3) Nail polish, artificial nails, or skin contamination
Optical sensors depend on consistent light absorption and reflection. Nail polish and residue can distort readings, especially for finger-based devices. If your ODI is unexpectedly high on nights where you wore polish, this is a prime suspect.
4) Incorrect threshold or ODI settings
ODI is not a single universal number. Many systems compute ODI using a specific desaturation definition (commonly 3% or 4% drop from baseline, with a minimum recovery window). If your ODI is based on a different threshold than you expect, the mismatch with SpO2 can look dramatic.
Also consider filtering and event rules: some devices require a minimum duration of desaturation, while others are more sensitive to brief drops.
5) Real physiology: true desaturation patterns
Sometimes the mismatch is real. For example, you might see brief SpO2 dips that don’t meet the ODI definition (or don’t recover fast enough), resulting in a higher or lower ODI than your eyes expect. Conversely, SpO2 can remain near a baseline while frequent small drops fail to cross the ODI threshold.
Practical example: during REM sleep, some people experience more apnea-related events with a particular timing. If your ODI definition is tuned to 3% drops, you may see ODI rise even if the overall SpO2 trend looks similar.
6) Data handling issues
Less obvious, but it happens: corrupted segments, clock drift, sensor swap mid-session, or export settings that change how events are summarized. If you see ODI spikes exactly at the same timestamps every night, suspect segmentation or post-processing.
Step-by-step SpO2 vs ODI troubleshooting process
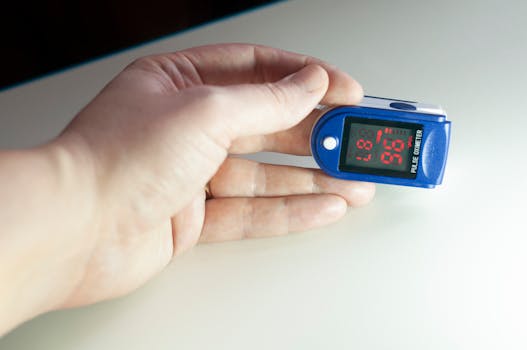
Use this sequence. It’s designed to help you isolate whether you’re dealing with sensor/signal issues, settings, or true physiology. Keep your changes small and testable.
Step 1: Confirm the ODI definition used by your device
Check the ODI calculation settings in your platform or report. Look for:
- Desaturation threshold (e.g., 3% vs 4%)
- Minimum drop duration (if specified)
- Recovery criteria (how quickly SpO2 must return)
- Whether ODI is computed from raw SpO2 or filtered values
Why this matters: if you expect ODI to reflect every visible dip, but the device only counts dips meeting a threshold, your “mismatch” may be expected. If the threshold changed between nights (even by a setting), ODI can jump without any sensor problem.
Step 2: Inspect signal quality and waveform consistency
If your device provides signal quality (often as a bar, numeric score, or waveform stability indicator), focus there first. A common pattern is:
- Signal quality drops → pulse waveform becomes unstable → SpO2 values become noisy
- ODI events cluster immediately after those unstable segments
Even if you don’t have a waveform display, watch for timestamps where SpO2 becomes “jumpy” or flat and ODI rises soon after.
Step 3: Reproduce the setup conditions and remove obvious artifacts
Before you run the next measurement, control the variables that most often cause SpO2 noise and ODI overcounting.
- Warm the hands for 2–5 minutes before placing the sensor (especially in winter).
- Remove nail polish or artificial nails.
- Ensure the sensor is centered on the finger and the strap is snug (not painful, but no slack).
- Avoid placing the hand under your head or tucked under your body.
- Keep the cable from tugging as you turn.
Real-world scenario: One user noticed ODI was consistently 20–30 events/hour higher than expected. The only difference between nights was that they wore dark nail polish on one hand. After removing polish and using a tighter sensor fit, ODI dropped markedly while SpO2 stabilized during movement periods.
Step 4: Verify sensor placement and device type
Finger sensors are common, but they’re also more sensitive to motion and perfusion than forehead or ear-based alternatives (depending on the system). If you’re using a finger clip or finger-style sensor:
- Try the other hand for the same person and compare stability.
- Confirm the finger thickness is within the sensor’s intended range.
- If the device supports it, enable any “motion reduction” mode (some systems adjust filtering).
If you’re using a wrist-based or other non-finger approach, check that the placement matches the manufacturer’s instructions exactly. A small angle or slipping position can create repeatable ODI spikes.
Step 5: Compare a short segment in real time (5–10 minutes)
Don’t wait for the full night to discover a sensor problem. Start a short test:
- Apply the sensor correctly.
- Record for 5–10 minutes while you sit quietly.
- Then do 2–3 controlled position changes (turning from back to side) and watch for SpO2 jumps.
If you see SpO2 “drops” during movement that recover immediately when you stop moving, those are likely artifacts. ODI derived from those events can become artificially high.
Step 6: Check for true physiology signals that should affect ODI
If signal quality looks good and the ODI pattern is consistent with breathing-related timing (for example, events clustering with sleep onset or REM), consider physiology. Watch for:
- Snoring or witnessed apnea
- Morning headaches, dry mouth, or daytime sleepiness
- Known COPD, asthma, or heart failure history
- High altitude exposure during the test
In this case, you’re not trying to “fix” the readings. You’re trying to ensure the measurement is trustworthy enough to guide next steps.
Solutions from simplest fixes to more advanced fixes
Work through these in order. Stop when the mismatch improves—don’t keep escalating if a basic adjustment solves it.
Start with the simplest: placement, warmth, and cleanliness
- Warm the hands for 2–5 minutes before starting. Cold fingers are a top cause of poor pulse detection.
- Remove nail polish and any residue. If you must use polish, consider scheduling tests on a day without it.
- Re-seat the sensor so it’s aligned and the strap is snug. A loose sensor can create intermittent signal loss that ODI interprets as desaturation events.
- Reduce motion by placing your hand comfortably and avoiding tucking it under your body.
Adjust how you manage motion artifacts
If ODI spikes always occur during turning, coughing, or getting up, you can often reduce false events by improving stability and filtering.
- Secure the cable so it doesn’t pull on the sensor when you move.
- If you have a sensor with a longer clip or stabilizing strap, use it according to the manufacturer’s fit guidance.
- If your platform offers an “artifact rejection” setting, try enabling it for a repeat test (only if it doesn’t conflict with your study protocol).
Confirm perfusion: try a different site or device style
If warming and clean placement don’t help, the issue may be perfusion or sensor sensitivity. Options:
- Try the sensor on the other hand.
- If you have access to an alternative sensor type (for example, a different finger clip model or a system designed for better motion tolerance), compare stability over a 5–10 minute window.
- For people with very cold extremities, consider a sensor approach designed to maintain stable contact and detect weaker pulses more reliably.
Soft product guidance: many users find it easier to get consistent results with a well-fitting finger pulse oximeter clip and a stable strap. If you’re shopping for a replacement, prioritize models that explicitly describe motion tolerance, stable signal quality indicators, and support for low perfusion conditions.
Validate settings: align ODI threshold and event rules with your goal
If your SpO2 shows frequent small drops but ODI is unexpectedly low, you may simply have an ODI threshold that’s too high for what you’re seeing. Conversely, if ODI is too high, your threshold may be too sensitive.
- Set ODI threshold to the level you intend to interpret (commonly 3% or 4% drop).
- Ensure the minimum duration and recovery criteria match the report definition you’re using clinically or personally.
- Keep settings consistent between nights if you’re comparing trends.
Important: don’t change multiple settings at once. Change one, repeat a short test, and observe whether the mismatch improves.
Re-run the measurement with a controlled protocol
When the mismatch is persistent, treat it like a measurement experiment. For example:
- Night 1: baseline setup (your usual routine)
- Night 2: same setup but with warmed hands, removed polish, and secured cable
- Night 3: same setup plus a different finger/hand (or alternative sensor style if available)
If ODI decreases after the controlled change while SpO2 becomes smoother, you’ve confirmed measurement artifact as a major contributor.
Assess for equipment degradation and replace worn consumables
Over time, sensors can degrade. Clips can lose spring tension, straps can stretch, and cables can develop intermittent faults. These don’t always fail completely; they can create intermittent signal quality loss that triggers ODI artifacts.
- Inspect the cable for kinks, frays, or loose connections.
- Check whether the clip still holds consistent pressure and alignment.
- If you’re using disposable or replaceable sensor pads (in some systems), replace them and re-test.
If you notice that signal quality drops every time you move the cable slightly, that’s a strong sign you need a hardware check or replacement.
Use a more advanced verification step: cross-check with a second measurement
If you have access to another validated oximeter (or a clinical-grade device), compare readings during the same conditions.
A practical approach:
- Measure SpO2 and observe waveform stability simultaneously for 3–5 minutes while you rest.
- Then repeat during controlled movement (turning on your side).
If one device shows frequent brief dips while the other remains stable, the first device/sensor setup is likely introducing artifacts. If both show similar dips, the events are more likely physiological.
Soft recommendation: if you’re using consumer devices for trend tracking, cross-checking with a second device occasionally can prevent chasing measurement noise.
When replacement or professional help is necessary
At some point, troubleshooting stops being about settings and becomes about safety and reliability.
Replace the sensor or device when you see consistent hardware-linked failure patterns
Consider replacement (or at least a different sensor) if:
- Signal quality repeatedly drops within minutes despite correct placement
- SpO2 becomes “jumpy” whenever the cable is touched or the hand shifts
- ODI is consistently inflated in a way that doesn’t change after warming, cleanliness, and secure fit
- You observe persistent gaps in valid data across multiple nights
Also replace if the clip no longer provides stable contact pressure. A slightly loose clip can create intermittent optical coupling—enough to distort ODI.
Seek professional guidance when the pattern suggests clinically meaningful desaturation
If your ODI is high and the events appear physiologically plausible (not just during obvious movement), professional evaluation is warranted—especially if you have symptoms such as:
- Daytime sleepiness or falling asleep unintentionally
- Frequent awakenings with choking/gasping
- Morning headaches
- Known cardiovascular disease, COPD, or heart failure
- SpO2 repeatedly dropping to concerning levels during sleep
Even with good troubleshooting, home pulse oximetry is not a full diagnostic tool for sleep apnea or respiratory disease. It’s a screening and monitoring aid. If your measurements remain concerning after you improve data quality, involve a clinician and consider formal sleep testing.
Don’t rely on ODI alone for interpretation
ODI is useful, but it’s derived from thresholds and event detection rules. If SpO2 vs ODI troubleshooting leads you to a situation where the signal quality is borderline, treat ODI as “possibly overcounted” rather than definitive.
In practice, you’ll get the most value when you combine:
- Stable signal quality
- Consistent ODI across nights
- Reasonable physiological timing (events tied to sleep rather than movement)
A quick decision checklist you can use before the next night
- Did you confirm the ODI threshold definition in your report?
- Did SpO2 look stable during 5–10 minutes of quiet rest?
- Did you remove polish and warm your hands for 2–5 minutes?
- Did ODI spikes line up with obvious motion or with sleep-related patterns?
- If mismatch persists, do you have a second sensor/device to cross-check?
If you can answer “yes” to the first four, you’re likely dealing with measurement artifacts that you can control. If the mismatch persists after those steps, it’s time to consider sensor replacement and professional review—particularly if you’re seeing repeated desaturation episodes.
22.12.2025. 05:34