Wearable SpO2 Accuracy Protocol: A Step-by-Step Setup
Goal: Get reliable SpO2 readings you can trust
A wearable pulse oximeter (SpO2) can be very useful for tracking oxygen saturation trends, but accuracy depends heavily on how the device is worn, the quality of the signal, and the conditions around measurement. This wearable SpO2 accuracy protocol gives you a repeatable method to maximize measurement quality, reduce avoidable artifacts, and capture readings that are consistent enough for real-world monitoring.
Use this protocol when you set up a device for the first time, when you notice unusual values, or when you want to compare readings across days, locations, or activities.
Preparation: What you need before you start
Before measurement, gather the essentials that affect signal quality. This protocol works best when you treat SpO2 like a controlled measurement rather than a quick glance.
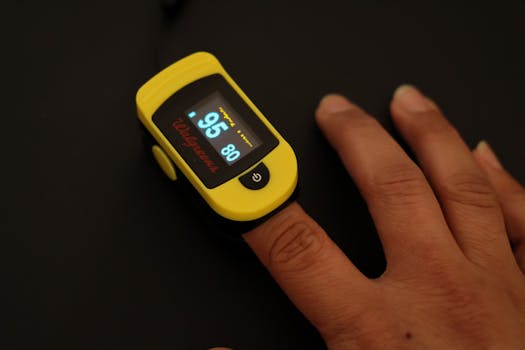
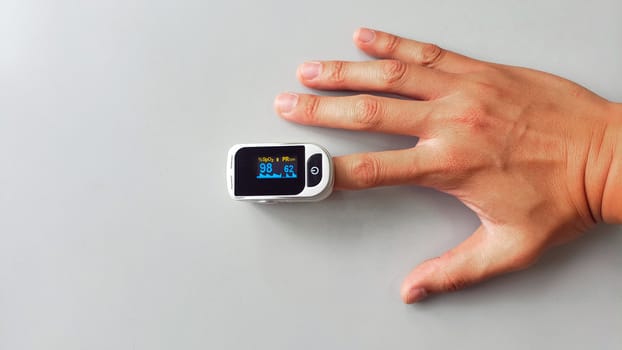
- Wearable pulse oximeter with an SpO2 display and a pulse rate value (or waveform/quality indicator, if provided).
- Skin access to the sensor area (finger, wrist, or earlobe depending on the device).
- Clean, dry skin and enough time to warm up hands if they’re cold.
- Stable posture (seated, arm supported) and minimal movement.
- A stopwatch or timer to standardize measurement duration.
- Environmental control: avoid strong ambient light sources when possible (especially for optical sensors).
- Optional reference device for verification, such as a clinically validated fingertip pulse oximeter, if your goal is calibration-level confidence.
If your wearable includes a “signal quality” indicator or a “searching” status, plan to use it. If it does not, you will rely on consistent pulse rate stability and visual comfort (no excessive pressure, no sensor shifting).
Step-by-step wearable SpO2 accuracy protocol
- Confirm the device is ready and clean. Charge the device, ensure the app or screen is functioning, and wipe the sensor surface gently. For devices that contact skin, remove lotions or residues that can interfere with optical transmission.
- Choose the measurement location and fit type correctly. Place the sensor on the recommended site (for example, fingertip for clip devices, wrist for wrist wearables, or earlobe for some bands). Ensure the sensor is aligned as directed by the manufacturer and that it sits flat without twisting.
- Warm the measurement site if you’re cold. If your hands are cold, wait until they feel comfortably warm. Cold skin reduces perfusion and can cause low signal strength or unstable SpO2. A common practical approach is to sit quietly for 3–5 minutes with the sensor site warmed by normal circulation (avoid placing the sensor directly on a heat source that could cause sweating or burns).
- Remove motion and stabilize the body. Sit with your back supported. Keep the arm with the sensor supported on a table or your lap. Avoid talking, walking, or gesturing during the measurement. Motion is one of the biggest causes of dropouts and false readings.
- Ensure the sensor has consistent contact pressure. The sensor should be snug enough to prevent shifting, but not so tight that it causes numbness or visible constriction. If your wearable uses a strap, tighten gradually until it stays in place when you relax your hand. Recheck after 30–60 seconds to confirm it hasn’t slid.
- Control ambient light exposure. If your wearable is optical and skin-contact based, avoid direct bright light aimed at the sensor (for example, strong sunlight reflecting into the sensor window). Indoor lighting is typically more consistent. If you must measure outdoors, shade the sensor with your hand briefly while maintaining stable position.
- Start measurement and wait for signal stabilization. Begin the reading and do not record values immediately. Many devices take 10–30 seconds to stabilize. Wait until the pulse rate looks steady and the device indicates stable signal (if available). Record only after stability is achieved.
- Standardize measurement duration. Use a consistent window for each reading. For example, measure for 60–90 seconds, then capture the SpO2 value when the device is stable. If your device updates in real time, record the average value shown during the stable period rather than the first number displayed.
- Capture multiple readings and use a consistent rule. Take at least two measurements separated by 1–2 minutes of relaxed rest. If the values are within a narrow range (your device will define its own stability behavior), take the mean of the stable readings. If they differ widely, repeat and verify technique before concluding there’s a true change.
- Document context that affects interpretation. Note whether you were at rest or active, whether you had just eaten, whether you were breathing through your mouth, and whether you have known factors that affect oxygenation (for instance, recent illness, altitude exposure, or smoking). This helps you avoid misreading measurement artifacts as medical trends.
- Verify with a reference when results don’t match your expectations. If your wearable shows persistent low SpO2 or sudden drops, confirm using a clinically validated fingertip pulse oximeter (if available) while following similar rest conditions. Verification is especially important if you’re considering any action based on the numbers.
- Confirm recovery behavior after activity. If you’re tracking post-exertion changes, measure at consistent time points after the activity (for example, immediately at 30 seconds, then at 2 minutes). Keep posture consistent. This reduces confusion between true physiological recovery and sensor instability from movement.
Common mistakes that reduce wearable SpO2 accuracy
- Measuring while moving. Even small wrist motion can disrupt the optical signal. Always measure at rest with the sensor site supported.
- Cold hands or poor perfusion. Cold exposure often causes low signal strength and unstable readings. Warm the site and wait for stabilization.
- Sensor shifting during the measurement. A strap that’s too loose or a finger that isn’t fully seated can cause intermittent contact and false variability.
- Excessive pressure. Tight straps can reduce blood flow and create misleading values. Snug is enough—avoid constriction.
- Dirty or lotion-covered sensor contact. Oils, lotions, and sweat films can alter light transmission and reflection. Clean and dry the area before measurement.
- Reading too early. Recording the first number without waiting for stabilization can capture transient artifacts.
- Ambient light interference. Direct sunlight or bright spotlights can affect optical sensors, especially on exposed fingers and wrists.
- Assuming single readings are definitive. SpO2 should be treated as a trend when possible. One measurement can be wrong due to temporary motion or signal dropout.
- Ignoring the pulse signal quality. If the pulse rate shown is erratic or the device indicates low signal, treat the SpO2 reading as unreliable until stability returns.
Additional practical tips to optimize accuracy
Use a consistent “rest state” routine
To make your readings comparable across days, create the same pre-measure routine each time. For example: sit quietly for 5 minutes, breathe normally, keep the sensor site warm, and measure for a standardized duration. Consistency matters more than chasing a single best number.
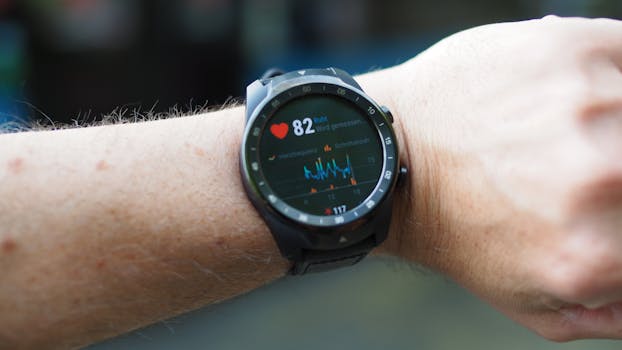
Standardize posture and arm position
For wrist-based devices, keep the wrist at heart level or supported to avoid changes in hydrostatic pressure. A wrist held low can alter blood flow and affect the optical signal. Support the arm on a surface and keep it still.
Account for skin and circulation factors
Skin tone, calluses, tattoos, nail polish (for fingertip devices), and vascular conditions can influence optical performance. If you use a wearable such as a wristband SpO2 monitor or a fingertip clip device, follow the manufacturer’s placement guidance closely and repeat measurements until you achieve stable signal behavior.
For fingertip devices, remove nail polish and avoid measuring on a finger with cold exposure. For wrist devices, ensure the sensor window isn’t obstructed by fabric seams or tight sleeves.
Choose the right moment to measure
Avoid measuring immediately after heavy activity or during intense breathing patterns unless that’s specifically what you’re studying. If your goal is baseline monitoring, measure when you’re calm and at rest. If your goal is exercise response, measure at fixed intervals after activity while keeping the sensor stable and the body posture consistent.
Use the device’s signal indicators when available
Many modern wearables show pulse rate, stability, or signal quality. Treat low-quality status as a prompt to adjust fit, warm the site, or pause movement—not as a reason to accept the displayed SpO2.
Track trends rather than chasing precision
SpO2 can vary naturally, and optical wearables have limits. The protocol’s purpose is to reduce avoidable errors so that changes you observe are more likely to reflect real physiology. When you see repeated deviations under consistent measurement conditions, that’s more meaningful than a single outlier.
Plan for verification and safety boundaries
If your SpO2 repeatedly appears lower than expected, confirm with a reference fingertip pulse oximeter under rest conditions. Also consider that certain conditions can affect oxygen delivery and SpO2 interpretation, including anemia, poor perfusion, and some skin and motion artifacts. If you’re monitoring a known medical condition, follow your clinician’s guidance on what thresholds matter for you.
Practical example: Baseline measurement on a cold morning
1) Sit quietly for 5 minutes with your hands comfortably warm. 2) Place the wearable sensor on the correct site, ensuring stable contact. 3) Start the reading and wait for the pulse rate to stop fluctuating. 4) Measure for 60–90 seconds and record the stable SpO2 value. 5) Repeat after 1–2 minutes and average the stable values. If the numbers are still unstable, warm again and check strap fit before relying on the reading.
Practical example: Post-walk recovery monitoring
1) Perform the walk at a consistent pace. 2) Immediately after stopping, keep the sensor site still and support the arm. 3) Start the measurement at a fixed time point (for example, 30 seconds after stopping) and record the stable SpO2 after signal stabilization. 4) Repeat at 2 minutes. 5) Compare values only across the same time points and rest posture to reduce variability from motion.
When to troubleshoot further
If you repeatedly get unstable SpO2 values even after following the protocol, treat it as a measurement system problem rather than a physiological certainty. Re-check sensor cleanliness, placement, strap tension, ambient light, and rest posture. If you have access to a reference fingertip oximeter, verify whether the wearable is producing consistent results under stable conditions. Persistent discrepancies may require device replacement or a different measurement approach.
For people using wearables for health monitoring, the most accurate protocol is the one you can reproduce consistently. Use this wearable SpO2 accuracy protocol to standardize each reading, reduce artifacts, and make your SpO2 data more dependable for trend-based interpretation.
24.01.2026. 02:43