

HRV wearable accuracy validation protocol: how to test any tracker

What you’re comparing: HRV validation approaches for wearables
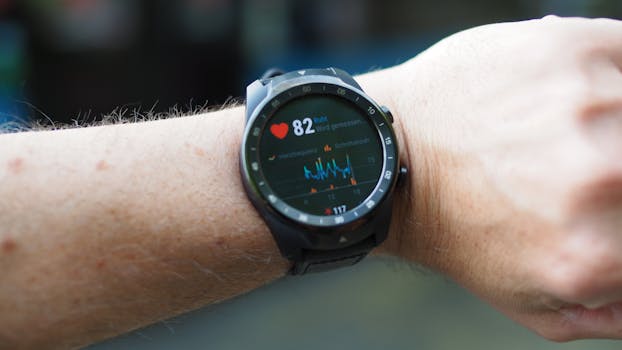
If you wear a smartwatch or ring to track HRV, you’re already acting on a belief: the numbers coming from your device are “good enough” to make decisions. The problem is that HRV is not a single measurement. It’s a family of metrics (RMSSD, SDNN, pNN50), computed from RR intervals—and every wearable can estimate those intervals differently.
This article compares three practical HRV wearable accuracy validation approaches you can run on yourself. Each approach answers a different question:
- Protocol A: ECG reference + controlled rest — you validate your wearable against a medical-grade ECG during standardized breathing and quiet rest.
- Protocol B: Multi-session consistency + external benchmark — you validate by stability across days and compare against a trusted reference session you repeat weekly.
- Protocol C: Step-by-step preprocessing alignment — you validate by matching filtering, artifact handling, and time-window choices as closely as possible between devices.
All three are “accuracy validation protocols,” but they emphasize different failure modes. Wearables can be consistent yet wrong (systematic bias), or accurate only when you’re still (conditional accuracy). Your goal is to choose a protocol that matches how you actually use HRV.
Quick takeaway: If you want the strongest overall accuracy signal for making training or recovery calls, you’ll usually get the best results with Protocol A (ECG reference + controlled rest), then use Protocol B to confirm that the wearable’s behavior holds up in real life. Protocol C is valuable when you’re comparing two consumer devices and you can’t access an ECG reference.
Strongest overall option: ECG reference + controlled rest (Protocol A)
For most people, the most reliable way to validate an HRV wearable is to anchor it to a reference you trust. A chest-strap ECG (or a clinical-grade ECG) gives you RR intervals with far less ambiguity than optical sensors. Then you standardize the conditions so you’re not “validating” changes in breathing, movement, posture, or caffeine.
In practice, Protocol A tends to produce clear outcomes. You’ll see whether your wearable’s HRV tracks the reference directionally (higher/lower), how tight the relationship is, and whether errors spike during transitions (falling asleep, shifting posture, talking).
Once you’ve done Protocol A for one or two devices, Protocol B becomes your day-to-day reality check: does the device behave consistently enough to support decisions when your life isn’t a lab?
Side-by-side comparison table: validation protocols that actually work
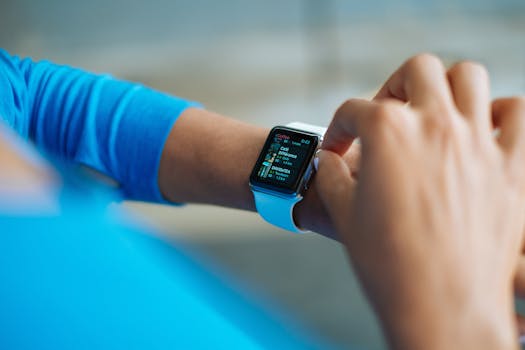
| Protocol | What you compare | Setup time | Data you need | Best for | Main weakness | Typical “decision clarity” |
|---|---|---|---|---|---|---|
| A: ECG reference + controlled rest | Wearable HRV vs ECG-derived HRV | 30–60 minutes per device | ECG chest strap/app export + wearable HRV export | Accuracy (closeness to reference) | More effort; still not perfect for sleep/noise | High |
| B: Multi-session consistency + external benchmark | Wearable HRV stability + repeat reference session | 2–4 weeks total | Daily wearable HRV + 1–2 weekly reference sessions | Usability in real life | Can be consistent but biased | Medium–High |
| C: Preprocessing alignment (artifact handling + windows) | Wearable A vs wearable B after matching analysis choices | 2–5 hours once you’re set up | Raw/interval data if available, or consistent exports | Comparing consumer devices without ECG | Hard to fully replicate proprietary processing | Medium |
Real-world performance differences you’ll notice
Even if two wearables both output “RMSSD,” you’ll see different behavior depending on signal quality and how the device handles artifacts. Here are the differences that show up when you run these protocols side-by-side.
1) Directional tracking vs numerical closeness
In controlled rest (Protocol A), many devices track the direction of HRV changes with good fidelity. If your HRV rises with relaxed breathing, the wearable often rises too. But the absolute values can be off by 10–40% because the optical system estimates RR intervals with different error characteristics.
When you’re making decisions, directional tracking can be enough for trends. If you’re trying to set thresholds (e.g., “HRV below X means overreaching”), numeric closeness matters more.
2) Artifact sensitivity during transitions
Wearables struggle when you’re not truly still. The biggest “accuracy breaks” often happen during:
- falling asleep (head movement, variable perfusion)
- talking or laughing
- lying on one side with reduced sensor contact
- after a workout when heart rate is falling quickly
Protocol A will reveal this quickly because you can compare the same time windows to ECG. Protocol B will show it as day-to-day variability: you’ll see more “spikes” or missing data on certain nights.
3) Time-window effects (morning vs night vs session)
Many consumer HRV values are averaged over different windows (e.g., 5-minute segments, 30-minute averages, or “sleep-stage” derived metrics). Two devices can disagree simply because they’re summarizing different periods.
Protocol C tries to reduce this by aligning windows and filtering choices. You may still not fully match proprietary processing, but you can often explain a surprising chunk of the mismatch.
Practical example: a 20-minute “same conditions” test
Let’s say you want to validate two wearables for recovery decisions. You do this:
- Day 1: sit quietly for 10 minutes, then do 5 minutes of slow breathing (e.g., 6 breaths/min), then sit for 5 more minutes.
- Wear both devices on the same wrist, chest strap ECG in place.
- Export HRV from each device for the same time windows if possible.
In many real setups, one device will show a stronger correlation to ECG during the slow-breathing portion, while both devices may diverge during the “sit quietly” baseline. That’s a hint: the better device may be better at detecting stable intervals, not necessarily “all HRV.”
Pros and cons breakdown for each protocol
Protocol A: ECG reference + controlled rest
How you run it: Use an ECG reference (commonly a chest strap paired with an app that outputs RR intervals or HRV). Then run 20–30 minutes of standardized rest while wearing your wearable(s). Repeat on 2–4 separate days to reduce random noise.
Pros
- Best accuracy signal: you can measure closeness to reference HRV, not just “looks similar.”
- Clear failure modes: you’ll see whether errors come from artifacts, sensor contact, or time-window averaging.
- Fast feedback: you can often decide within the first day whether a device is trustworthy for trends.
- Enables calibration: if your wearable consistently underestimates by a consistent factor, you can interpret the number differently.
Cons
- More effort: you need an ECG reference and repeat sessions.
- Controlled rest isn’t your real life: sleep and daily movement still introduce complexity. Protocol A validates a condition, not everything.
- Metric mismatch: if the wearable reports RMSSD and the ECG-derived reference uses a different HRV definition (or vice versa), you must align metrics or compare cautiously.
Where this shines (clear winner behavior): If you care about “how close is it?”—especially for training readiness or recovery scoring—Protocol A is the most defensible.
Affiliate-style device notes: If you’re comparing rings and watches, Protocol A often highlights differences in sensor contact stability. A ring can be excellent when your hands are warm and still, but it can degrade during posture changes. A wrist watch may be more consistent for daytime sessions. Your validation will tell you which holds up for your physiology.
Protocol B: Multi-session consistency + external benchmark
How you run it: You use your wearable normally for 14–28 days. You track daily HRV (morning or nightly, depending on what your device provides). Then you run a short reference session weekly (ECG if possible) or compare to a stable, previously validated baseline session.
Pros
- Real-life relevance: you validate whether the wearable is usable for your actual routines.
- Robust to “lab-only” accuracy: a device that looks great during controlled rest but fails during sleep will show it.
- Lower ongoing burden: you don’t need ECG every day.
- Useful for trend-based decisions: consistency often matters more than perfect numeric accuracy if you’re watching patterns.
Cons
- May hide systematic bias: a wearable could be consistently wrong yet stable. Protocol B won’t fully catch that.
- Interpretation depends on your behavior: if your caffeine, sleep schedule, hydration, or stress changes a lot, HRV variability increases and can mask sensor issues.
- Longer time horizon: you need at least 2 weeks to see meaningful patterns.
Where this shines: If you’re building a personal recovery baseline—like “my HRV drops after hard intervals”—Protocol B is usually the better fit than a one-off test.
Product examples that fit this protocol: Many users validate devices like the Oura Ring, Whoop, or Garmin-style HRV sleep summaries using multi-week trend checks. Protocol B helps you decide whether the device’s “readiness” or HRV tracking is consistent enough to trust.
Protocol C: Preprocessing alignment (artifact handling + windows)
How you run it: You compare two consumer wearables (or one wearable across two apps/exports) and you align time windows and preprocessing choices as much as the available data allows. If you can access RR interval streams, you can do more. If you only have summarized HRV values, alignment is limited.
Pros
- Useful when you can’t access ECG: you still learn which device behaves more reliably under your conditions.
- Helps explain mismatches: a lot of disagreement is due to averaging windows and artifact rejection, not “true HRV differences.”
- Good for device-to-device selection: you can pick the wearable that produces smoother, more consistent HRV series.
Cons
- Hard to fully replicate proprietary processing: wearables often do proprietary artifact handling. You can align what you can see, but not everything.
- Still not a ground truth: you’re validating relative agreement, not absolute accuracy.
- Requires technical effort: you may need to export data and standardize windows carefully.
Where this shines: If you’re choosing between two consumer devices and you want a disciplined comparison without buying an ECG reference, Protocol C can still be informative—especially for daytime stability and missing-data patterns.
Best use-case recommendations for different buyers
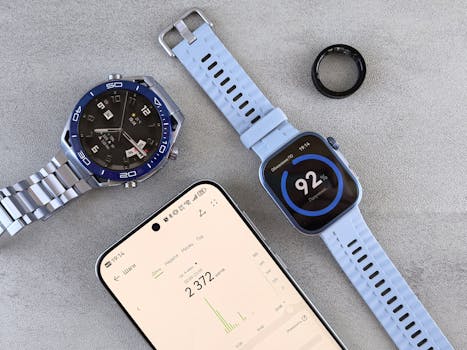
Pick your protocol based on what you want to do with HRV. Your “best” option changes depending on whether you’re making thresholds, tracking trends, or comparing devices.
If you want the most trustworthy HRV numbers (threshold-style decisions)
Choose Protocol A. You’ll get the clearest answer to questions like:
- “Does my wearable’s HRV actually reflect changes captured by ECG?”
- “How big is the error during stable rest?”
- “Do I need to treat the number as a trend only, or can I use it as a quasi-absolute metric?”
Buyer profile: athletes doing structured blocks, people managing stress with HRV targets, or anyone who wants defensible numbers for coaching decisions.
If you mainly want recovery trends you can trust day-to-day
Run Protocol B, ideally after a single Protocol A session to confirm the device isn’t wildly off. Consistency is what supports decisions like “I’m trending down for 3 mornings” or “my baseline is shifting.”
Buyer profile: busy people who won’t repeat ECG sessions, runners tracking fatigue, and anyone who uses HRV in a habit-based way.
If you’re comparing two consumer wearables and can’t use ECG
Use Protocol C for a relative ranking. You’ll likely end up choosing the device that:
- has fewer missing segments
- produces smoother series during typical sedentary days
- responds more consistently to known recovery events (e.g., a restful night vs a poor night)
Buyer profile: someone deciding between two rings/watches who wants a practical, disciplined comparison without extra hardware.
How to combine protocols without overcomplicating your life
If you want a strong outcome with manageable effort, a common path is:
- Week 1: Protocol A once (20–30 minutes per device), 2 days total.
- Weeks 2–4: Protocol B using the device you trust most from Week 1.
- Only if needed: Protocol C to compare two devices you’re still unsure about.
This hybrid approach is often the best “accuracy vs effort” trade-off.
Final verdict: which HRV wearable accuracy validation protocol fits your needs
Here’s the practical bottom line.
Choose Protocol A if you need accuracy you can defend
Winner: HRV wearable accuracy validation protocol (Protocol A) — ECG reference + controlled rest.
It’s the best option when your goal is true validation: closeness to reference, clear correlation, and understanding where the wearable fails. If you want to use HRV beyond vibes—especially for training readiness—this is the strongest approach.
Choose Protocol B if you need HRV you can actually use
Runner-up winner: Protocol B — multi-session consistency + external benchmark.
It’s not perfect for absolute accuracy, but it’s excellent for real-world reliability. Most people don’t need their wearable to be “ECG-accurate.” They need it to be consistent enough that your trends mean something.
Choose Protocol C if you’re comparing devices without ECG
Best for relative comparisons: Protocol C — preprocessing alignment.
If you can’t access a reference, this protocol is the next best discipline: align time windows, handle missing data consistently, and compare the quality of the HRV series rather than only the headline number.
Your best overall strategy: Use Protocol A to establish what the wearable is doing, then use Protocol B to confirm it works in your life. That combination usually produces the clearest decision: which device you should trust, and how you should interpret its HRV.
05.05.2026. 03:09