Knee Pain With Squats Mobility Troubleshooting: Fix the Causes
What knee pain with squats can feel like—and why it matters
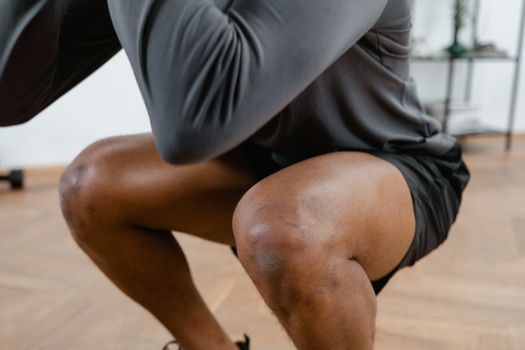
Knee pain during squats usually shows up in a predictable pattern. People often describe discomfort in one of these locations: the front of the knee (around or behind the kneecap), the inner knee, the outer knee, or a deeper ache that appears only at the bottom position. Some notice a sharp pinch when they reach a certain depth, while others feel a dull burn that builds as reps continue.
Mobility troubleshooting matters because squats demand coordinated movement at the ankle, hip, and trunk while the knee tracks through a changing angle. When one part of the chain can’t move well, the knee often becomes the “pressure point.” The goal is not to push through pain, but to identify which movement restriction or control issue is forcing the knee to compensate.
Most likely causes behind knee pain during squats
The most common drivers fall into a few mobility and mechanics categories. In many cases, more than one is present.
- Limited ankle dorsiflexion: If the ankle can’t bend forward enough, the body typically shifts the knee forward and/or the hips drop early. This can increase stress around the kneecap.
- Poor hip mobility or hip control: Tight hip flexors, limited internal rotation, or weak glute control can cause excessive knee collapse inward (valgus) during descent.
- Inadequate knee tracking: The knee may drift inward, twist, or travel too far forward relative to your foot. Even with decent mobility, poor control can create a painful load pattern.
- Insufficient tissue tolerance: Tendons and cartilage may be irritated if squat volume, depth, or load increased too quickly.
- Foot pressure and arch mechanics: Overpronation, limited toe extension, or an unstable base can change how the knee loads.
- Stiffness in the quads, hamstrings, or adductors: Restriction can alter the squat’s shape and timing, especially near the bottom range.
- Referred or non-squat-specific issues: Meniscus irritation, patellofemoral pain, or inflammatory conditions can be triggered by squats, but mobility alone won’t “fix” the root problem if the joint is already compromised.
Mobility troubleshooting starts by separating “range limitation” from “movement control.” Range limitation often shows up as a consistent end-range block (ankle or hip). Control issues show up as knee drift, twisting, or sudden loss of alignment at a specific depth.
Step-by-step troubleshooting and repair process
Use this sequence to narrow down what’s driving the pain. Work through it in order. If you find a clear restriction, address that first before adding load or increasing depth.
1) Confirm the pain pattern and set a safe test range
Before mobility work, note where pain occurs: at the top, mid-range, or only at depth. Rate it from 0–10 and note whether it changes as you warm up. If pain is sharp, unstable, or accompanied by swelling or catching, stop squatting and move to the professional-help section.
For troubleshooting, choose a squat variation that stays below the painful range. For example, use a box squat to a comfortable height or perform partial squats to the point where pain begins.
2) Check ankle dorsiflexion with a simple wall test
Stand facing a wall with one foot about a hand’s width from the wall. Keep your heel down and move your knee forward until it touches the wall. Compare sides.
- If your heel lifts early or your knee can’t reach, you likely have limited dorsiflexion limiting squat depth.
- If both sides match, ankle range may not be the primary driver.
This test helps you choose whether ankle mobility should be a first-line fix.
3) Check hip mobility and squat “shape”
In a pain-free partial squat (or bodyweight box squat), watch two things: how your hips move relative to your knees, and whether your knees track over your toes without collapsing inward.
- If your hips drop and your knees collapse inward at a certain depth, hip control and/or adductor and glute stability may be limiting.
- If you can’t maintain an upright torso without overreaching your knees forward, hip mobility and trunk positioning may be off.
- If your pelvis tucks excessively (butt wink) or you lose balance, reduce depth and address control before mobility.
4) Evaluate foot pressure and stability
During a bodyweight squat, feel where your weight lands. A common issue is shifting too far toward the heels or letting the arch collapse, which can change knee tracking.
- If you feel weight collapsing to the inner heel/arch, you may need foot stabilization and better pressure distribution.
- If your toes can’t grip and you lose balance forward, ankle mobility or toe extension may be limiting.
Try a cue: keep pressure evenly through the midfoot and heel while your toes stay active.
5) Identify whether the knee is tracking “straight” or twisting
From the front, look for knee drift inward. From the side, look for excessive forward knee travel relative to your foot position. Pain that appears during inward drift often responds well to hip control and cueing.
Also check whether you twist at the knee or femur during the bottom. If you feel a rotational pinch, mobility plus control work may help—but persistent mechanical symptoms require a clinical evaluation.
Solutions from simplest fixes to more advanced fixes
Start with the simplest changes that reduce knee stress while you restore movement and control. Move to the next level only if you’re not improving.
Level 1: Reduce load and depth to break the pain cycle
For troubleshooting, your first job is to stop provoking the same painful range. Use one or more of these:
- Box or bench squat to a height that stays pain-free.
- Tempo squats (e.g., 3 seconds down) with a controlled range.
- Pause squats at mid-range to train control without bouncing.
- Switch to sit-to-stand patterns if squats are too irritating initially.
Keep reps modest and stop if pain increases during the set.
Level 2: Use mobility drills that match the restriction you found
Choose drills based on your wall test and squat shape.
- If ankle dorsiflexion is limited: try knee-to-wall holds (short range, heel down), calf stretching (straight-knee for gastrocnemius, bent-knee for soleus), and ankle rocks with a band or light support. Ankle mobility tools like a slant board can help you bias dorsiflexion safely, especially if your heels consistently lift.
- If hips feel stiff: add hip flexor stretching in a half-kneeling position and gentle hip internal rotation work. Focus on maintaining a stable pelvis rather than chasing deeper range.
- If adductors are tight or knees drift inward: include controlled lateral hip work and adductor-friendly mobility such as a light Copenhagen progression (only if it’s pain-free).
Do mobility daily in short sessions. The best sign is not “feeling stretched,” but improved squat mechanics at the same depth with less knee pain.
Level 3: Improve knee tracking with simple form cues
Form cues should be specific and testable:
- “Knees track over toes”: use a mirror or phone to confirm. If your knee always ends up inward, reduce depth and practice alignment at a higher box height.
- “Push the floor away”: helps distribute force through the feet rather than letting the knee collapse.
- “Keep your ribs stacked over hips”: prevents compensations that alter squat mechanics.
- “Stay tall in the bottom”: if you fold forward and knees shoot forward, reduce range and rebuild control.
These cues are often enough when the primary issue is control rather than joint range.
Level 4: Add targeted strength for the movement pattern
Mobility without strength often fades under load. Strength work should support the squat pattern you’re troubleshooting.
- Glute med and hip stability: clamshells, side-lying abductions, banded lateral walks, and single-leg balance progressions. If you have a band, use it to cue the knees to stay aligned.
- Quads and knee tolerance: start with split squats to a comfortable depth, step-ups, and controlled leg extensions only if they don’t flare symptoms.
- Calf and ankle stiffness tolerance: calf raises (straight and bent knee), progressing tempo and range.
- Core and trunk control: dead bugs, side planks, and bracing practice to keep the pelvis stable during descent.
Progress slowly. If knee pain rises as strength work increases, scale back range or volume.
Level 5: Adjust equipment and technique to reduce knee stress
Sometimes the knee pain is aggravated by how your body is forced to move. Equipment changes can buy time while mobility and strength improve.
- Shoe choice: a stable, flat shoe can improve foot pressure and control. If you’re using very flexible footwear, consider switching to something with better stability.
- Squat depth modification: if pain is at the bottom range, don’t chase full depth immediately. Train the pain-free range consistently, then gradually extend.
- Foot positioning: experiment with stance width and toe angle by small increments. Some people experience less kneecap irritation with slightly wider stances if their hips can rotate without collapsing.
- Heel elevation: for limited dorsiflexion, a small heel lift (or a squat wedge) can allow you to squat with better alignment while you work ankle mobility. Use it as a temporary troubleshooting aid, not a permanent fix.
Make only one or two changes at a time so you can tell what helps.
Level 6: Advanced mobility integration and controlled progression back to full squats
When the basic range and tracking improve, you can integrate mobility into the squat itself.
- Perform “ankle and hip” mobility in the exact squat position: use controlled reps to the edge of your new pain-free range.
- Use isometric holds at mid-range: pause at a height where pain is minimal and hold for 20–40 seconds to build tolerance.
- Progress depth gradually: add 1–2 inches at a time (or a small change in box height) and retest your pain response.
- Reintroduce load last: only after you can complete bodyweight reps with stable knee tracking and no increase in pain afterward.
If pain returns when you add load, it’s often a signal that strength tolerance hasn’t caught up yet, or that your mechanics degrade under heavier weight. Go back a step and rebuild.
When to stop troubleshooting and get professional help
Mobility troubleshooting is appropriate when pain is mild, mechanical, and improves as you adjust range and technique. Seek professional evaluation (sports physical therapy or an orthopedist) if any of the following are present:
- Swelling after squats or persistent swelling that doesn’t settle.
- Locking, catching, or a feeling that the knee “gives way.”
- Sharp pain that spikes with depth or load and doesn’t improve with range reduction.
- Night pain or pain at rest that is increasing over time.
- Significant loss of motion or inability to bear weight normally.
- Symptoms that worsen over 2–4 weeks despite consistent range reduction, mobility work, and technique changes.
Replacement is not typically a consideration for squat-related knee pain unless there’s a diagnosed degenerative condition severe enough to warrant it. Most people can make meaningful progress with the right combination of mobility, control, and gradual loading—but persistent joint symptoms deserve clinical assessment.
If you can describe where the pain is located (front, inner, outer), when it appears (early range vs depth), and what changes reduce it (box height, stance width, heel lift), a clinician can narrow the likely cause faster.
Practical checklist to keep your troubleshooting on track

- Keep squats in a pain-free range while you work mobility and control.
- Use the wall test to confirm whether ankle dorsiflexion is a limiting factor.
- Watch knee tracking for inward drift and avoid twisting at the bottom.
- Match mobility drills to the restriction you actually observe.
- Build strength that supports alignment: glute med stability, controlled quad tolerance, and calf/ankle work.
- Progress depth and load gradually and only after mechanics stay stable.
05.12.2025. 21:10