Wearable Respiration Rate: Accuracy Drift and How to Validate
Why respiration-rate drift matters in wearables
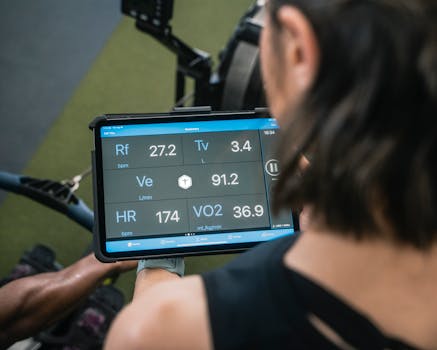
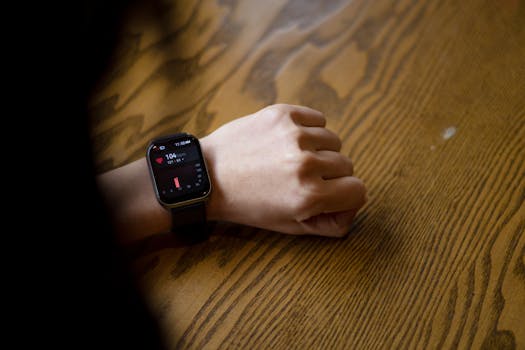
Wearable devices that estimate respiration rate are useful for sleep monitoring, stress trend analysis, and recovery tracking. However, the number you see on-screen is not always stable. Over minutes, nights, or weeks, respiration-rate estimates can drift due to sensor changes, signal quality, motion artifacts, and physiological variability. If you rely on these values for interpretation—such as noticing breathing pattern changes—drift can lead to incorrect conclusions.
This guide explains what “accuracy drift” means for wearable respiration rate, why it occurs, and how to validate the reliability of your device’s readings in a practical, repeatable way.
What “accuracy drift” means for respiration-rate estimates
Accuracy drift refers to a gradual or context-dependent change in how closely a wearable’s respiration-rate output matches a reference measurement. Drift can show up as:
- Systematic bias: The wearable consistently reports rates higher or lower than a reference.
- Time-dependent drift: Early readings look reasonable, but later readings diverge.
- Context-dependent drift: Accuracy changes with sleep stage, body position, device placement, temperature, or activity level.
- Device-to-device variability: Two wearables worn on the same person may disagree due to sensor placement and calibration differences.
It’s important to distinguish drift from normal physiological variation. Respiration rate can change with posture, stress, caffeine, illness, altitude, and sleep stage. A robust validation approach separates measurement error from real changes in breathing.
How wearables estimate respiration rate (and where drift enters)
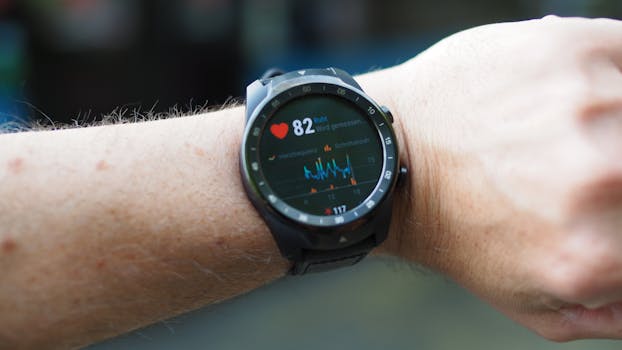
Most consumer wearables do not measure airflow directly. Instead, they infer breathing from physiological signals related to chest and abdominal motion or from optical/biophysical signals that correlate with respiration.
Common estimation pathways include:
- Motion or displacement signals: Accelerometers and gyroscopes detect subtle torso movement correlated with breathing.
- Photoplethysmography (PPG) modulation: Changes in blood volume and timing can correlate with breathing patterns.
- Multi-sensor fusion: Some devices combine PPG, accelerometer data, and temperature or skin-contact metrics to estimate respiration.
Drift enters when any part of the chain degrades:
- Sensor contact changes: Loose straps, shifting placement, or skin differences alter signal quality.
- Motion artifacts: Micro-movements during sleep, tossing, or restless periods can mimic breathing rhythms.
- Algorithm adaptation: Some systems use internal filtering, confidence scoring, or adaptive baselines that may “lock in” to a noisy signal and slowly drift.
- Environmental factors: Sweat, cold skin, and pressure changes can affect both PPG and motion signals.
- Physiological changes: If breathing becomes shallow (e.g., during certain sleep stages), the signal-to-noise ratio can worsen and accuracy can degrade.
Typical patterns of respiration-rate drift you can observe
You don’t need lab equipment to spot potential drift. These patterns often indicate that the wearable is losing alignment with the underlying breathing rhythm:
- Gradual trend away from expected ranges: For example, a steady decline over an entire sleep session when breathing should not monotonically fall.
- Sudden step changes: Large jumps without corresponding changes in comfort, posture, or activity.
- High variability during stillness: If you are motionless and the reading fluctuates rapidly, the device may be interpreting noise as respiration.
- Mismatch with perceived breathing: If you can clearly feel slower or faster breathing while the device shows the opposite pattern, calibration or filtering may be off.
These indicators are not proof of inaccuracy, but they are reasons to validate using a reference method.
Step-by-step validation: practical checks at home
Validation works best when you test under controlled conditions and repeat the same protocol. The goal is to quantify whether errors are stable (consistent bias) or drifting (changing bias over time).
1) Establish a baseline with controlled breathing
Start with a short session while you are seated and still. Use a reference you can trust, such as counting breaths for a fixed interval (e.g., 30 seconds) with a stopwatch. Then compare the wearable’s displayed respiration rate or trend for the same time window.
Repeat for multiple breathing patterns:
- Normal relaxed breathing
- Deliberately slower breathing (comfortable)
- Deliberately faster breathing (comfortable)
Look for two things:
- Bias: Is the wearable consistently above or below your counted rate?
- Stability: Does the error change as you repeat trials?
2) Validate across time to detect drift
To test drift, repeat the same breathing pattern after a delay (for example, 30 minutes later). If the wearable’s estimates shift systematically even though your breathing pattern is the same, that suggests time-dependent drift or contact-quality changes.
Also validate across different segments of a session:
- Early in the session
- Midway
- End of the session
If the respiration-rate estimate “walks” away from the reference, you are seeing drift.
3) Compare position and strap tension
Respiration estimates are sensitive to how the device sits on the body. Repeat the controlled breathing test with consistent placement, then deliberately change one variable:
- Move the device slightly higher or lower on the wrist
- Tighten vs. loosen the strap by a small, consistent amount
- Ensure the sensor area remains in full contact
If accuracy changes materially, drift may be partly mechanical (signal quality) rather than algorithmic.
4) Validate during sleep using confidence indicators
Many wearables provide an internal signal-quality indicator (or a quality score) and may flag periods of poor measurement. Use those indicators to avoid validating on low-confidence data.
Practical approach:
- Choose nights when you were relatively still early on.
- Focus validation on segments where the device indicates stable sensing.
- Compare the respiration-rate pattern to what you expect physiologically (e.g., less stable breathing during wake periods, more regularity during certain sleep stages).
Even without a lab reference during sleep, consistent behavior in high-confidence periods is a sign the device is not drifting severely within the night.
Reference methods: what to use and what to expect
Validation is only as strong as the reference measurement. Consider these options, in increasing complexity:
- Manual breath counting: Useful for quick checks, but human timing errors and irregular breathing can limit precision.
- Smartphone video or timer-based tracking: Helps standardize intervals, but still depends on accurate counting and motion visibility.
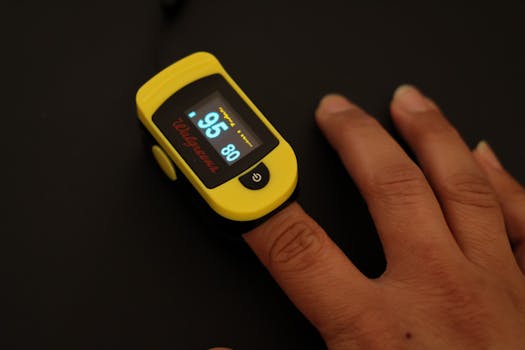
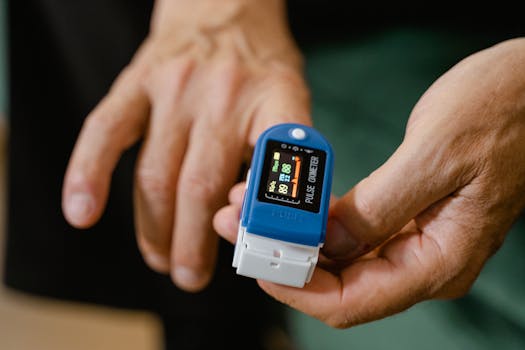
- Respiratory belt (inductive plethysmography): Measures chest/abdominal circumference changes and is commonly used in sleep research settings. It can provide a closer reference for breathing rate.
- Clinical-grade capnography or airflow measurement: Best accuracy but usually not available outside medical environments.
If you can’t access clinical equipment, the goal is not perfect truth—it’s quantifying whether the wearable’s respiration estimate is stable and whether errors are consistent enough to interpret trends.
Interpreting validation results: bias vs. drift vs. real physiology
After you compare wearable readings to reference values, organize your observations into three categories:
- Consistent bias: Example: wearable is always ~2 breaths/min higher. This may be correctable for trend interpretation, though it may not be clinically accurate.
- Variable bias (drift): Example: error grows over time or differs across nights without clear sensor-contact changes. This reduces confidence in long-term tracking.
- Pattern mismatch: Example: wearable shows rhythmic changes that do not match your breathing behavior. This can indicate algorithmic misinterpretation or excessive artifact sensitivity.
To reduce confusion, repeat tests on multiple days. Real physiological changes are often smaller than measurement instability when you control breathing and contact conditions.
Common causes of drift you can prevent
Many drift issues are avoidable with careful setup and consistent routines.
Sensor contact and placement
Keep the sensor area clean and ensure consistent placement. Skin oils, lotion residue, and sweat can degrade signal quality. Also avoid wearing the device too loosely—micro-slippage during sleep can alter both motion and optical sensing.
Motion and sleep behavior
Restless sleep can produce accelerometer patterns that resemble breathing. If your wearable reports respiration rate during highly active sleep periods, drift may be artifact-driven. Validation should emphasize stable segments or use the device’s confidence indicators when available.
Temperature and skin conditions
Cold skin can reduce optical signal quality. If you frequently see degraded readings in cold environments, treat that as a likely signal-quality limitation rather than a purely algorithmic drift.
Algorithm confidence and filtering
Some devices smooth respiration estimates over time. Smoothing can reduce noise but also delay response to true breathing changes. If validation shows that the wearable reacts slower than your reference, the issue may be filtering latency rather than accuracy drift.
Validation protocol you can repeat monthly
To manage long-term reliability, adopt a repeatable validation routine. A lightweight monthly protocol can reveal drift before it becomes a persistent issue.
- Day 1 (baseline): Perform controlled breathing checks (normal, slow, fast) and record differences from manual counting.
- Day 1 (time check): Repeat the normal breathing check after 30–60 minutes.
- Sleep check: Review a night with good signal quality and verify that respiration-rate trends look physiologically plausible (no extreme monotonic drift or frequent step changes).
- Device setup consistency: Keep strap tension and placement consistent across months.
If you notice growing error or increasing variability, it’s a sign to re-evaluate fit, skin contact, and measurement conditions. If the pattern persists across multiple cycles, the wearable’s respiration-rate estimation may be intrinsically limited for your use case.
Where respiration-rate drift becomes a safety concern
Most wearable respiration-rate uses are informational. Still, significant discrepancies can matter if you are interpreting abnormal breathing patterns. If you observe persistent readings that suggest dangerously high or low respiration rate, or if you have symptoms such as shortness of breath, chest pain, or dizziness, treat the device reading as a prompt to seek clinical evaluation rather than a standalone diagnostic.
Validation helps you understand measurement reliability, but it does not replace medical assessment when symptoms are present.
Summary: validate to separate drift from breathing changes
Wearable respiration-rate accuracy drift can come from sensor contact changes, motion artifacts, filtering latency, and algorithmic adaptation. The most effective way to validate is to compare the wearable against a reference during controlled breathing, repeat tests over time to detect drift, and review sleep segments using signal-quality confidence when available.
By separating consistent bias from time-dependent drift, and by preventing common sources of signal degradation (strap tension, placement, cleanliness, and temperature), you can make respiration-rate data more trustworthy for trend observation. When readings appear implausible or symptoms are present, treat the device as a monitoring aid and seek appropriate medical guidance.
FAQ: wearable respiration rate accuracy drift validate
How can I tell if my wearable’s respiration rate is drifting?
If the error vs. a reference grows over time (same breathing pattern, different estimate later), or if the device shows monotonic trends and step changes without corresponding breathing changes, you likely have drift or signal-quality degradation. Repeating controlled breathing checks after a delay is one of the clearest ways to detect it.
What reference can I use to validate respiration rate at home?
Manual breath counting with a stopwatch is a basic reference for short sessions. For higher confidence, an inductive respiratory belt (chest/abdominal movement) provides a stronger reference than counting. Clinical-grade airflow or capnography is the most accurate but is typically available only in medical settings.
Does sleep position affect respiration-rate accuracy?
Yes. Body position changes torso motion and can alter sensor contact and the strength of the breathing-related signal. Side-sleeping, arm position, and device slippage can all influence accuracy and contribute to apparent drift across the night.
Why does respiration rate look stable on one night and unreliable on another?
Differences in strap tension, cleanliness, sweat, temperature, movement during sleep, and internal signal confidence can all change measurement quality. If your wearable provides a signal-quality indicator, use it to avoid interpreting low-confidence segments.
Can algorithm smoothing make respiration rate seem inaccurate?
Yes. Smoothing and filtering can reduce noise but also introduce response delay and dampen abrupt changes. If the wearable consistently lags behind your reference during controlled breathing, this may be filtering latency rather than true accuracy drift.
Is wearable respiration-rate drift the same as normal breathing variation?
No. Normal respiration varies with sleep stage, posture, and stress. Drift is a measurement error pattern that changes the wearable’s output relative to a reference under similar conditions. Validation protocols help separate the two.
07.03.2026. 20:05